The screens
Every screen in Orbital Frontier: what it is for, what is on it, the button that takes you there and the one that brings you back.
There are two places the game ever really is — the Hangar, where you build and spend, and Flight, where you fly. Everything else on this page is a sheet that opens over one of those two and closes again, leaving you exactly where you tapped it from.
Every screen, and how to open it
| Screen | Opens from | Closes with |
|---|---|---|
| An update is ready / Update required | The game starts here when your version is out of date | Later for an update that can wait; an update that cannot has no way past but Update |
| Downloading the game's pictures | The game starts here, every time | Goes by itself once the pictures are ready; Retry if they could not be had |
| Hangar | After the pictures are ready | — |
| Parts drawer | A category tab in the palette | The tab again |
| A part's panel | Tapping a part on the canvas that is already selected | Tapping the part again, or empty canvas |
| Your ship | Tapping the mass / TWR / cost strip | The ✕ on the sheet |
| Stages | Stages, top right | Stages again |
| Your ships | The rocket on the bottom bar | Close |
| Sub-assemblies | The satellite on the bottom bar | Close; tapping a piece or its pencil |
| Space Center | The dome on the bottom bar | Close |
| Tech tree | The branching mark under the palette; Research Centre » Open tech tree | Close |
| Earn discovery | A tech node's card » Where to earn … more discovery | Close, back to the tree |
| Contracts | The clipboard under the palette; Administration » Open contracts | Close |
| Player contracts | Administration » Player contracts, from level 2 | Close |
| Post a contract | Player contracts » Post a contract; or, in flight, a free docking port's sheet » Post a docking contract | Close, or Post; the board comes back, or the flight |
| Choose a world | Post a contract » the world's picture, or Choose another world | Tap a world, or Close |
| Add a part | Post a contract » Add a part | Tap a part, or Close |
| The Meek | The helmet under the palette; Astronaut Center » Open the Meek | Close |
| Store | The amber Store tile under the palette | Close |
| Online Pass needed | Fly in the hangar, or the first stage on the pad, when the shared world needs an Online Pass you do not have | Not now, or a tap outside it |
| Check the staging | Fly in the hangar, when the engines' staging looks wrong | Check staging, Fly anyway, or a tap outside it to stay in the hangar |
| Comm Station | Tapping it on the strip | Part of the Space Center |
| Your purse | The purse, top left of the hangar | Close |
| Achievements | Your purse » Achievements | Close |
| Readings | Your purse » Readings | Close |
| Sign in | The first time the game opens; Settings » Sign in; Sandbox off while signed out | Play in sandbox, signing in, or Close from Settings |
| A message | By itself, when the game starts or the hangar opens and there is news | A button that puts it away |
| A tutorial | By itself: in the hangar, and on the flight screen at the moment each walk is about (lighting the first stage, reaching orbit) | Doing its last step, or Skip tutorial; a flight walk also goes when the flight ends |
| Tips | The question mark at the right edge of the hangar, the Space Center, the tech tree, the Meek, the flight and the map; and by itself as you arrive on one, until Show tips on this screen is unticked there | The X, a swipe left or right, or opening another sheet |
| Settings | The figure under the palette | Close |
| The manual | Settings » Help » Open | Done, or Back |
| Reminders | Settings » Reminders » Open, or the flight menu | Close |
| Flight | A launch, or picking up a ship on the map | The flight menu |
| A part's sheet in flight | Tapping a part on the rocket | Close |
| Cloak this ship | A pod or probe core's sheet » Cloak this ship, in the shared world | Not now, or a tap outside it |
| A warp drive's sheet | Tapping a warp drive on the rocket | Close |
| Warp | A warp drive's sheet » Warp and the span | Close, the backdrop, or FORM THE BUBBLE |
| Another ship's sheet | Tapping a part of another ship of yours drawn beside you | Close |
| Transfer crew | A pod or cabin's sheet » Transfer crew (the rings; LIST on their bar for the sheet), or another ship's sheet » Transfer crew | A tap on a green module, the bar's cross; the sheet: Close, or the backdrop |
| Transfer resources | A store's sheet » Transfer resources » a green store, or LIST | Close, or the backdrop |
| Resource prices | A command part's sheet, with Share resources with other players on » Resource prices | Done, or the backdrop |
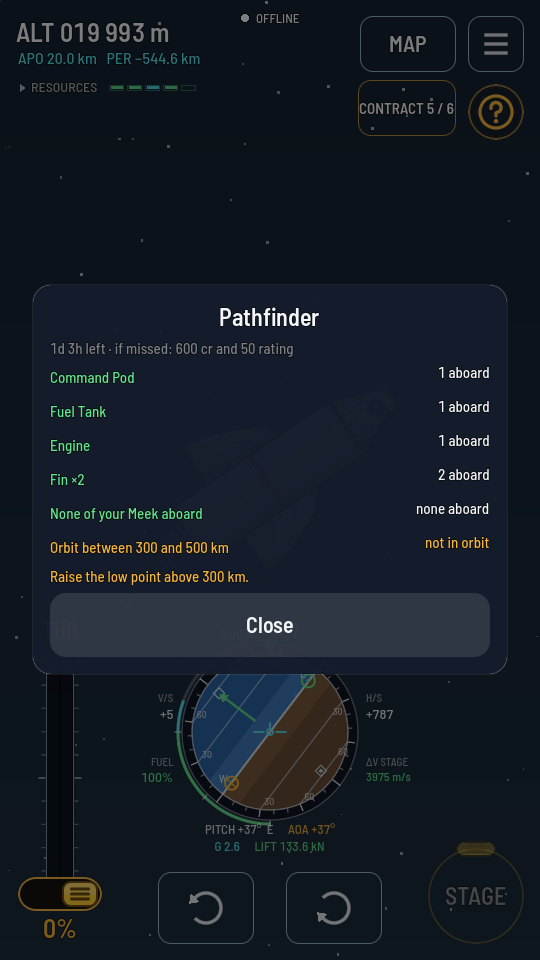
| A contract's checklist | CONTRACT or DELIVER under MAP in flight, while the ship carries a held contract's parts | Close / Not yet |
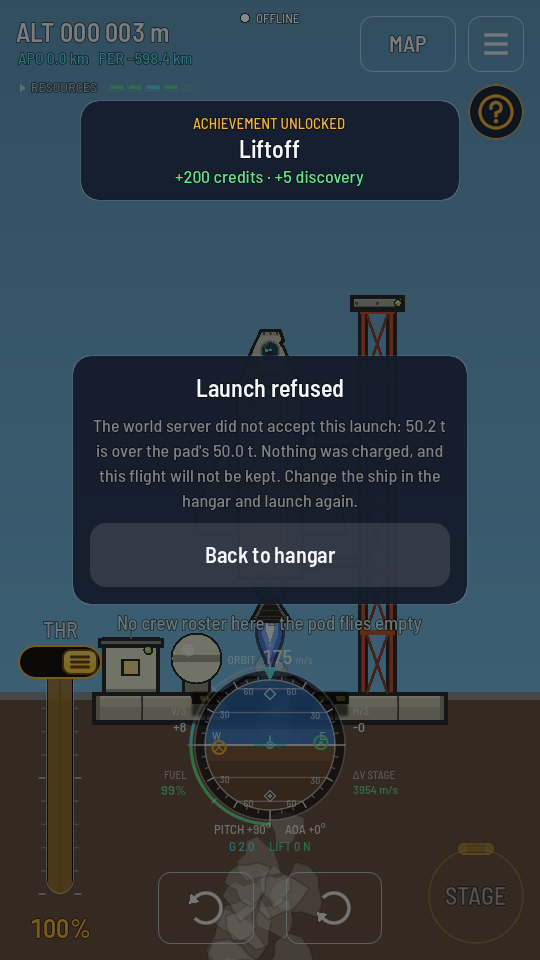
| Launch refused | By itself, just after the first stage lights, when the game turns the launch down | Back to hangar, or a tap outside it; both end the flight |
| The flight menu | The three-bar button, top right | The same button, now a ✕ — or a tap anywhere outside the menu |
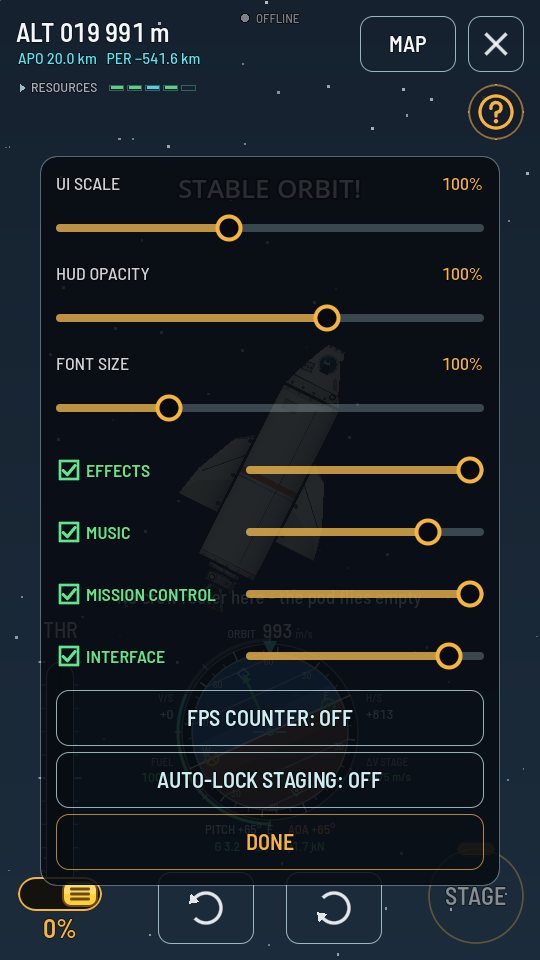
| Flight settings | Flight menu » SETTINGS | DONE |
| The Map | The ringed world in the hangar, MAP in flight | Close / FLIGHT |
| A maneuver node | Tapping a node you have placed | DELETE NODE, or tap away |
| Fly it for me | A node's panel » FLY IT FOR ME, in the shared world | Not now / Close, or a tap outside it |
| Now leave this ship | Comes up by itself in flight once a burn is marked Fly it for me | Back to the hangar / Stay for now, or a tap outside it |
Typing on a phone
Whenever you type into a box (a ship’s name, a parachute’s Auto deploy height, your email), the whole screen slides up so the box sits above the keyboard, and a bar with Done rides on top of the keys. Done keeps what you typed and puts the keyboard away, just as the keyboard’s own return key does, so it also works on a number pad, which has no return key. On the sign-in sheet, Done on the email moves on to the password. A tap anywhere away from the box while you type only puts the keyboard away: the sheet or panel you were typing into stays open, so a tap above the keys never loses what you typed.
An update is ready, or Update required
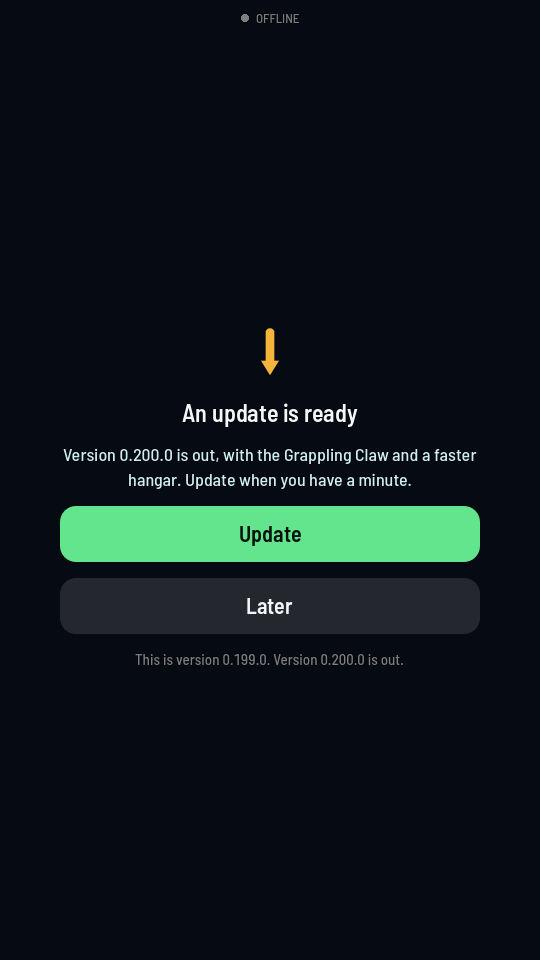
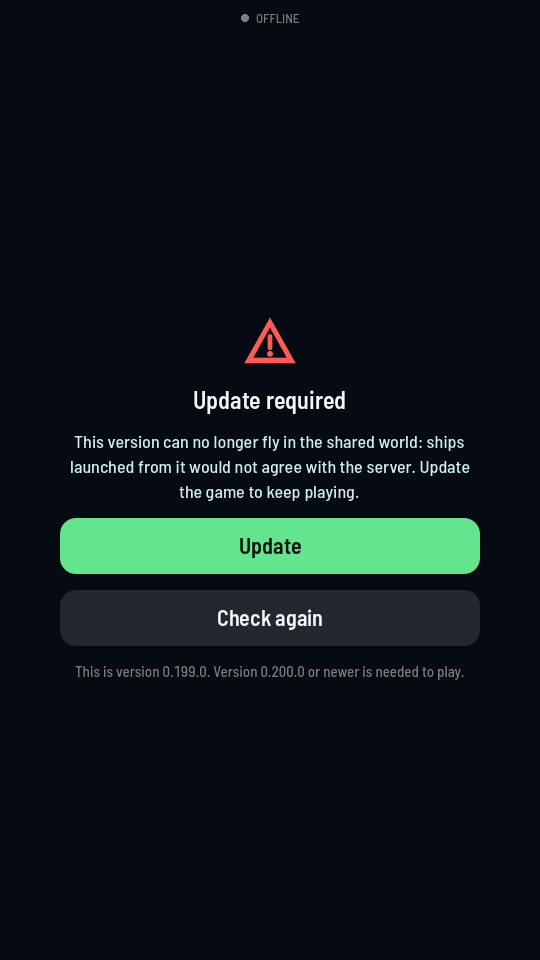
Before anything else, the game checks whether your version is still the one to play. When a newer one is out, the first screen says so before the game loads, in one of two ways.
An update is ready is a nudge: the new version is worth having, but yours still plays. Update opens the store (or, on a Mac, the download page) and Later carries on into the game. It comes back every time the game starts until you update, and stops by itself once you have.
Update required is a stop: your version can no longer play, usually because the shared world has changed in a way an old version would get wrong. There is no way past it but updating. Update opens the store, and Check again asks once more, which is what to tap after updating on the store’s side if the game still shows it. The line at the bottom says which version you have and which one is needed. The game remembers the last answer, so it still holds with no connection.
Downloading the game's pictures
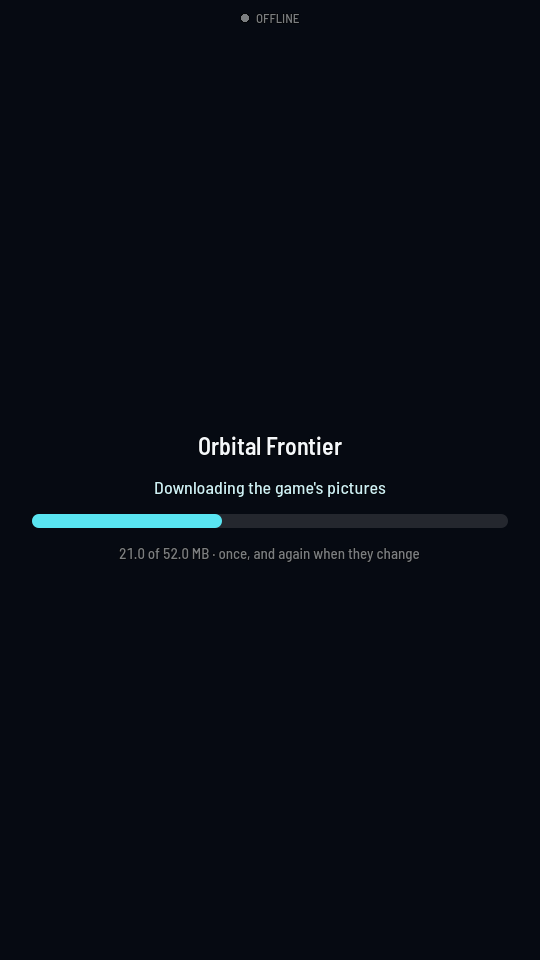
The first screen, every time the game opens. The planets' maps and the Meek's faces are not part of the app: they come in one download the first time you open the game, and again whenever they change — a world redrawn, a new face for the crew. The screen shows the download's progress and moves on to the hangar by itself when it is done. Most starts need nothing and it is gone at once, and with no connection at all a game that has downloaded them before just carries on with what it has.
The very first time, the pictures have to come from the internet. If they cannot — no connection, or the download stopped — the screen says so and offers Retry; the game does not start without them.
The Hangar
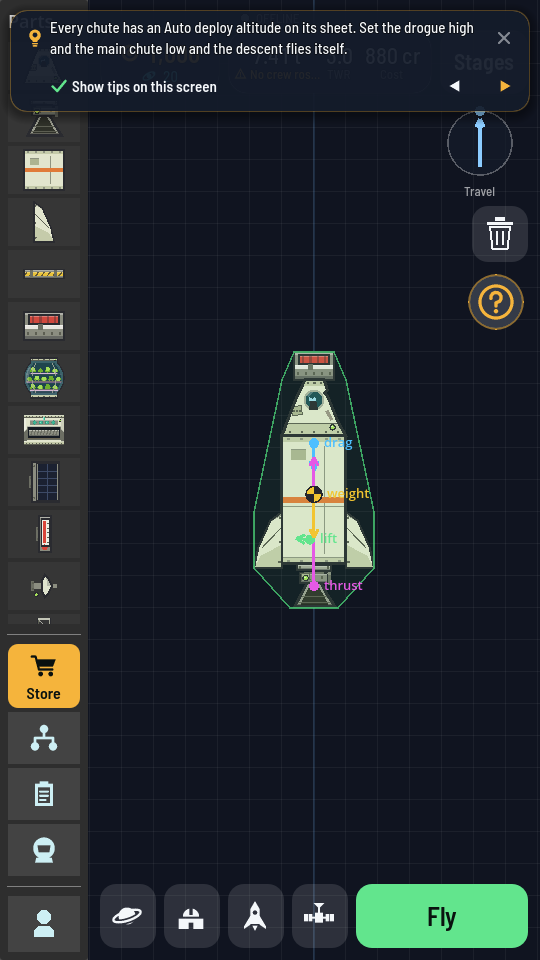
The Hangar is where you build. The game opens into it on the last ship you worked on here, just as you left it — whether or not you ever saved it to your ships. Flying that ship, or taking the controls of another one from the map, never swaps it out; on a new phone, or after you sign out, sign in or switch accounts, the canvas starts with the starter rocket. The left column is the palette, one tab per category of part; tapping a tab slides out the parts drawer beside it. Drag a part out of the drawer onto the canvas in the middle to add it to the ship. Once it is joined on, dragging any part moves the whole ship; holding a part still for a moment breaks it off at the joint above it, so a rocket only comes apart when you ask it to.
At the foot of the palette, over the small figure that opens Settings, three tiles open the Space Center's lists without walking there: the branching mark is the tech tree, the clipboard the contract board and the helmet the Meek. Each is the same screen its building's button opens, and closing it puts you back in the hangar.
The strip along the top reads your ship's mass, TWR and cost, with the purse on the left: your credits large, your discovery and gems under them — tap it for the Your purse sheet. The Travel compass in the top right sets which way the ship is considered to be flying while you build it, and the bin below it clears the canvas, after asking, so a ship can be started from scratch. The round question mark under the bin opens the hangar's tips.
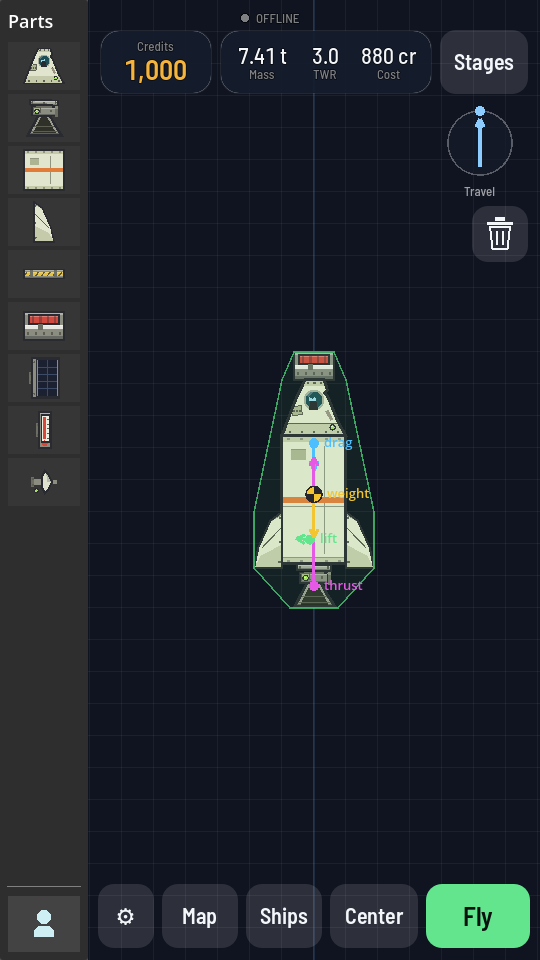
The bottom bar is always there. Its four small buttons carry pictures instead of words: the ringed world opens the map of the solar system, the dome opens the Space Center, the rocket saves or loads a ship (Your ships), and the satellite saves a piece of a ship or adds a saved one (Sub-assemblies). Fly takes the ship to the pad. How the parts join and resize is Building a rocket.
The parts drawer, and a part's panel
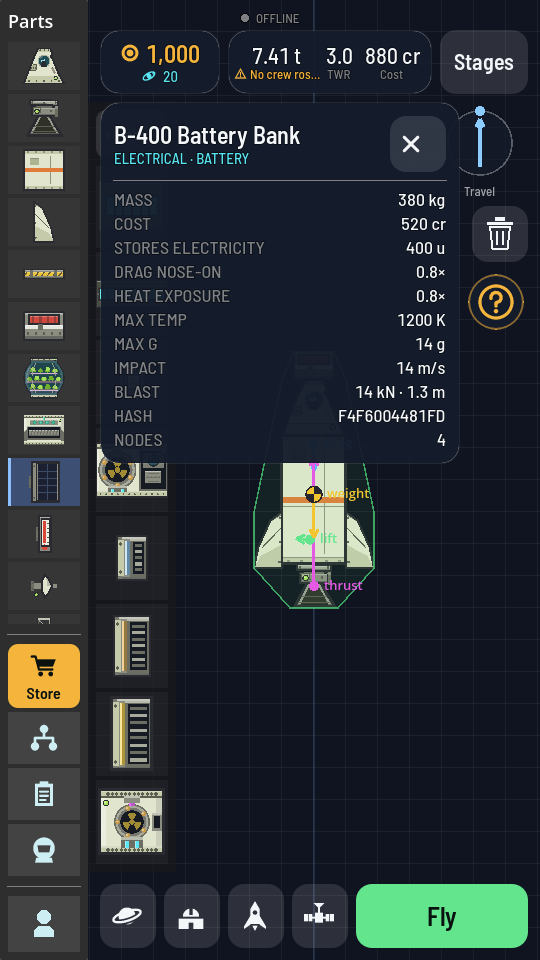
The drawer is the column of pictures that slides out beside the palette. Parts are drawn, not named — the column is too narrow for names — so press and hold one to read its info card: mass, cost, thrust, whatever that part has. A quick tap does nothing; a sideways pull is what takes the part out onto the canvas.
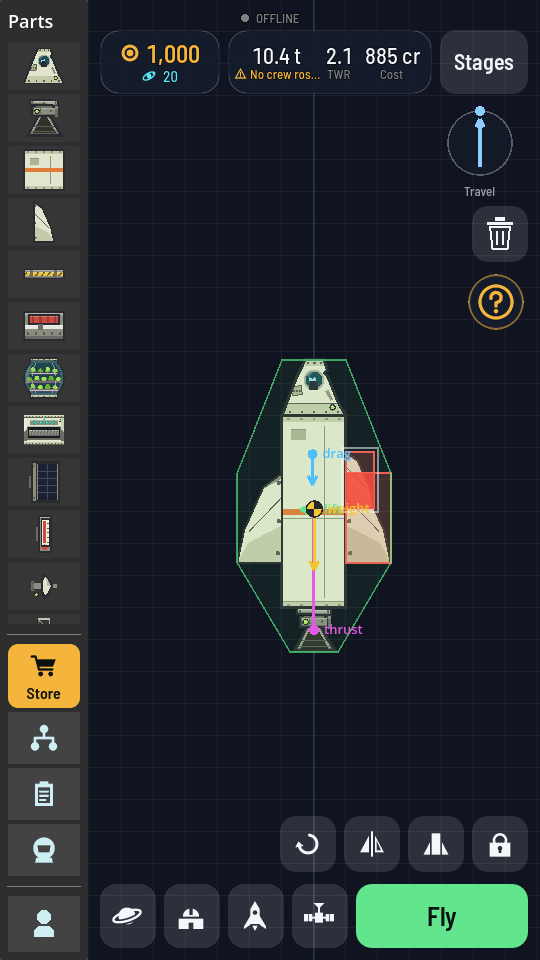
Tapping a part already on the ship selects it and leaves the whole ship in view while you drag it about. Four buttons marked with pictures stand at the bottom right of the build area, over Fly: rotate (a curved arrow, a quarter turn), flip (a solid and a hollow half, mirroring the part where it stands; both turn everything hanging off the part along with it, and on the part at the top of an assembly they turn the whole assembly), symmetry (a fin on each side, adding a linked twin on the far side; greyed when the part already has one) and lock (a padlock, putting the part out of reach so a tap picks what it covers; a tap on the padlock drawn on the part unlocks it, see Lock a part).
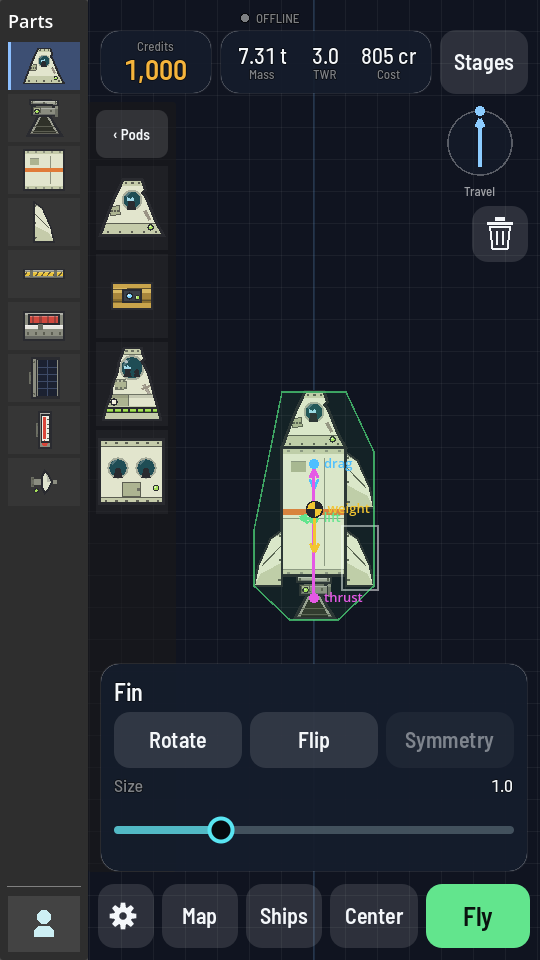
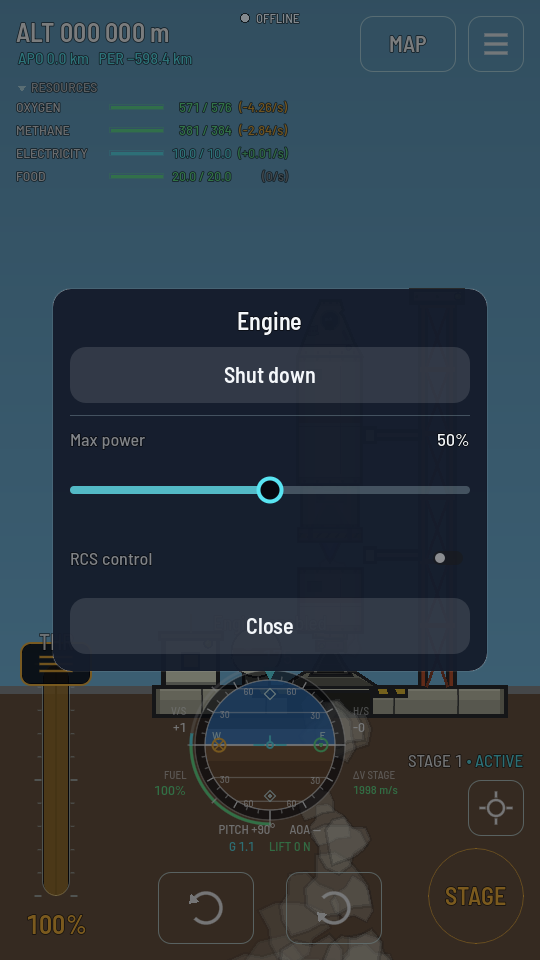
Tap the part again and that part's own panel opens along the bottom of the canvas. What is on the panel is the part's business, not the screen's: every part offers Rotate, Flip, Symmetry and Lock, a tank adds a length slider, a cargo bay a length slider and its Cargo row — a bar of the hold, a slider per resource in it and a tile for each one it can still take (Load a cargo bay), anything fuel runs through a Fuel line button (Draw a fuel line), an engine a Max power slider and an RCS control switch, a pod the seats for your crew. Tap the part once more, drag it, or tap empty canvas to put it away. While the panel is up, the four buttons at the bottom right give way to its own row. See Resize a tank and Seat crew on a pod.
Your ship
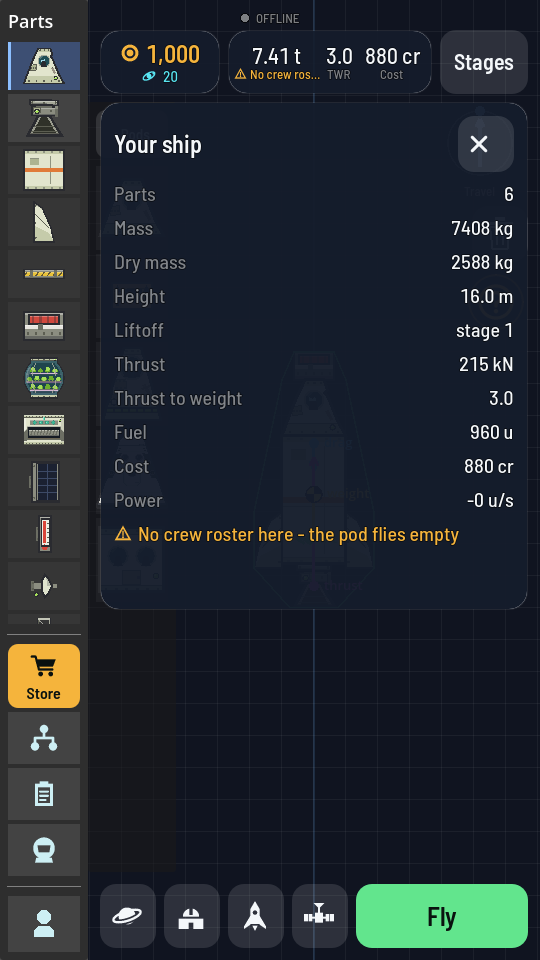
Tapping the mass / TWR / cost strip at the top opens Your ship: the whole rocket's figures in one list — parts, mass, dry mass, height, the stage it lifts off on (liftoff), that stage's thrust, thrust to weight, fuel and cost. This is the sheet to check against the pad's limits before you fly.
Stages
Stages, top right, hands the two left-hand columns over to staging and leaves the rocket in view. The palette becomes the stages, each tile picturing what it holds; the drawer becomes the open stage's contents. One line under the ship says what the + tile will do next. Tap Stages again to go back to the parts.
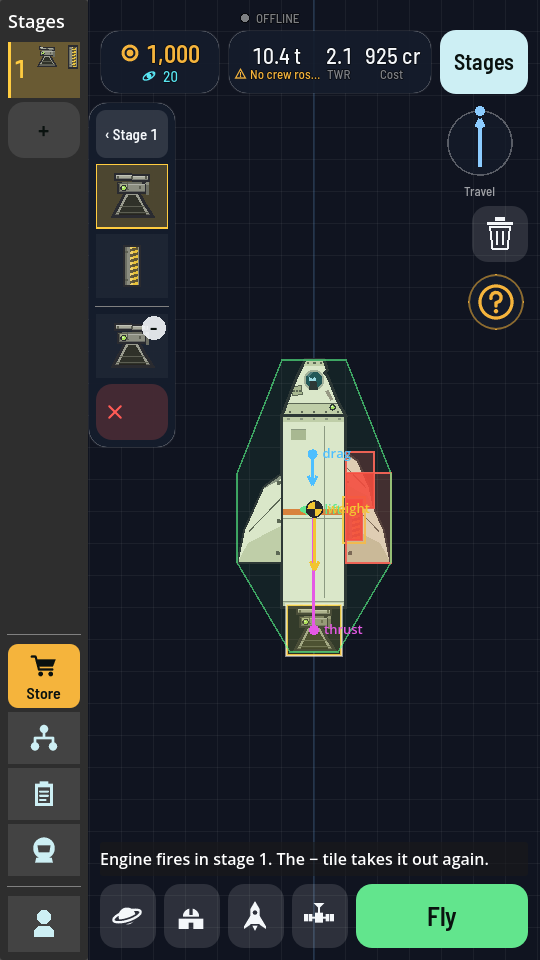
What the stages actually do is Staging.
Your ships
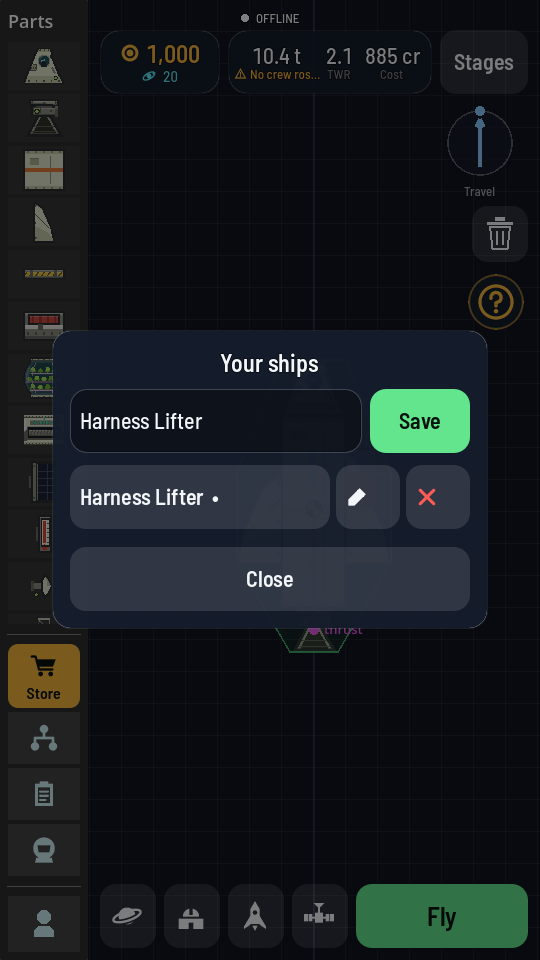
The rocket on the bottom bar opens your saved designs. Type a name and tap Save to keep the rocket on the canvas; tap a row to load one back; the pencil renames and the red ✕ deletes. Saved designs are yours across devices — they travel with your account, not with the phone. A design with a part you have not discovered yet is not listed until the tech tree gives you that part.
Sub-assemblies
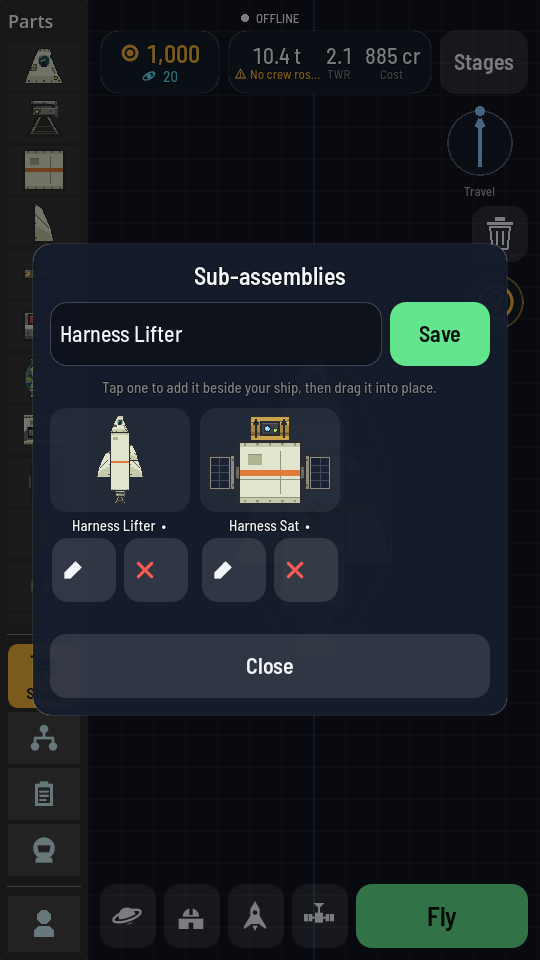
The satellite on the bottom bar opens Sub-assemblies: pieces you saved to add to a rocket rather than fly on their own, such as a satellite or a lander. Type a name and tap Save to keep what is on the build area as a piece. Each saved piece is shown in a grid as a picture of its parts, with its name under it. Tap a picture and the sheet closes with a copy of that piece standing beside your rocket, to be dragged on; the pencil opens the piece on its own to change it, and the red ✕ deletes it. Like your ships, sub-assemblies travel with your account, a new game may find a few ready-made pieces there already, and one with a part you have not discovered yet waits off the grid. The steps are Save and reuse a sub-assembly.
The Space Center
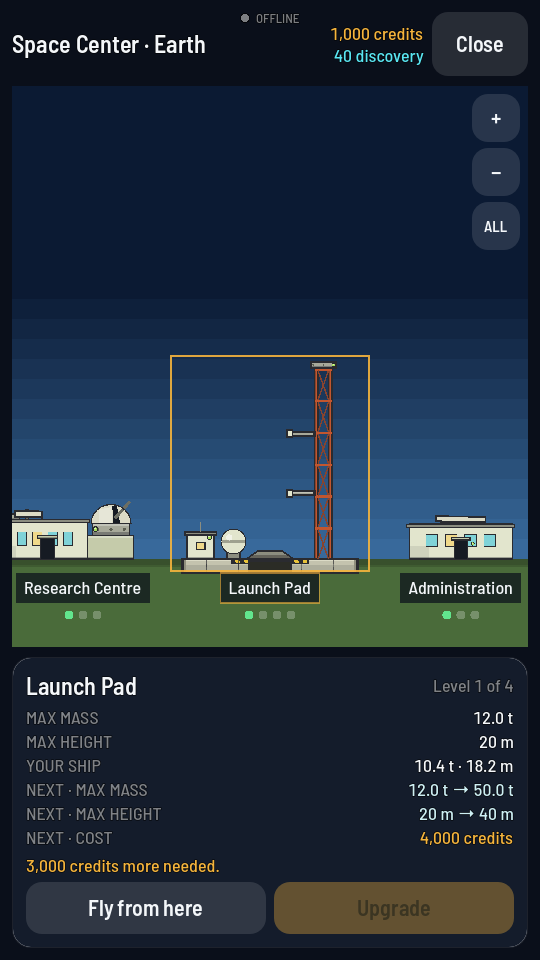
The Space Center is where you spend on the ground rather than in the air. Its title reads Space Center · Earth: every building stands once, on a strip of ground beside Earth's one Launch Pad; tapping one selects it and fills the sheet below with its figures at the current level, what the next level gives, and what that costs on the NEXT · COST row. Upgrade buys it.
The strip is wider than the screen: drag it to walk along the ground, + and − zoom, and ALL in the top right pulls back far enough to see every building at once.
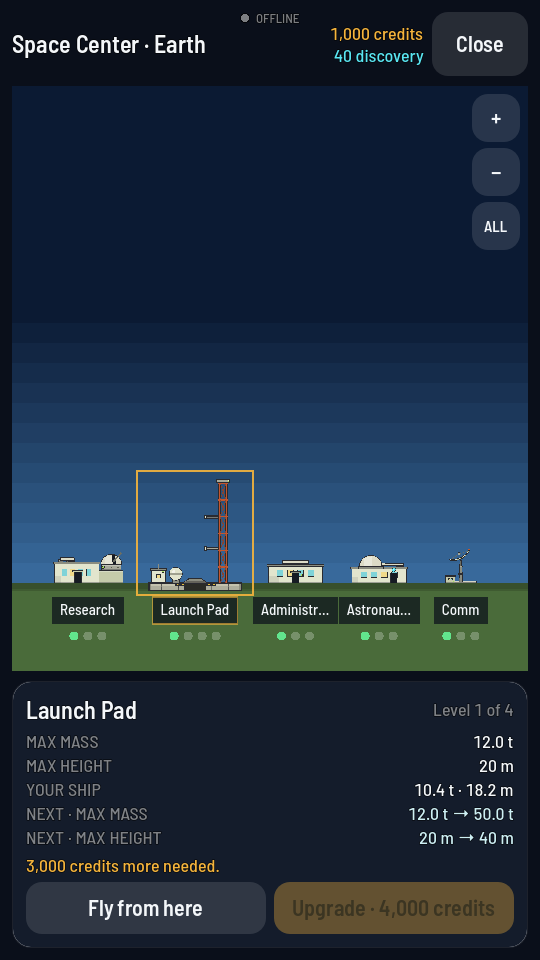
You get here from the Hangar's Space Center button (the dome on the bottom bar), and from the pad itself when a ship you are trying to fly does not fit it. Close, top right, takes you back. What each building does and how upgrading works is The Space Center.
The Launch Pad
The pad's sheet is the one you will read most: MAX MASS and MAX HEIGHT are the limits a rocket has to fit, RUNWAY is how long the strip of flat ground beside the tower is, and YOUR SHIP right underneath is what the rocket on the canvas actually weighs and measures — in red when it does not fit. A ship standing on landing gear goes to the runway instead, so its row reads its mass, its length and the word runway, and MAX HEIGHT is read as the longest ship the runway takes (Aeroplanes). Fly from here launches without going back to the hangar first.
The Research Centre and the tech tree
The Research Centre's sheet says which tech tiers are open to you; its Open tech tree button is the way in to the tree itself. Nodes are laid out in tiers, with lines showing what needs what. Tapping a node opens a card underneath: what it unlocks, what it requires and what it costs in discovery.
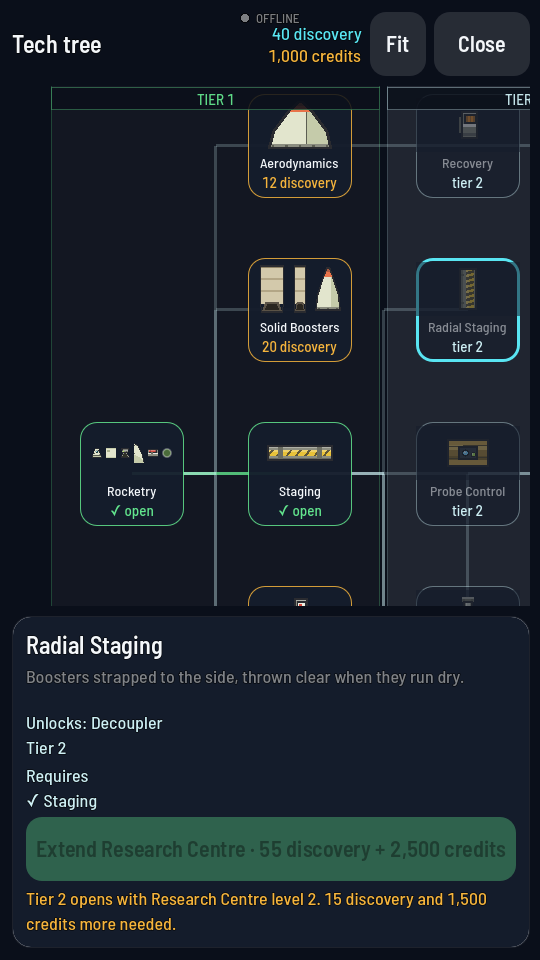
Fit zooms out to show the whole tree at once; Close returns to the Space Center. See Buy a tech node.
Reset the tech tree
The red Reset beside Fit opens the Reset the tech tree sheet over the tree: what a reset gives back and what it ends, and a violet button with its price in gems. When a reset is not possible yet, the sheet's first line says why in red, and the violet button is not there. Not now, or a tap outside it, puts it away. In sandbox the button is not there. See Reset the tech tree.
Earn discovery
When the selected node costs more discovery than you hold, its card carries Where to earn … more discovery. It opens the Earn discovery sheet over the tree: what you have and what is needed, then every source still open — contracts on your board that pay discovery, places nobody has measured on each world, and achievements you can build for — each with what it pays. It is a list to read; Close returns to the tree. See Find more discovery.
The Administration and the contract board
The Administration's sheet says how many jobs you may hold at once and which tiers of work you are shown. Open contracts is the board.
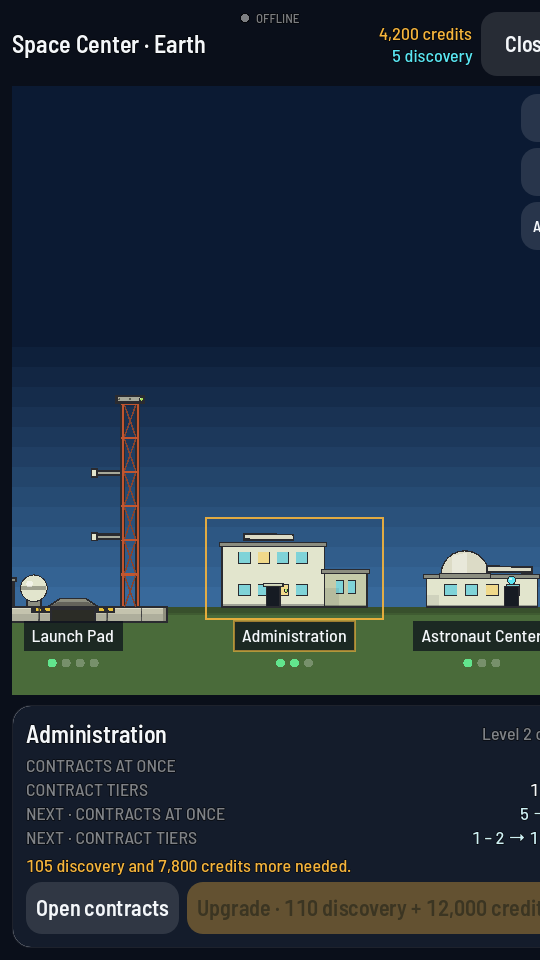
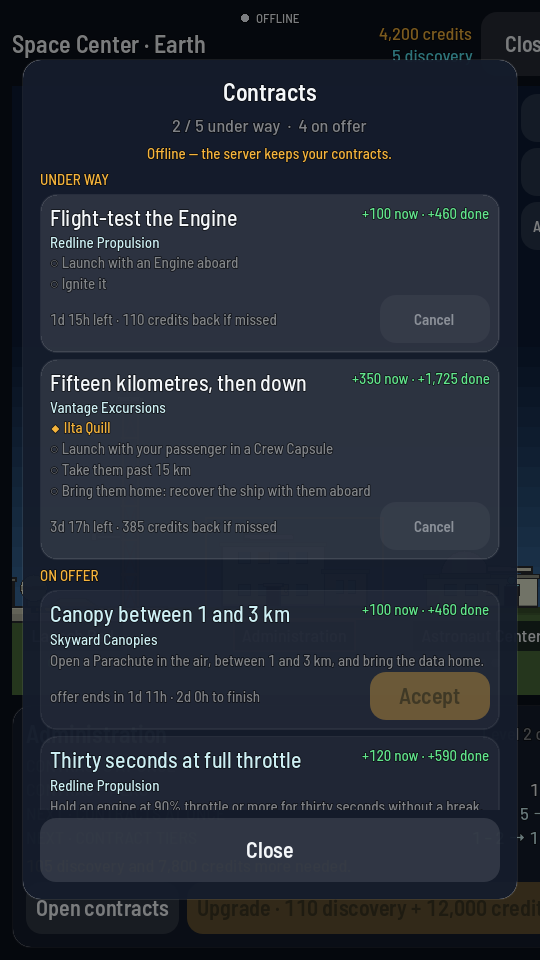
The board has up to four sections, in this order: PROGRAMME, the ordered chain that tells you what to fly next; UNDER WAY, the jobs you have accepted, with their goals ticking off; ON OFFER, what is available right now, each with a countdown; and RECENT, what became of the last few. Accept signs an offer, Cancel drops one, Skip passes over a Programme mission for good.
The same board opens in flight from the menu's CONTRACTS chip, but there it is read-only and lists only what is under way — a contract is signed on the ground, before launch. See Contracts and the Programme, the Programme's missions, and See contracts in flight.
Player contracts
From level 2 the Administration's sheet has a second button, Player contracts: the board every pilot shares. The line under its title is your pilot rating and how many contracts you hold out of how many you may. YOURS, UNDER WAY lists what you hold, each with its clock and what a miss costs, and Give up, which arms on the first tap and names the price in red. OPEN lists what you may take, the dearest first: each card gives what it pays, the world and orbit band, the place to land or the ship to dock to, the parts, the poster's record and the clocks; View opens a card in place with Accept at its foot. A card asking for a part you have not unlocked is framed in amber and has no button. Under a rating of 250 the open cards are not shown and an amber card, No contracts for now, says why.
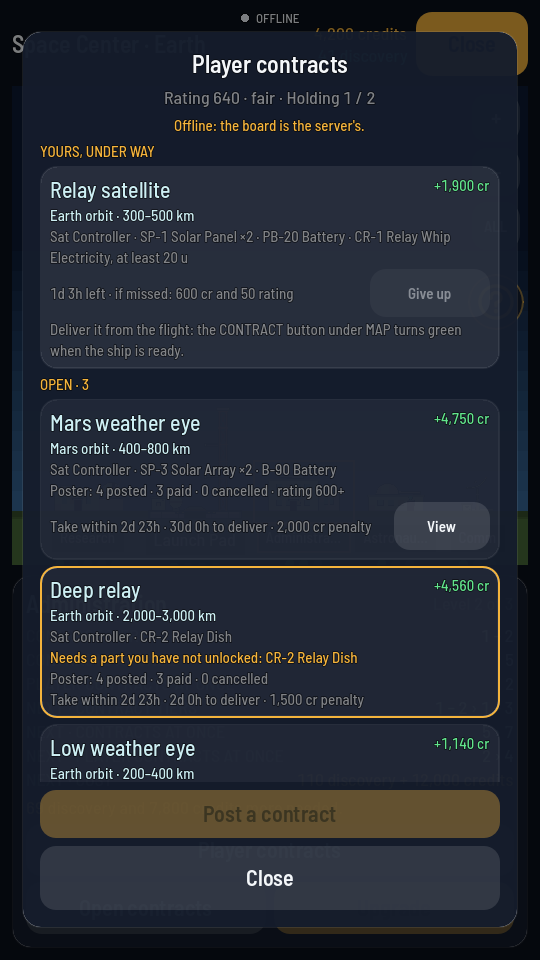
Over OPEN, five buttons choose which kind it lists: All, Orbit, Surface, Docking and Meek, the passengers; the lit one is the kind shown. A sixth, Destroy, joins them while a contract to destroy a ship is open to you.
Your own contracts are under YOUR POSTS, each saying how long it has to be taken or, once taken, who holds it — their tag, rating and record — with Withdraw or Cancel, both arming on the first tap; the last few that closed are listed under them with how they ended. Post a contract, at the foot, opens the posting screen.
A ship is delivered from the flight, not from here. See Player contracts, Take a player contract and Deliver a player contract.
Post a contract
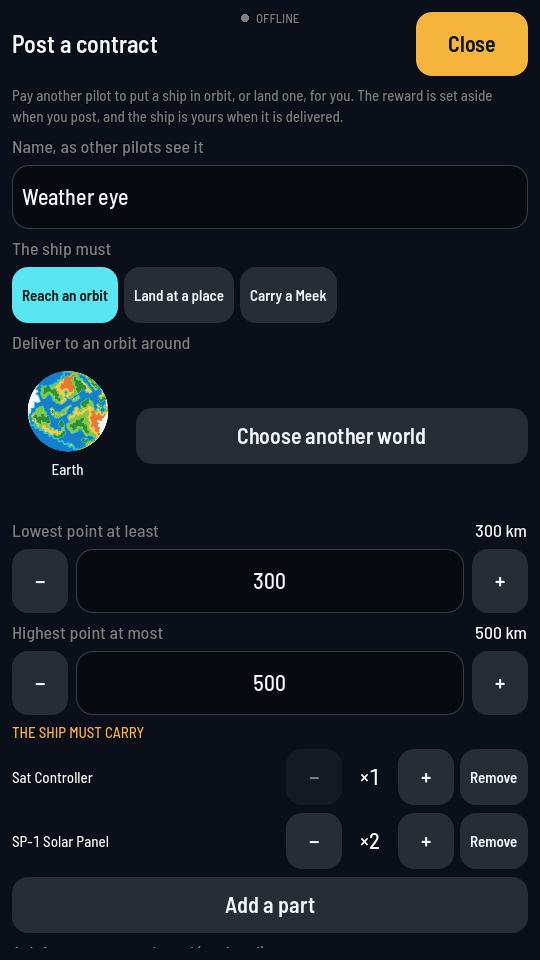
A screen of its own, opened from the board's Post a contract: the name other pilots see, The ship must (Reach an orbit, Land at a place or Carry a Meek), then Deliver to an orbit around, the world's picture with Choose another world beside it (both open the world picker), and the orbit's lowest and highest point, or Land on, the same, then the world's picture to tap or drag the marker round, At, round from the top and Within, either side, or for a passenger Who and To; the parts the ship must carry (Add a part, which opens the part picker, −, +, Remove), an optional resource, then Reward (the slider stops at the cap, said under it), Penalty if they miss it, a share of the reward (a button for each share), and three sliders that name their step: Who can see it, Open to take for and Then to deliver within. Every choice is a button or a slider: nothing opens a list. The line under the form sums it up, and Post names the credits it sets aside. Close goes back without posting, to the board or to the flight it was opened from. Opened from a free docking port's sheet in flight (Post a docking contract), the same screen is titled Post a docking contract: in place of the world and the orbit it names the ship, Dock to and how many of its docking ports are free, asks what the module must carry, and under the reward a green line gives the cover set aside with it. See Post a player contract.
Choose a world
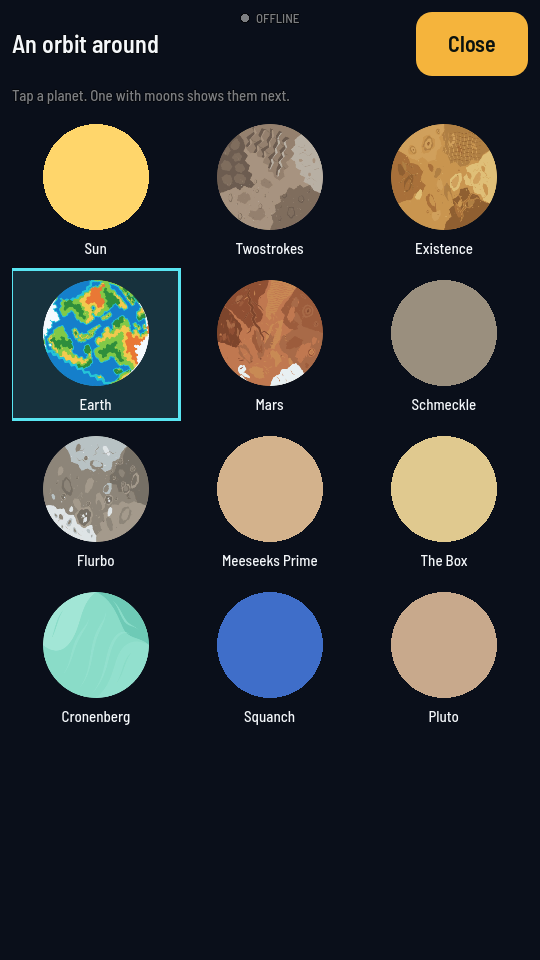
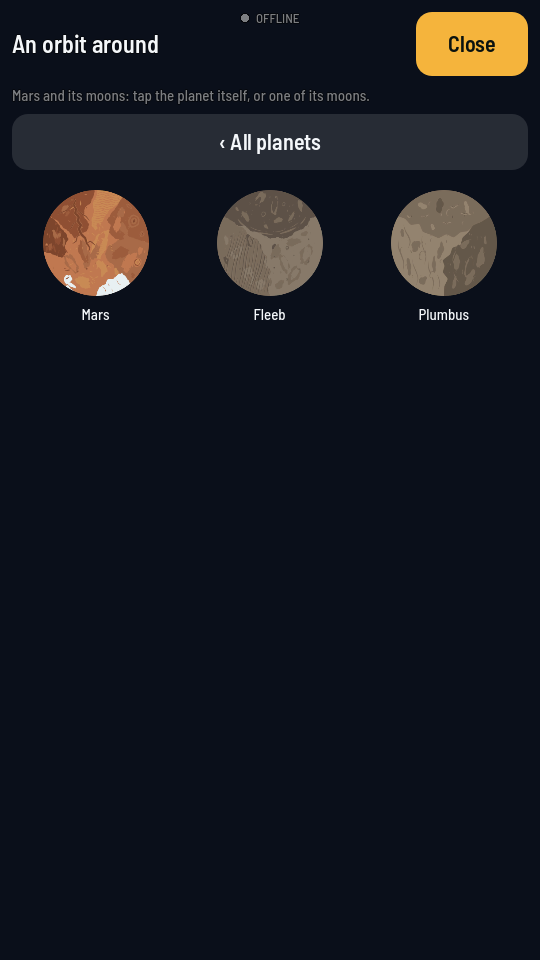
Opened from the world's picture, or Choose another world, on the posting screen, and titled An orbit around or Land on. The Sun and the planets are each shown as a picture, nearest the Sun first (a landing leaves the Sun out); the world chosen so far is framed. Tap a planet. One with moons opens on itself and its moons, with ‹ All planets above them to go back: tap the planet itself or one of its moons. Choosing closes it and the posting screen shows the world chosen; Close goes back without choosing.
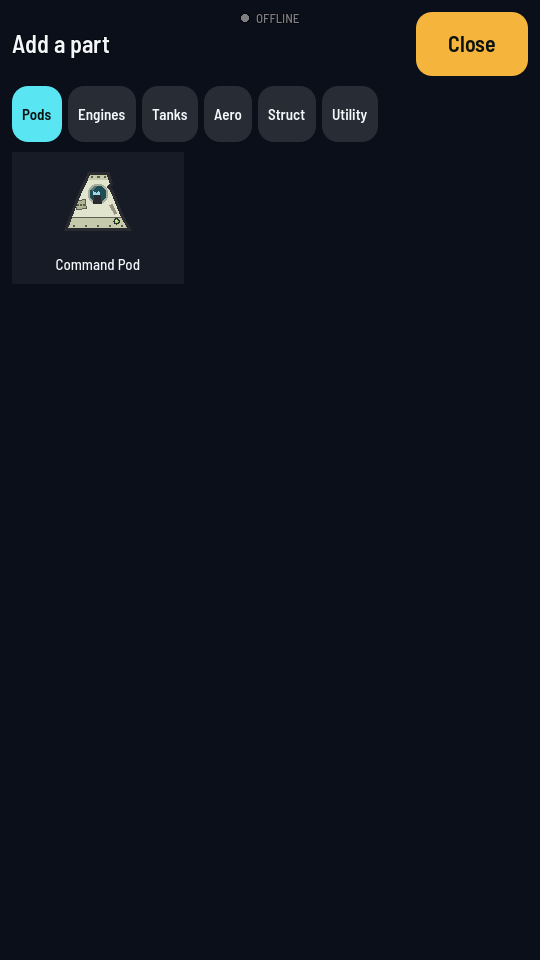
Add a part
Opened from Add a part on the posting screen. The hangar's part categories along the top, the open one lit, and under them the parts you have unlocked in that category that the contract does not ask for yet, each drawn as in the hangar with its name. Tap a category to see its parts, and a part to ask for it; the posting screen comes back with the part added. Close goes back without one.
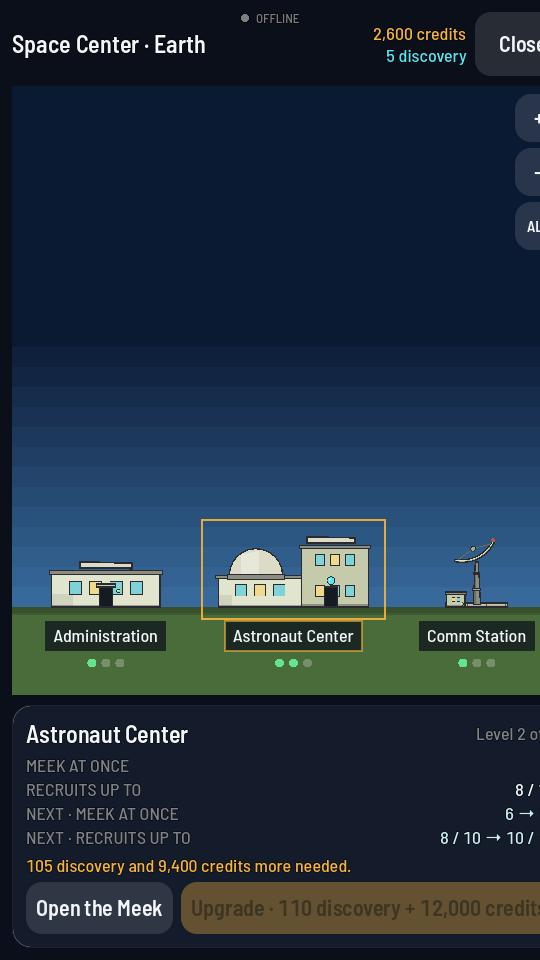
The Astronaut Center and the Meek
The Astronaut Center's sheet says how many Meek you may keep on the roster and how good the recruits it finds you may be. Open the Meek is the crew screen.
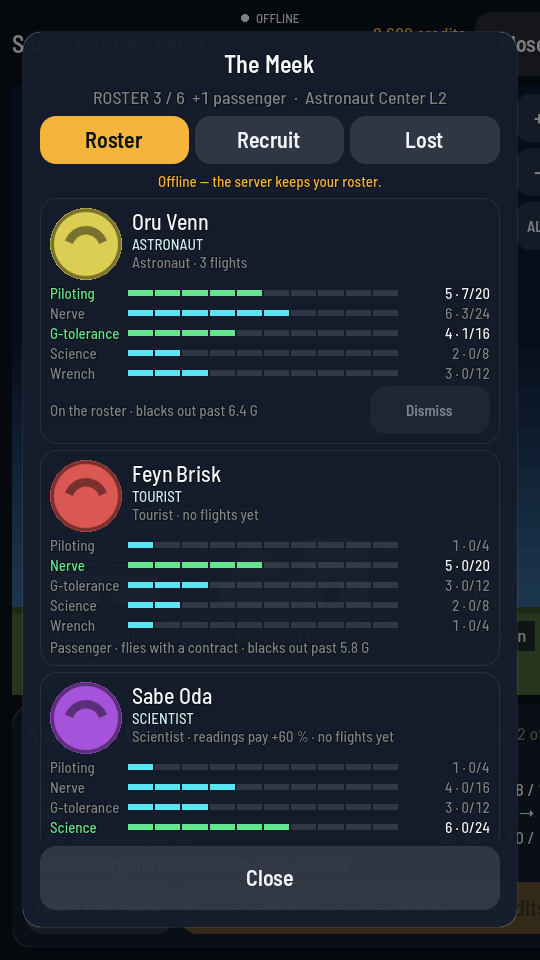
Three tabs: Roster is who you employ, with each Meek's five stats and what they are doing right now; Recruit is who is available to hire and for how much; Lost is the memorial, where each Meek's card carries the short obituary written for them. See The Meek and Recruit a Meek.
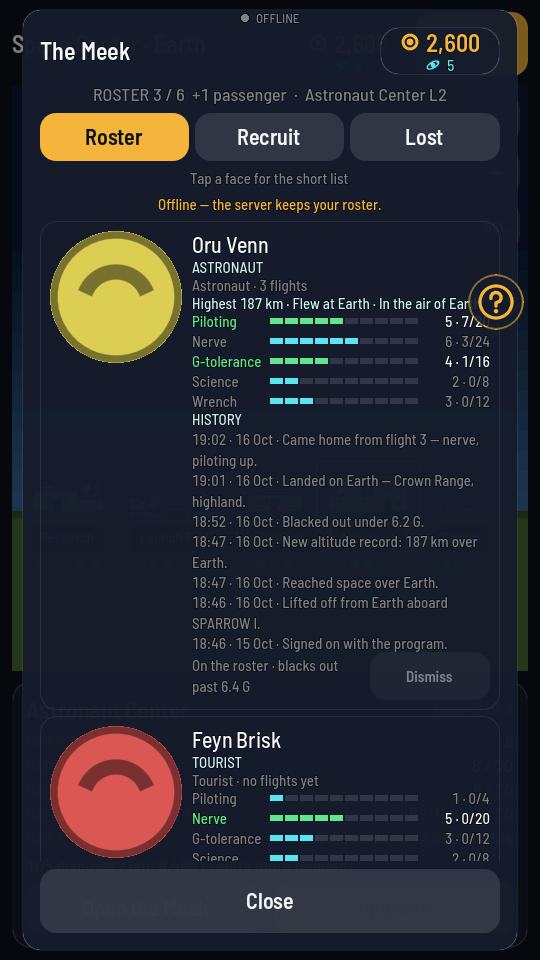
Tap any face and the list changes rather than opening anything: the portraits become large, and beside each one stands what that Meek has done — the highest they have ever been, the worlds they have flown at, and a dated list of their history, newest first. Tap a face again for the short cards. It is the same three tabs either way, and the setting holds until you change it.
The Comm Station
The Comm Station is the only building whose sheet offers nothing but its own figures — there is no screen behind it. What it holds is the reach of the ground station your ships talk to: one row per kind of antenna, saying how far each can reach home from. Upgrading it lifts every one of those distances at once. Its last row, OTHER PLAYERS, says whether your map shows other players' ships: hidden in amber at level 1, on the map from level 2, and the NEXT row under it says the upgrade changes that.
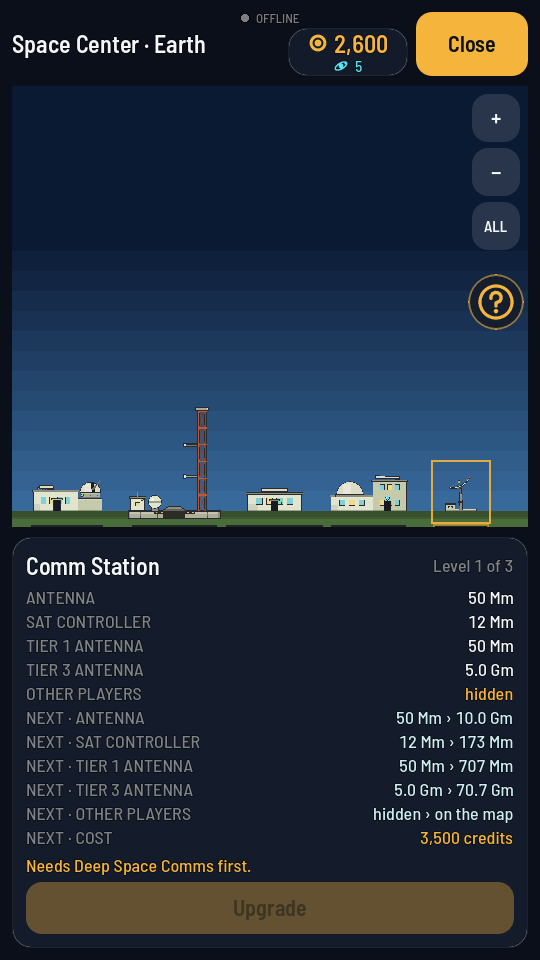
What those distances mean is Talking to your ships.
The Store
The amber Store tile at the foot of the palette, above the tech tree, contracts and Meek tiles, opens the Store: a whole page listing what the game sells, top to bottom, some things as squares, up to three side by side, the rest as cards across the page, with a heading or a banner between them. The packs of gems stand side by side, each with its count, its name and its price on the button that buys it. The Online Pass, which you need to fly in the shared world, comes with its free trial, and one-time purchases such as Seed Money add credits, discovery or both to your programme at once. A product may be shown as a picture alone, with no words or button around it (a square shows the middle of its picture): tap the picture and a sheet comes up with the product’s name, its price, what it is and the small print, and the button that buys it (Close, or a tap outside it, puts it away with nothing bought). Any other card shows the price in your own currency as your phone's store quotes it, what you get, a line of small print about the trial or what the purchase adds, and a button: Start free trial or Subscribe for a subscription, Buy for the rest. A one-time purchase that is only useful in the shared world says Needs an Online Pass instead of Buy until you have one. Either way the App Store's or Google Play's own payment sheet opens; nothing is charged by the game itself. The sheet for something you already have, or can't buy yet, says why in place of the button.
A subscription you already have shows a green tick and until when it runs instead of a button, and the line under the title says whether your Online Pass is active. Credits only matter in the shared world, so until you have the Pass, Seed Money says it needs one instead of offering a button. Restore purchases at the bottom asks your store for anything you bought before, on this phone or another — purchases belong to your account, so a Pass bought on an iPhone also works on Android and the Mac. The page asks on its own, too, whenever you open it without a Pass: the line under the title reads Checking your store account… for a moment with the buttons waiting, and a subscription your store account already pays for then shows up as yours without a tap. You need to be signed in to buy; on a computer the page lists the products and says purchases are made in the phone apps. If the list cannot be loaded, the page says so and why (Could not load what is on sale… Trying again…) and asks again by itself; after a minute or two without luck it offers Try again. Privacy Policy and Terms of Use, under the list and again on every product’s sheet, open those two pages in your browser without leaving the game.
A refund of a one-time purchase takes its credits, discovery or gems back from your programme, as far as you still have them: your purse never goes below zero. Ask Apple for a refund and, while Apple decides, whatever is left of that purchase is set aside. It comes back if Apple says no, and stays gone if Apple refunds you. What had already been spent is owed: the next purchase of the same thing (credits for credits, gems for gems) pays it first and adds only the rest. Its card and its sheet say so in amber above Buy (A refunded purchase left 2,000 credits owed. This purchase pays that first, then adds 3,000 credits.), and once it goes through the line at the bottom says where the credits went.
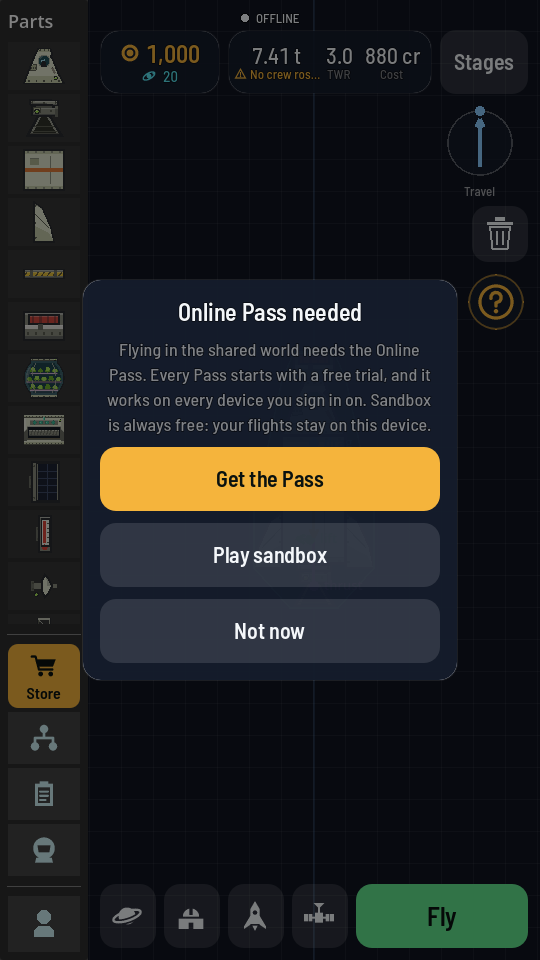
Online Pass needed
Flying in the shared world needs an Online Pass. If you are signed in without one, Fly in the hangar brings up this sheet instead of taking you to the pad, and so does lighting the first stage on the pad, so a flight is never started that the shared world will not keep. It can also come up once while you play if the game finds your Pass has run out.
Get the Pass opens the Store, where every Online Pass starts with a free trial. Play sandbox moves you to sandbox, which is always free: your flights stay on this device. Not now closes it. On a computer there is no Get the Pass: the Pass is bought in the iOS or Android app, and works on the computer too once you sign in with the same account.
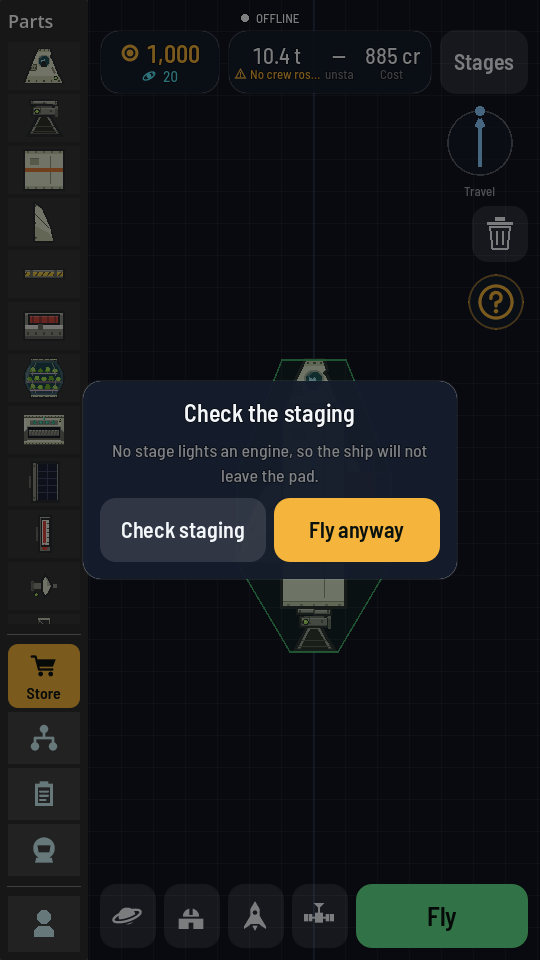
Check the staging
Before Fly takes a ship to the pad, the hangar looks over its engines. If no stage lights an engine, an engine is in no stage while others are, or an engine would fire into the separator under its bell, this sheet says which. Check staging opens the staging list to fix it; Fly anyway launches the ship as it is. What each problem means is Staging.
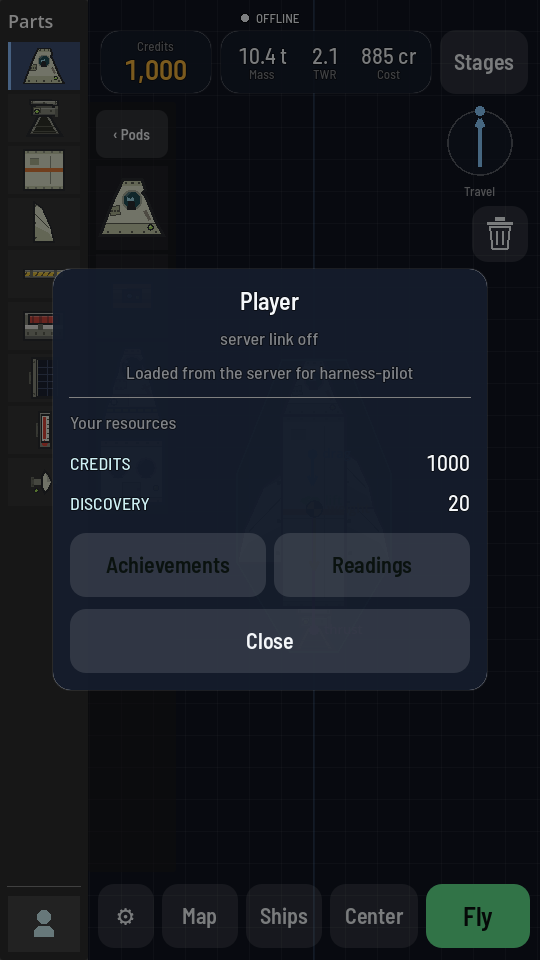
Your purse
The purse at the top left of the hangar opens the Your purse sheet: one row for each currency, CREDITS, DISCOVERY and, signed in to the shared world, GEMS, with its mark, how much you hold, what it buys and where it comes from, and under them the programme they belong to and whether the game is talking to the shared world. In sandbox each row says what it means there instead, and the gems row is gone. Under the gems, Get gems opens the Store. Two buttons lead on from it, and they are the only way to either of the next two screens. The same chip stands in the header of the Space Center, the tech tree, the Store, the Meek and the contract board, to read rather than to tap.
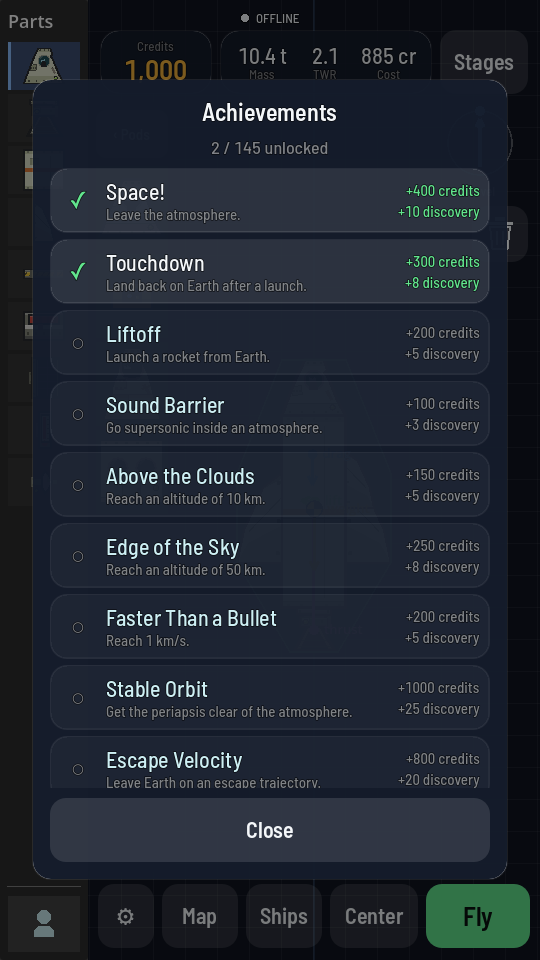
Achievements
The whole list, ticked or not, each with what it paid or would pay in credits and discovery. The line at the top counts how many exist and how many are yours. Under it, two filters, Completed and Not completed, both ticked when the sheet opens: tap one to hide that half of the list, tap it again to bring it back. The count at the top does not change with them. Two rows at the bottom stand for the ones that get no row of their own: a padlocked row counting the achievements that need parts you have not unlocked, which join the list as you buy tech, and under it the hidden ones, marked ?, which the game will not describe until you earn one.
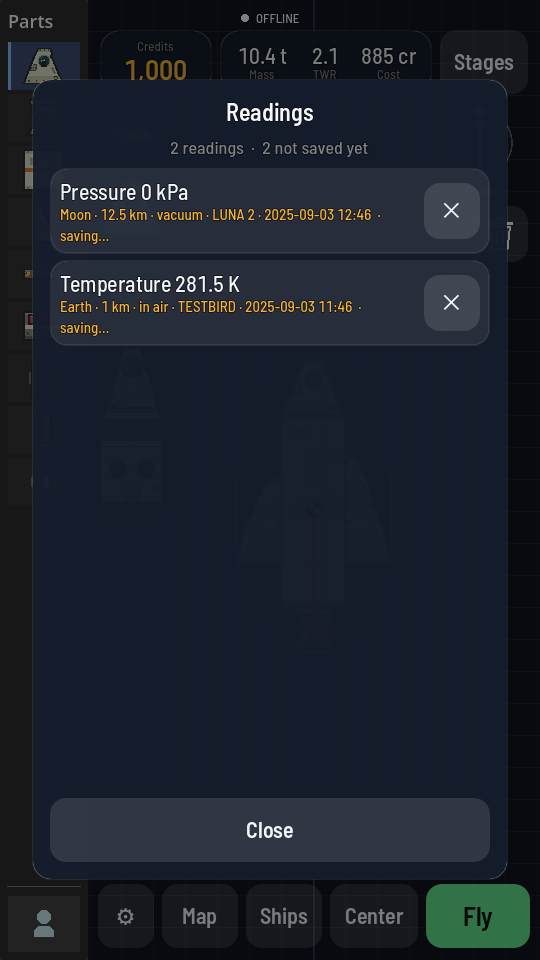
Readings
Every measurement you have taken, newest first: what was read, the place it was read at, the ship it was read from and when. Each row has a ✕ to throw that reading away. A row still saying saving… has not reached the shared world yet.
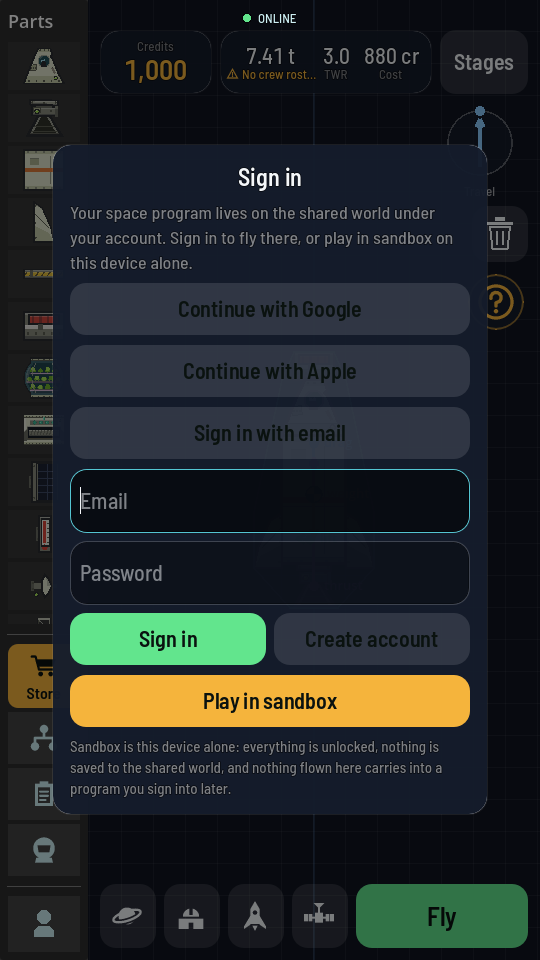
Sign in
The one sheet that ever stops you to ask something, and only the first time the game opens: Continue with Google, Continue with Apple, Sign in with email (which opens an email and a password field in place, with Sign in and Create account) and, given the same weight, Play in sandbox. Google and Apple open in the phone's browser and come straight back. An email address that is not confirmed yet turns the sheet into Check your email, with I've confirmed it, Send the link again and Use another email in place of the sign-in buttons (Your account). After a first sign-in the sheet offers a code field, for a program you already have on another device. It comes back from Settings » Sign in, and from turning Sandbox off while signed out, where it has a Close.
See Your account.
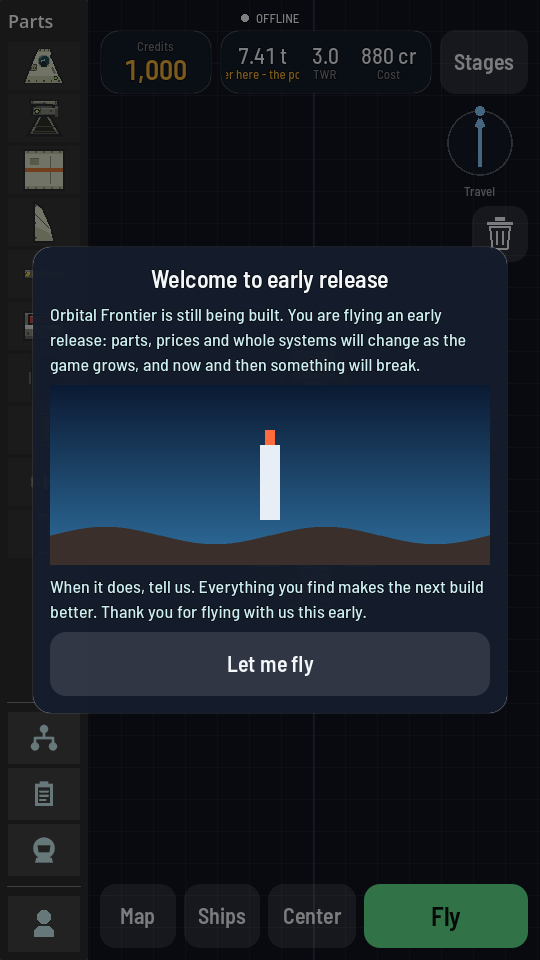
A message
Now and then the game has something to tell you that is not about your rockets: that it is an early release, that something new has arrived, that an event is on this week. It says so in a message that comes up over the hangar by itself, either when the game starts or when you come back to the hangar. A message has a few paragraphs and sometimes a picture, usually under a title across the top, and up to three buttons at the bottom, whose words change from message to message (OK, Let me fly, Read more). At least one of them puts the message away. Another may open a web page in a browser over the game; close the page and the message is still there to put away. Tapping outside the message does not put it away; a long one scrolls by dragging. A paragraph may stand out from the rest in its own colour, larger or smaller, bold or slanted, centred or set to the right, as the message was written.
Messages wait their turn: none comes up while another sheet is open, the sign-in sheet included, and when there are several they come one after another. Most are shown once on each phone or computer and never again; some come back after a while, a day or a week later. They are written after the game is released, so a message can appear without an update; one that needs a picture waits until the picture has downloaded.
A tutorial
The first time the hangar opens, a short guided walk starts over it: an amber arrow from a caption to the thing to tap or drag, a line saying what to do, and a glow round that thing for a few seconds. Nothing is greyed out and nothing is blocked — the screen works as it always does — and the walk moves to its next step only when the thing is actually done: pulling a pod onto the canvas puts one there. The first walk, Build a rocket, goes bin, pod, a tank under the pod, an engine under the tank, a Fin low on the side of the tank and its twin with Symmetry, a Parachute on top of the pod, its Auto deploy set to 2500 so it opens by itself on the way down, an astronaut in the pod's seat and Fly, ten steps, and ends on the launch. Each part has to be in its place: a tank joined on top of the pod, or an engine anywhere but under the tank, does not count, and the caption says where it goes. The fins have to leave the green lift mark below the yellow weight mark on the build area: with no fins, or with them up beside the pod, the rocket turns over in the air, and the walk says so. A sheet that opens over the hangar hides the walk until the sheet goes; the staging list does not, so a walk about staging stays up beside it.
A walk follows what you do rather than a script. Its words and its arrow change with what is on the screen — with the parts drawer shut it points at Pods, with the drawer open at the pod itself — and a step you have already done is passed on the spot. Undo something it taught you and it comes back for it: take the pod off the canvas and the walk returns to the pod, saying so in amber above the step; a tank dropped beside the rocket instead of under it keeps the arrow until it is joined on; set the parachute's Auto deploy back to Off, or take the astronaut out of the seat, and that step returns. Stay on one step for a while and a second line appears under the words, saying how the gesture goes.
Your first flight follows it, on the flight screen, and starts when that launch puts you on the pad: five steps — the throttle to the top, STAGE to light the engine, a turn key held until the rocket leans over, MAP, and the ≡ menu that is the way back. It waits for the hangar's walk, so it only appears to a player who has just built something; if that flight ends in the ground, it is there again on the next one.
Four more follow, and each waits for the moment it is about rather than for a screen to open. Why rockets throw pieces away waits in the hangar for the moment a rocket can reach orbit — Staging discovered and the Launch Pad upgraded to its second level, since nothing that fits the first pad gets there — and a rocket on the canvas. It builds a second stage under your rocket: a Separator on the bottom of the engine, a tank under that with its Length set to 192 on its sheet, an engine, and a pair of fins low on the lower tank (the top pair stays, because the top stage flies on through the air alone once the bottom one drops); then the staging list — the bottom engine in Stage 1, the separator and the top engine in Stage 2 — an astronaut in the seat, and Fly. A separator put anywhere else (on top of the pod, where it would drop nothing) does not count, and the caption says where it goes. Getting into orbit comes after it and starts when you light the first stage of a rocket that still has a stage to drop: lean east, burn until APO under your height reads over 70 km, above the air (tapping STAGE when a stage runs dry), cut the throttle and coast up out of the air, then point along your track and burn again until PER, the bottom of the orbit, clears the air too — all of it read off the flight screen, without the map. Reading your orbit and Coming back down both wait until you are actually going round: the first is the map, its high point and its low one and what burning at either end does to the other (in sandbox it ends by running the clock forward); the second is the way home, turning backwards along your track, burning until the low point drops into the air, the fall, and the landing, where the words follow how your parachute opens — by itself at the height you set, from STAGE, or by tapping it. The manual says all of this at more length in Space school.
A walk on the flight screen that cannot go on — the flight ends in the ground, the fuel runs out short of orbit, or there is none left in orbit to slow down with — says so for a moment and goes. It is not counted as done: it picks up again on your next flight.
One walk per visit to a screen: finishing one never opens the next on top of it, so the one after comes at your next flight, or the next time you walk into the hangar.
Each walk shows once. Skip tutorial on the caption ends the one on screen for good. A skipped walk counts as done, so the walks that come after it still come. The switch and Play again are under Settings » Tutorials; both are the device's, not your program's. Play again brings every walk back and puts the first of them on the hangar as soon as you close Settings — and a walk that finds a step already done (the canvas is already empty) passes it on the spot and points at the next thing instead. When the game has no guided walks to offer at all, none start and Settings has no Tutorials section.
Tips
Six screens carry a round question-mark button, in the same place on each: at the right edge, a little way down from the top (under the bin in the hangar, under ALL on the Space Center, under MAP and the menu button in flight). The six are the hangar, the Space Center, the tech tree, the Meek, the flight and the map. It opens the Tips card, small and rounded, at the top of the screen: one short piece of advice about that screen, picked at random. Nothing under it is dimmed and a tap anywhere outside the card reaches the screen, so the tip can stay up while you build or fly. The arrows at the bottom right of the card go round that screen's tips in either direction, a tap anywhere else on the card shows the next one as the right arrow does, and the X in its top right corner, or a swipe of the card to either side, puts it away — the Meek, the tech tree or the Space Center stays open underneath; opening another sheet, or a message arriving, puts it away too. The card also opens by itself a moment after you arrive on one of those screens, unless a tutorial or a message got there first; Show tips on this screen under the tip, ticked to begin with, turns that off for that screen alone, and the question mark still opens its tips. A screen with no tips has no question mark. New tips can arrive without an update. The steps are in Read the tips.
Settings
The small figure at the foot of the parts column, below the palette, opens the app's Settings screen — a different thing from the Your purse sheet, and the one screen here that is about the app rather than about the game. Each setting is one row: its name, a ? beside it, and its switch or button on the right. A switch reads Off, or On and lit. Tap the ? to open a few lines on what the setting does right under it, and tap it again to fold them away; a line under a row that stays open says how the setting stands now. Nine sections, from the top: World (Sandbox), Account (Your program: who you are signed in as, with Sign out — or Sign in when you are not; then, signed in, your Pilot rating and the cover you hold, your Visible name with its Save, Other devices with Generate code and Enter a code, and Reset or delete with Reset account beside Delete account), Help (Player manual, this manual), Tutorials (when the game has walks to offer: the Guided tutorials switch, and Play again once one has been seen, which brings every walk back and starts the first of them as soon as you close this screen), Reminders, Sound (All sound and its volume, then one line apiece for EFFECTS, MUSIC, MISSION CONTROL — the radio callouts and their subtitles — and INTERFACE: a tick box that turns the channel on or off, and its volume slider beside it), Screen (FPS counter, and Show taps, which draws every touch on the screen for a video you record), Flying (Auto-lock staging, which locks STAGE again after every stage) and About (the build you are running, and Contact: our email address, which opens your mail app when tapped).
On a phone the sound does not stop when you leave the game. A ship coasting in orbit is on rails, so the moments worth hearing about — an apoapsis, a periapsis, a planned burn, and the point where the orbit meets the air — are all worked out before you put the phone away, and Mission Control speaks each of them a minute ahead while you are elsewhere, over the music. The songs are a radio station, Orbital Radio: everyone in the game hears the same song at the same moment, as on a real radio, and some things are on at set times of day. The song that was playing goes on in your pocket, followed by the station’s next ones; when you come back the game tunes in again to whatever the station is playing now, part-way through if a song has already started. Both follow the switches and volumes above: music at half volume is half volume in your pocket too, MUSIC off means silence there, and MISSION CONTROL off means the callouts wait until you are back. On a phone two more switches sit under the channels, BACKGROUND MUSIC and BACKGROUND ANNOUNCEMENTS, for keeping either one out of your pocket while leaving it on in the game. On an iPhone the announcements need the background music: the phone keeps the game awake only while it is playing something. In sandbox the music carries on but nothing is announced, because a sandbox world stands still while you are away. Nothing is announced for a ship under thrust, in the air or on the ground, because none of those are on rails and none of it can be known in advance.
While the music plays in your pocket, the phone shows it the way a music app does: on the lock screen and in the pull-down controls (the notification shade on Android). The song’s title and cover are there, and under them the next moment on your ship’s orbit and when it is due, for example Next: Apoapsis at 14:32 in your phone’s own clock. The line moves on to the following moment as each one passes. Pause and play there stop and restart the music and the announcements together, and tapping the notification opens the game. The station is named there as Orbital Radio — out here you’re never alone, which also stands in for a title when the music is not a song. In sandbox, and for a ship under thrust, in the air or on the ground, nothing is coming up, so only the song is shown.
FPS counter under Screen puts a small panel on every screen, the flight and the map included. Tap it to step through three views and back: MINI (just the frames per second — green when smooth, amber under 55, red under 30), BASIC (the average and the worst recent frame, so a single hitch shows even when the average looks fine, and a bar per frame against lines at 60 and 30 FPS) and FULL (the engine: the longest script and physics frame of the last second, render CPU and GPU time, draw calls, node count). Drag the panel to move it anywhere on the screen. The view, the place and the switch are all remembered on the device; on a keyboard, F3 flips the switch.
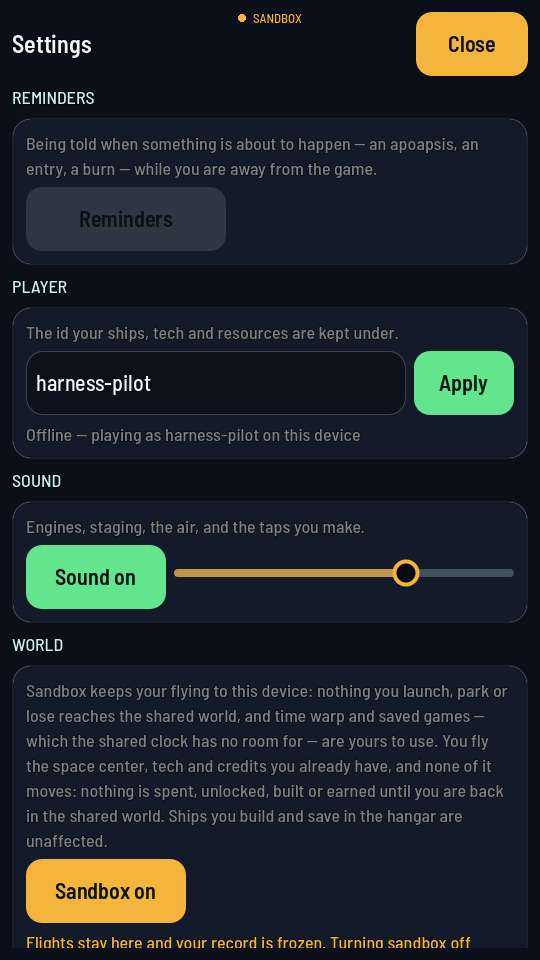
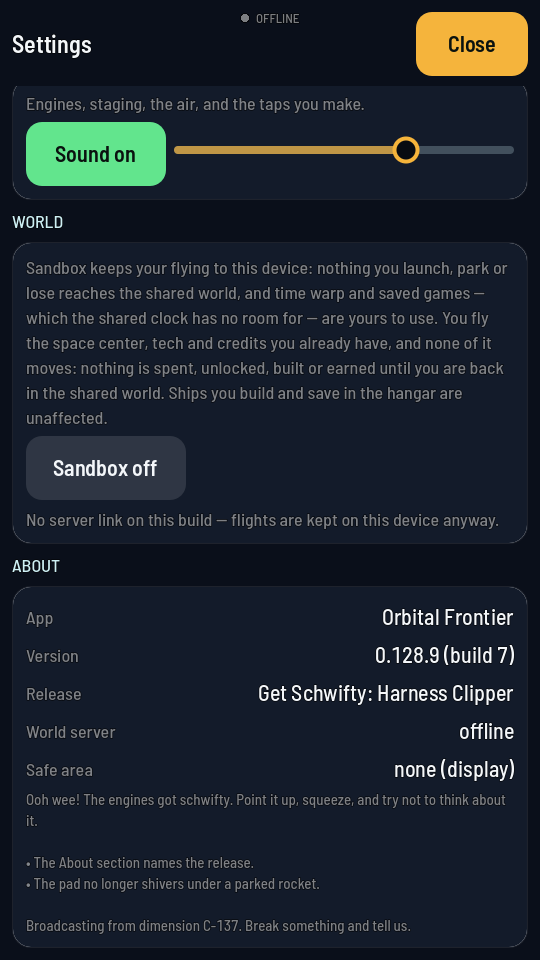
See Check the About list and Switch to sandbox.
The manual
Open beside Player manual, under Help in Settings, opens this manual over the game. It is the phone's own browser shown inside the app, so the game is still running behind it and closing the page — Done on an iPhone, Back on an Android — puts you straight back on the Settings screen you left. Nothing is lost and no rocket is dropped: look a figure up mid-build and carry on.
On a desktop there is no in-app browser, so the manual opens in your ordinary one instead, in its own window.
The manual you get is the one on whichever world server you are connected to, which is the copy that matches the build you are running. With the game offline you get the public copy at orbital-frontier.world/docs/player/, which is the newest one.
Reminders
Open under Reminders in Settings — and REMINDERS in the flight menu — opens the list of everything the game is going to tell you about: an apoapsis this evening, a capture burn next week. Each row says what and when, and + Remind me later adds one at a bare time. A reminder that has spoken leaves the list as it speaks, so everything here is still to come.
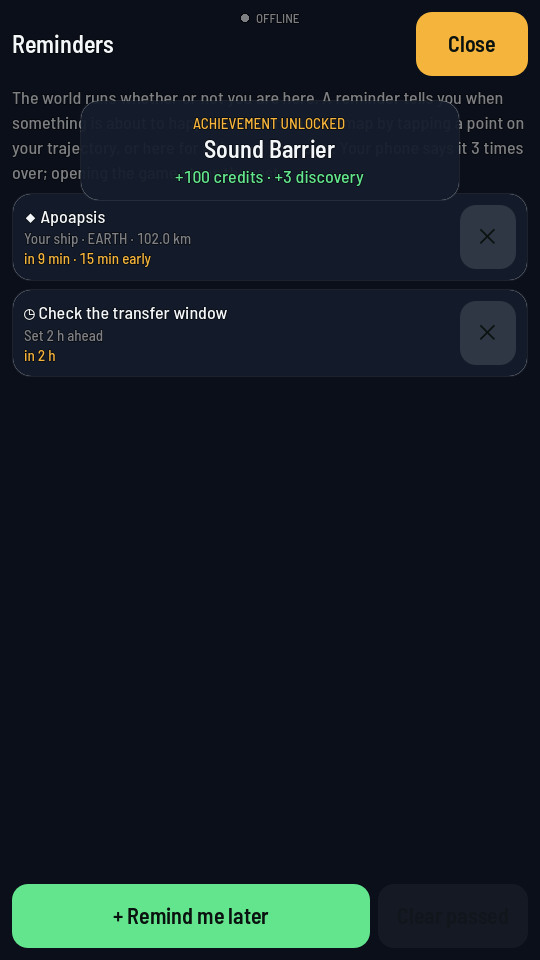
Most reminders are not set here, though — they are set where the game knows the time, which is the map. See Reminders and Set a reminder.
Flight
Flight is the screen a launch drops you into, and it stays up for the whole trip, however long the trip is. Altitude sits top left (tap it to switch between ALT, above sea level, and AGL, above the ground under you) with a RESOURCES row under it, folded to a row of dots; tapping that row opens the full list, and a tap anywhere on the open list folds it away again. The navball in the middle shows attitude and speed; the throttle (THR) is the lever at bottom left, whose yellow grip slides sideways in its handle to lock it, the two curved-arrow buttons beside it turn the ship, and STAGE at bottom right fires the next stage; held and pulled up, it locks.
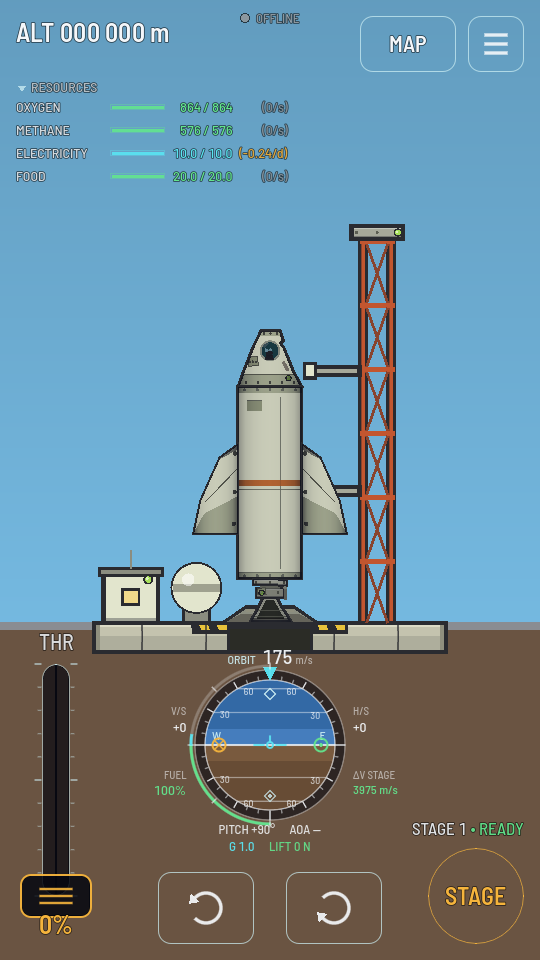
The view itself is yours to move: drag the sky to pan (the further you have pinched out, the further it can wander from the ship, though never down into the ground), pinch to zoom, and a crosshair button appears above STAGE whenever the view is no longer on the ship at its starting zoom — tapping it puts back both at once.
Chips appear along the edges as they become relevant and go away again when they do not: the crew (a tap on their chip makes the portraits big, in place, until the next tap), the radio link, a target you are closing on, a red COLLISION COURSE warning when another player's ship will meet yours, a HEAT or LOAD warning when a part is close to breaking (Air, heat and speed), the contracts under way. An RCS button appears above STAGE once something aboard answers the thrusters, and with it a three-position switch above the throttle — TURN, MOVE, DOCK — for the thumb pad. DOCK puts the turning and the sliding keys on screen together in one band along the bottom and, once you have a ship targeted, adds a TGT toggle that reads them against it and holds the view on your own ship, nose up; the throttle, STAGE and RCS leave the screen while it is up. How to fly is Flying, and the pad itself is Docking mode.
A part's sheet
Tapping a part on the rocket opens that part's sheet. What is on it belongs to the part: an engine offers Shut down or Ignite, its Max power and the RCS control switch; a parachute offers Deploy and later Cut away; a solar panel offers Deploy; a payload bay Open; a Mining Rig or an Antimatter Converter Start or Stop, with a greyed line under it saying what the machinery is doing; an Antimatter Reactor Start up or Shut down with the same kind of line; a radiator Deploy; an Antimatter Container Vent antimatter and its gravity gauge; a pod or a cabin offers Transfer crew; a part that stores something offers Transfer resources while another store could take its load; and a command pod its Ship name, Control from here and Space station switches. Settings that only make sense on the ground — a tank's length — are not on it. Above all of that, if the part stores anything, is what it is holding: one live line per resource with its level, its load in units and its flow per second, so a tank's sheet is those two lines and Close.
In the shared world a pod or probe core of yours also offers Cloak this ship, which opens the Cloak this ship sheet: what the cloak does, what it leaves out, what the ship can no longer do once it has one, and the price in gems on its violet button, Cloak for good (Cloak a ship); Not now puts it away. On a cloaked ship the button reads Cloaked: no other pilot sees this ship, greyed, and the switches about other players are gone from the sheet.
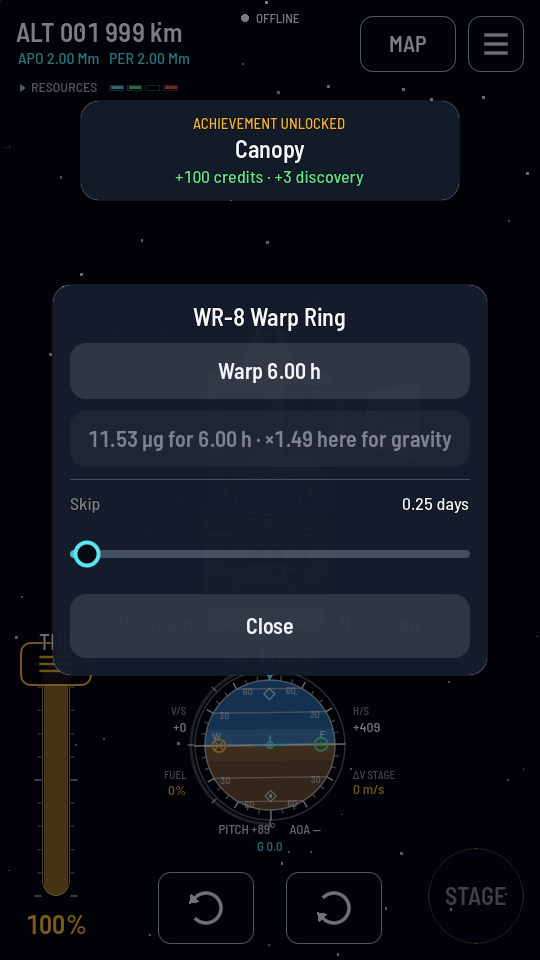
A warp drive's sheet
A warp drive has a sheet of its own because there is more on it than a button. It is titled with the drive — WC-4 Warp Coil, WR-8 Warp Ring, WL-8 Warp Lattice — and carries three things. A Skip slider sets the span, the stretch of its own orbit the ship is to be carried along, read in hours for a Coil and days for a Ring or a Lattice. It starts at the shortest skip that drive will make rather than at nothing, so the span it is left on is always one the drive accepts. A greyed line under the button prices that span in antimatter and says what gravity is adding to it here. And one button, reading Warp and the span, which opens the Warp sheet where the jump is actually made. The button and the priced line follow the slider as you drag it. Nothing on this sheet does anything by itself.
The button is dead while the drive's windings are still coming up, and the greyed line says how far along they are. The same Skip slider is on the part's panel in the hangar, so a span can be set before launch.
Warp
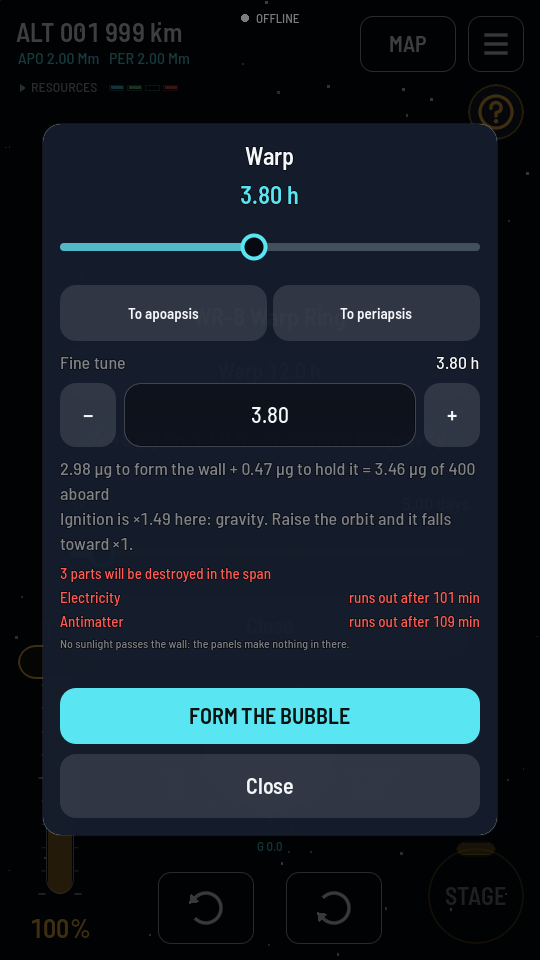
Warp opens the Warp sheet, and this is the one that matters: a warp lives its whole span in a single step, with no way to stop it half way, so everything that could go wrong is on the screen before you commit. Tapping the button closes the sheet and puts the wall up, so the jump is watched rather than read about.
Down the sheet: the span again as a slider, whose scale is a ratio so the middle of the track is hours and the far end weeks; To apoapsis and To periapsis, one tap each, which set the span to one of your own orbit's moments; a Fine tune field whose − and + step the span a notch at a time, so a moment can be walked off by a few minutes — all three are one value and each moves the other two; the bill in full, ignition and holding added up against the antimatter aboard, with a second line when gravity is making the ignition dearer; the forecast, one row per load aboard with what it will be when the wall opens — the bill already out of the antimatter, and a reactor's burn in it too — anything that reaches zero on the way written in red with when (runs out after, or gone when the wall closes when the cut or the bill takes all of it), and above the loads, in red, anything the span itself destroys; a note that no sunlight passes the wall; and the reason the jump cannot be made, in amber, when there is one — or Working out the span… while the forecast is still being worked out. At the bottom is FORM THE BUBBLE, which is greyed until every rule is satisfied and the forecast is in.
Another ship's sheet
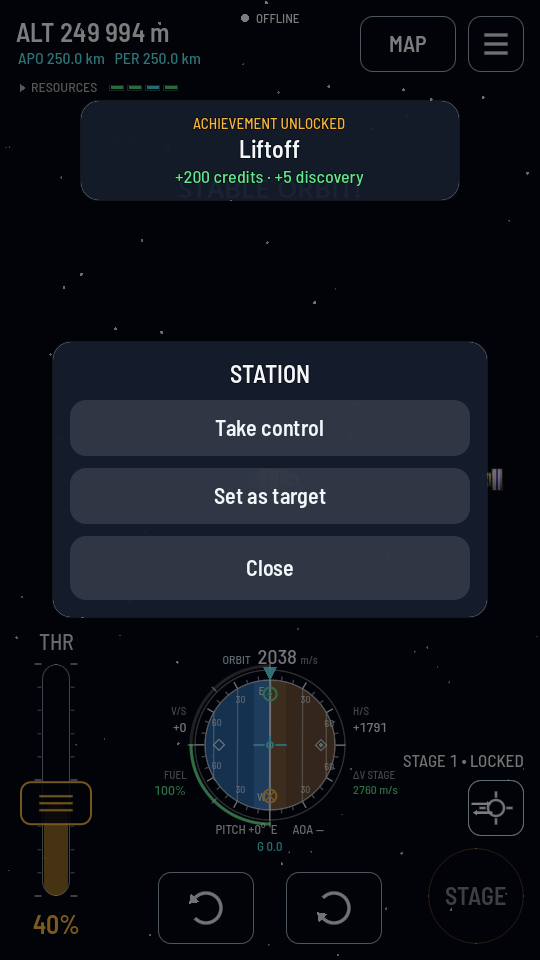
Once one of your other ships is close enough to be drawn beside you — a station you are docking with, a stage you dropped a minute ago — tapping any part of it opens that ship's sheet, titled with the ship's name, and under the name how far away it is and how fast the two of you are drifting apart, live — "30 m away · drifting 0.0 m/s". Take control puts you at its controls on the spot: the ship you were flying is left to coast exactly where it is, and its crew, its throttle and its planned burns stay with it until you tap your way back. On a piece nobody can fly the button is greyed and reads No command part. Set as target makes the ship the target of the one you are flying, as the map's TARGET button does; on the target itself it reads Clear target. A ship with a pod or a cabin aboard adds Transfer crew, the crew transfer sheet, for an astronaut to walk across to it or back. The sheet exists because two ships a few metres apart are one dot on the map: this is where they are told apart.
Transfer crew
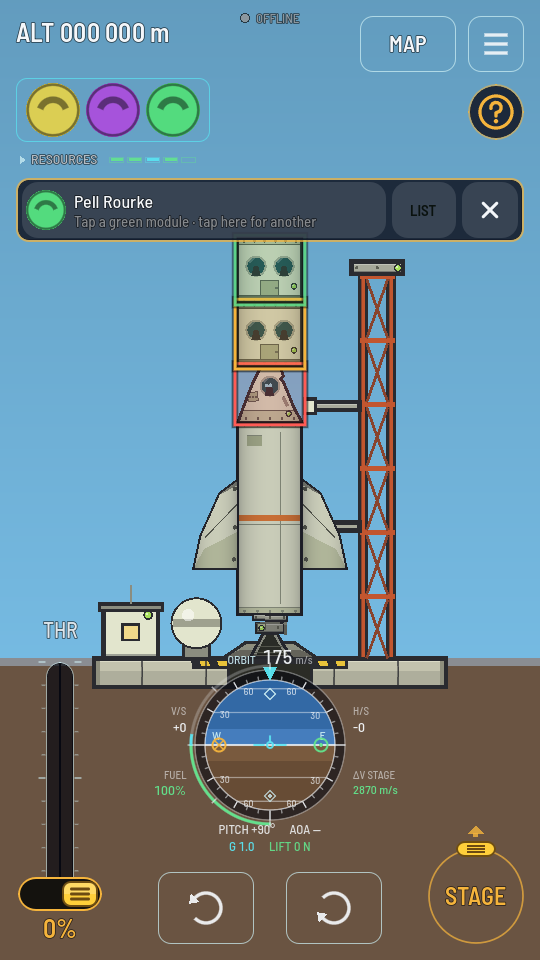
A pod or a cabin has one action of its own: Transfer crew. It closes the part's sheet and lets you pick on the ship itself: the module you started from is ringed in yellow, every module that can take the move in green, the rest in red, and a tap on a green one is the move. A bar across the top names who moves (tap the face for the next Meek in that module), LIST opens the crew transfer sheet — WHO MOVES and MOVE THEM TO, for a module that is not on screen — and the cross ends the pick. The button is only on the sheet while there is a second module to move somebody into — and after a docking, both ships' modules are ringed. Steps are in Transfer crew between modules.
Transfer resources
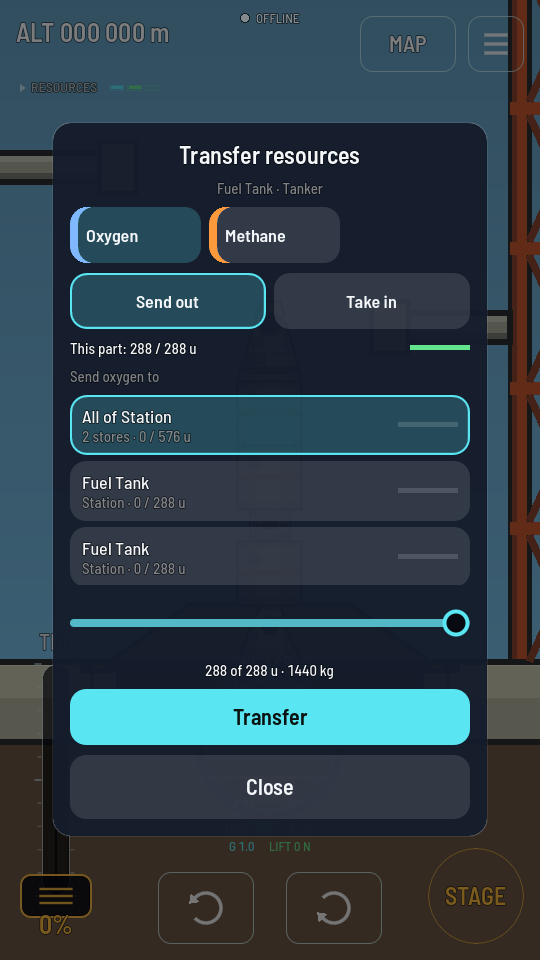
Any part that stores something — a tank, a battery, a pod, a cabin, a cargo bay — adds Transfer resources to its sheet while another store in reach can hold one of its loads. It closes the part's sheet and rings the ship's stores, as Transfer crew rings its modules: the part yellow, every store that can take the load green, the rest red, and a bar naming the load (tap it for the next), a button turning the move round, LIST and a cross. A tap on a green store, or LIST, opens the transfer sheet: a tile per resource the part can trade, Send out or Take in, on a docked ship This part or All of its ship, then the list of stores at the other end with how full each is — the other ship as one row first, then each store on its own — a slider for the amount and Transfer. The sheet stays open after a transfer, so a second resource is one tile away. A store on another player's ship that its owner has priced adds three lines under the amount — the price a unit, the 5% fee in amber, and You pay or You get — and the button reads Buy for … or Sell for …. Steps are in Transfer resources between stores and Buy from or sell to another player's station.
Resource prices
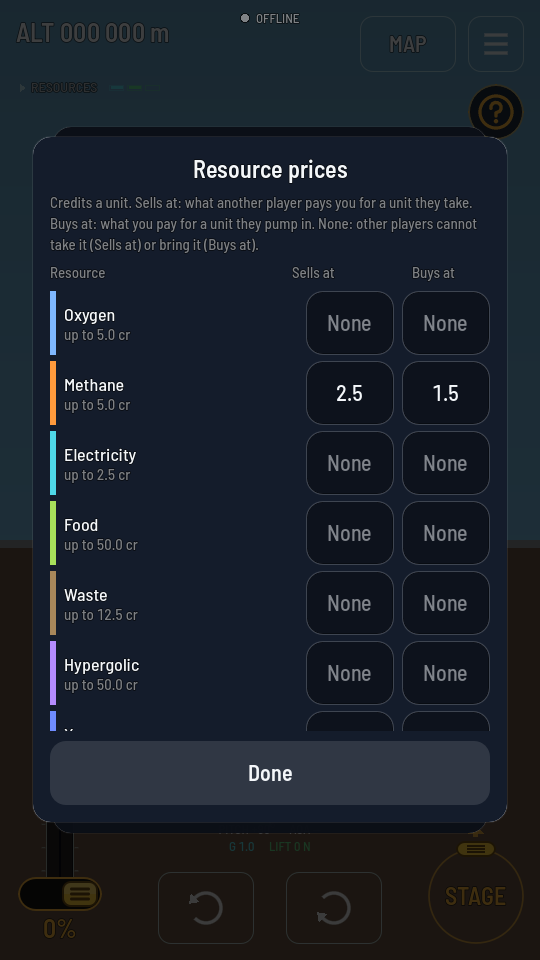
A pod or probe core whose Share resources with other players switch is on carries a Resource prices button, in flight and in the hangar, with a line under it saying how many prices are set. It opens a table of every resource that can carry a price: its name and the highest price it may carry, then a Sells at and a Buys at field in credits a unit, empty fields reading None, which closes that way to other players, since nothing crosses between two players for free. The table drags to reach the rows below, and Done keeps every figure typed and brings the part's sheet back. Steps are in Put prices on your station.
A contract's checklist
While you fly a ship that carries every part of a player contract you hold, a button sits under MAP: amber CONTRACT 4 / 5, counting the contract's lines the ship meets, then green DELIVER once all are. It is not there on the map. For a passenger contract it shows while the passenger is aboard, or while the ship they wait on is within reach, and the checklist then offers a button to take them aboard, named for them. Tapping it opens the checklist: each line with what is asked (green when met, amber when not) and what the ship has, and under them what to do next. When a contract is met the delivery is under the checklist — what you receive after the fee, the penalty coming back, the rating — with Deliver and Not yet.
Launch refused
When the first stage lights, the game checks the rocket once more against your Launch Pad and your credits. If the rocket is heavier or taller than the pad takes, costs more than you have, or carries a part you have not researched, the launch is turned down and the Launch refused sheet comes up over the flight. It says why, in a line such as 50.2 t is over the pad's 50.0 t. Nothing is charged, and the flight is not kept: Back to hangar (or a tap outside the sheet) ends it, so you can change the rocket and launch again. See The Space Center for the pad's limits.
The flight menu
The three-bar button in the top right, beside MAP, opens the flight menu; it turns into a ✕ while the menu is open. Tapping that ✕ puts the menu away, and so does a tap anywhere else on the screen — the flight or the map underneath does not hear that tap, it only closes the menu. What is on it depends on where the ship is and what it is doing:
| Button | What it does | When it is there |
|---|---|---|
| SETTINGS | The flight settings sliders | Always |
| SHOW TAPS | SHOW TAPS: OFF / ON: draws every touch on the screen for a recording, the same switch as Settings → Screen | Always |
| SAVE / LOAD | Save or load this flight | Sandbox only |
| HANGAR | Leave the flight and go back to building, with the ship left where it is. It reads EDITOR before the first stage has fired and once the flight is over, and wears a warning triangle while the ship is still in the air or under thrust — leaving then loses it, and the game asks first. | Always |
| CONTRACTS | The read-only board, with a count of what is under way | While something is under way |
| REMINDERS | The reminder list | Always |
| RENAME SHIP | Name the vessel, which is what the map calls it | Always |
| RECOVER | Bring the ship home and refund what is aboard | Standing still on the ground |
| TERMINATE | Destroy the vessel deliberately | While the flight is live and the ship still answers |
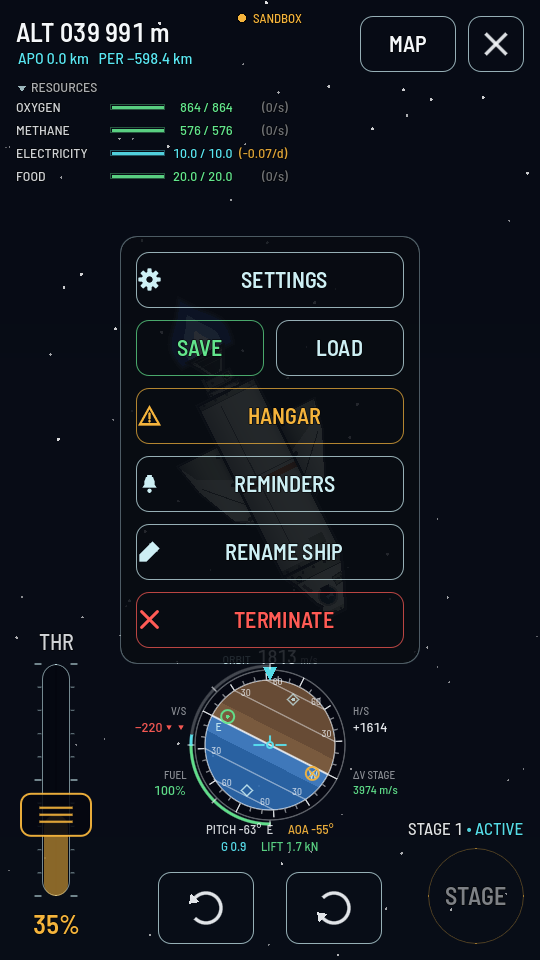
RECOVER and TERMINATE do not happen on the first tap: they unfold a line saying what you are about to lose, with STAY beside the button that goes through with it. That block sits at the foot of the menu and stays put — when the list above it is longer than the screen, it is the list that scrolls, under your finger like any other list in the game.
There is no other way out of a flight: the ship flies until it is recovered, lost, or you leave through HANGAR. See Recover a landed ship.
Flight settings
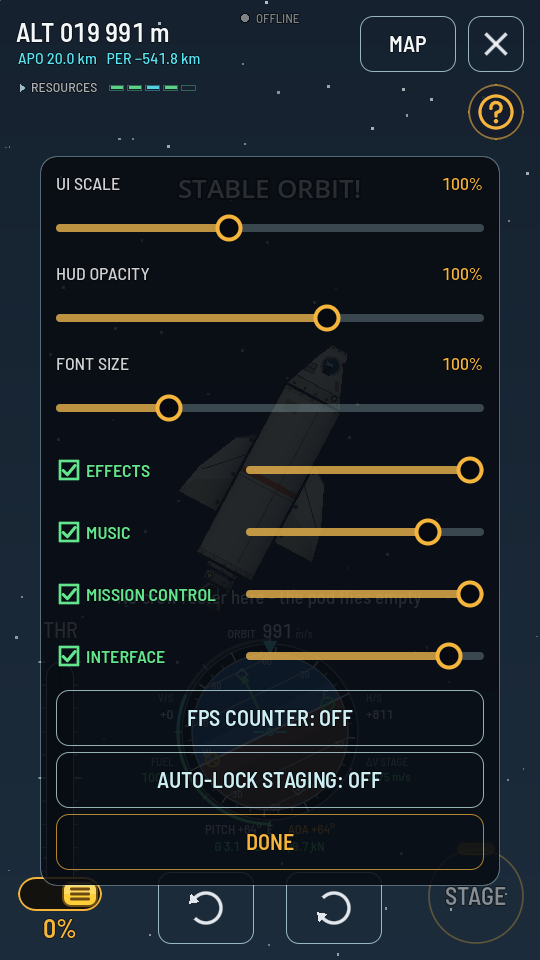
SETTINGS on the flight menu opens three sliders for how the instruments are drawn — UI SCALE, HUD OPACITY and FONT SIZE — then the sound, channel by channel: EFFECTS, MUSIC, MISSION CONTROL and INTERFACE, each one line: a tick box that turns the channel on or off and its volume slider beside it, the same boxes as the hangar's Settings → Sound, so the music or Control can be turned down without leaving the flight — and FPS COUNTER: OFF / ON, the same frame-rate switch as Settings → Screen, so a stutter in the air can be measured in the air — and AUTO-LOCK STAGING: OFF / ON, the same switch as Settings → Flying. DONE takes you back to the menu; a tap anywhere outside the sheet closes it and the menu together. Turn the opacity down to see more of the world — the gauges, the throttle lever and the help button fade with it, the other controls stay bright; turn the font up if the numbers are small in your hand.
The Map
The Map shows the solar system on rails: the sun, the planets and their moons on their orbits, and every ship of yours, dormant or flying. A card in the top left names whatever you have selected — a world, or one of your vessels — folded to its name; tap it to open its orbit's figures and tap again to fold them. For a ship those are its altitude, speed and orbit, then its mass, TWR and fuel: the TWR is the stage it is on now — the engines that are lit, or the next stage’s before they light — pushing against the whole ship’s weight where it is, in the air it is in. A ship with no engine has no TWR line. Pinch to zoom; drag to pan; twist two fingers to turn the map, and a NORTH button appears beside the others with a needle pointing to north — tap it to turn the map back. A ship is selected with a tap; a world by holding a finger still on it until the white ring around it closes.
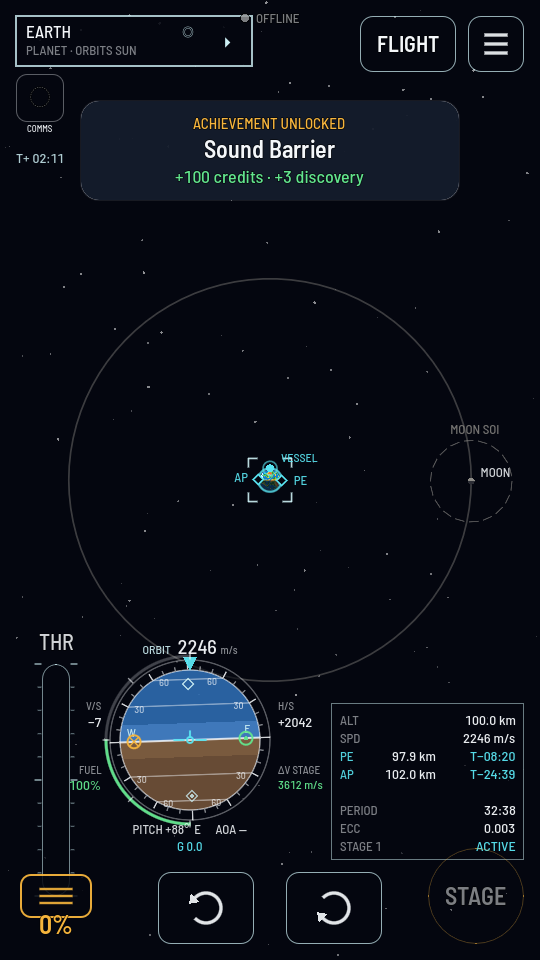
Beside that card, the two sharing the top of the screen, sits the ORBIT panel, with the map's chips underneath the pair. It starts folded to its header, which states your altitude with the orbit’s apoapsis and periapsis under it. Tap it anywhere to unfold the rest — altitude and speed, the next apoapsis, periapsis, atmosphere entry or sphere crossing with a countdown each, and the period and eccentricity — and tap again to fold it away, the way RESOURCES folds on the flight screen. The navball stays at the bottom centre, as in flight.
From the Hangar, the ringed world on the bottom bar opens it over your dormant fleet — that is where you pick a ship up and fly it again. In flight the top right button reads MAP to open it and FLIGHT to come back, and the flight carries on the whole time. See The map and maneuver nodes.
A maneuver node
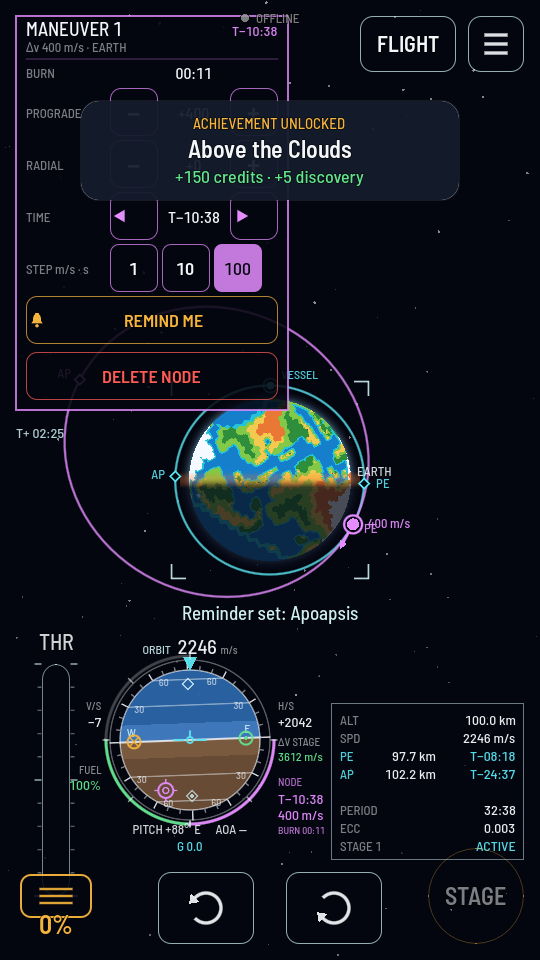
Placing a node on the orbit and tapping it opens the node panel in the top left, where the map's info card would be. PROGRADE and RADIAL are the burn itself, TIME slides it round the orbit, and STEP picks how coarse each tap is. REMIND ME sets an alarm for the burn; DELETE NODE throws the plan away. In the shared world, FLY IT FOR ME above them opens the Fly it for me sheet: the burn and when it comes, what the world will do with it while you are away from the ship, its price in gems with the money it is worth (Let the world fly a burn), and a violet button that marks it, or Don't fly it for me on a burn already marked. Not now, or a tap outside it, puts it away with nothing marked. Marked in flight, the Now leave this ship sheet follows at once: the world flies the burn only while nobody is flying the ship, so it says by when to leave it, with Back to the hangar (not there while the ship is still in the air or under thrust) and Stay for now.
See Plan a maneuver node and Execute a node.