Building a rocket
A rocket in the hangar is not a picture, it is a chain of parts joined at their points. Knowing how a join works tells you why a part snaps where it does, why a wing sits over a tank instead of beside it, and what the numbers along the top of the screen mean.
Three ways a part joins another
Every part carries named points where it can join. Drag one part near another and the game pulls it into place the moment a compatible point is close enough; let go and the two are connected.
Most points are stack points: a pod's bottom, a tank's top and bottom, an engine's top. They sit on the part's own axis and only join end to end, which is how a pod, a tank and an engine become a single line.
Radial points sit on a part's flank and face outward, the way the point on a Fin's inner edge does. They join a part to the side of whatever it is offered to, which is how fins and landing struts hang off a tank instead of stacking on it.
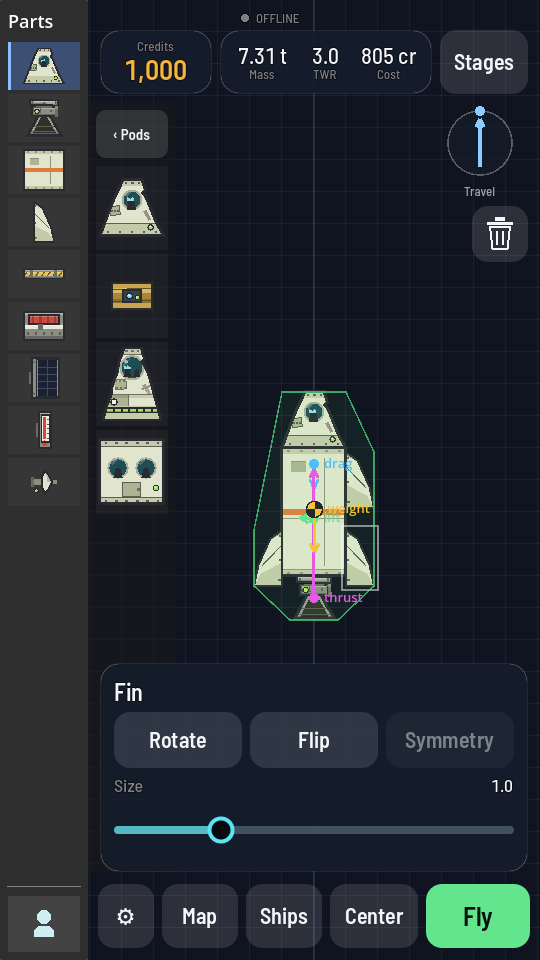
The Wing is different again: its one point has no direction, so it is a stud. A stud does not join to another point at all. It joins to a face, the whole flat side of a part like a tank's body. Drop a stud anywhere inside a face and it lands exactly where you let go, with no pull and no tilt. That is why a wing lies flat over a tank's picture instead of standing beside it: its span points out of the screen, toward you, not across it.
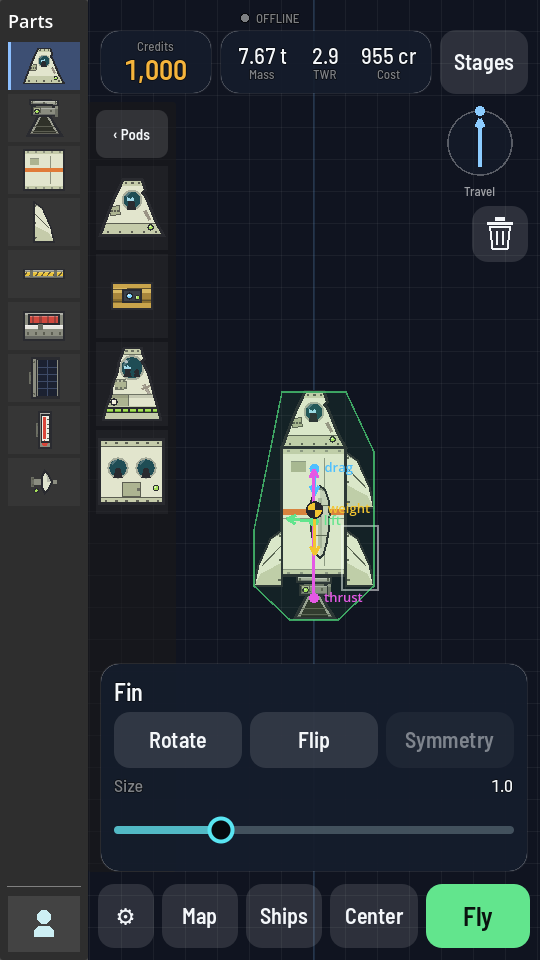
Studs and faces only ever pair with each other; two faces never join, and a stud never joins another stud.
A radial point is often a line rather than a spot. A fuel tank's flank, and both flanks of every beam, run the length of the part: whatever you offer to one sticks at the height you let it go, so a long part is a long mounting strip. That is what makes a beam worth carrying — it is frame with two of those lines down it and a stack point at each end.
Moving a ship, and taking it apart
Dragging a part on the canvas moves the whole assembly it belongs to — whatever is above it and whatever hangs below it — so pulling on a tank walks the entire rocket across the build area without disturbing a single joint. Nothing comes apart by being dragged.
To take a piece off, press and hold it for a moment. A ring fills at the joint that is about to let go; when it closes, that joint breaks and your finger keeps only the part you held and everything still attached below or outboard of it. Hold a tank halfway up a stack and the tank, its engine and its fins come away together, leaving the pod where it stood. Hold a booster strapped to the flank and the booster and its nose cone come off the rocket.
The joint that breaks is the one above the part you held — or the one on its inboard side if it hangs off a flank with nothing on top of it. The part you hold always becomes the top of the piece that comes away.
Once a ship is in two pieces, each is dragged on its own by the same rule, and pushing one back against the other joins them up again. To delete a part, break it off first and then drag it off the side of the canvas (or right-click it on a desktop). Dragging a whole ship off the side does not delete it — it goes back where you picked it up; the trash can at the top right is how a build is thrown away.
Pieces you build once
A piece you will want on many rockets — a satellite, a lander, a pair of boosters — can be saved as a sub-assembly, a saved piece rather than a whole ship. A tap puts a copy of it beside the rocket on the build area, not joined to anything, and you drag it on like any other piece: its own joints, mirrored pairs and fuel lines come with it, and its stages fire after the rocket's. See Save and reuse a sub-assembly.
Where the fuel goes
An engine burns from every tank it can reach, and it reaches a tank through the joints between them. Fuel runs through a tank's joints, an engine's top, a decoupler's or separator's, a docking port's, and those on the parts that stack inline like the bigger batteries. It does not run through a pod, a cabin or a solid booster, and it does not run through a beam: a beam is frame, not a pipe. Nor does it run out through an engine's bell, whatever the engine's size: the engine is where its stage's fuel ends, so the stage below never drinks the tanks above that engine. Electricity, food and thruster propellant are different: they run along every joint on the ship, whatever it is.
An engine drinks from all the tanks it reaches at once, each giving in proportion to what it holds. A fuel line is how you decide otherwise. It runs one way, from the part you draw it out of to the part you tap, with its arrow showing the flow, and it does three things. Into a tank, it fills it: the tank at the arrow's end is topped up from the one at its start for as long as that one has fuel. Into an engine, it feeds it, even across a beam or a pod. And between two tanks already joined through a decoupler or separator, it sets the direction: fuel then only flows the way the arrow points. Lines are drawn over the ship in orange, and only in the hangar: in flight they are still there and still carry fuel, but nothing shows them. See Draw a fuel line.
Pipe a rocket's side boosters into its core and all three of those work together: the side tanks keep the core full while every engine burns, the side engines cannot reach the core, and the boosters fall away empty with the core still full. That is asparagus staging. See Empty the side tanks first.
Mirroring a part
A part selected on the canvas can be turned or flipped where it stands with the buttons at the bottom right of the build area (or the same buttons on its sheet), or mirrored onto the other side of whatever it hangs from with a linked twin that follows every change you make afterward. See Mirror a part for both.
Resizing a tank
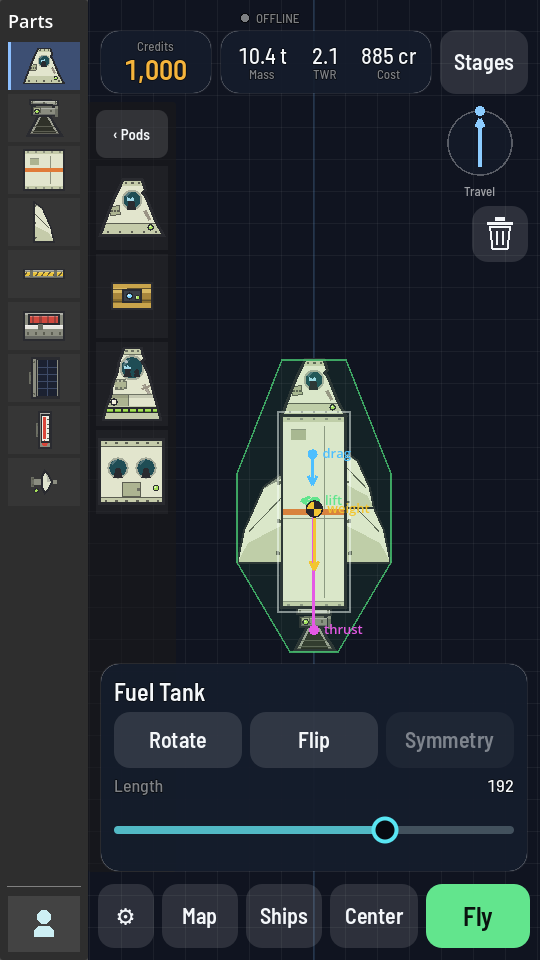
A Fuel Tank is not a fixed size. Select it, tap it again to open its properties sheet and drag the Length slider: the tank grows or shrinks from the middle, whatever is stacked on top or below rides along with it, and its mass, price and how much it holds all scale with the new length. See Resize a tank.
The view
The hangar opens with your ship centred on the canvas. A ship too tall or too wide to see whole at full size opens zoomed out just far enough to fit; pinch (or scroll) to zoom and drag with two fingers to move around.
The properties sheet
Tapping a part selects it and leaves the whole ship in view; tapping it again once it is selected opens its sheet at the bottom of the screen, and a third tap, a drag or a tap on empty canvas puts the sheet away. The sheet shows the part's name, then four placement buttons: Rotate, Flip, Symmetry and Lock (Lock a part). Rotate and Flip carry everything hanging off the part: turn a booster and its nose cone and fins turn with it, and turn the top part of a satellite you built on its own and the whole satellite turns, ready to go on the side of a ship. Below them is a row for every property the part has, a slider or a switch you can change right there. A part with nothing to adjust says so instead of showing empty rows. Some rows only appear on this sheet in the hangar; others follow the part into flight, where a tap opens the same sheet.
Anything that folds out — a landing leg, a solar panel, a dish antenna, a payload bay's doors — has a stance switch here, reading Deployed or, on a bay, Doors open. Throw it and the part swings out on the canvas at once, so you can see the shape of the thing you are building rather than a row of closed housings. The setting is saved with the design and with the ship, so a lander built standing on its legs leaves the pad standing on its legs. In flight the switch is not on the sheet: a tap gives you the Deploy and Stow buttons instead. A payload bay is the one that reads backwards — shut, the hangar draws no doors at all, so you can see and reach the cargo inside it.
Reading your ship
The strip along the top of the hangar always shows three figures: Mass, TWR and Cost. TWR is how hard the engines push against the ship's own weight. Above 1.0 it can lift off the ground. Tap the strip and it opens into a full breakdown: the number of parts, the dry mass with no fuel aboard, the height, the thrust and fuel a lit engine gives you, and the cost again. A warning takes over one of those lines in place of a figure: the ship is short of credits, too big for the launch pad, has a payload standing through a fairing that should be sheltering it, has parts built into one another, or is in several pieces that are not joined to each other at all. A ship standing on landing gear gets a line of its own there, Takes off from the runway: Fly lays it on its wheels beside the pad instead of standing it on the pad (Aeroplanes).
Parts that sit inside one another are drawn red on the canvas, with the area they share in solid red, and the line under the mass says how many there are: both of every such pair break apart the moment the first stage lights, before anything fires. The red follows the part in your hand too, so you see it before you let go. Parts joined by snapping never count, and neither does a wing lying over a tank (it stands beside the tank, out of the picture's plane) or anything carried inside a fairing's or a payload bay's hold.
On the canvas itself, four coloured arrows show the forces acting on the ship as it stands: a yellow arrow for weight, straight down from a checkered marker at the centre of mass; a pink one for thrust, from wherever the lit engines push; a blue one for drag, against the direction you are facing; and a green one for lift, from the centre of any wings or fins aboard. Nudging a part and watching where these arrows move and how long they get is the fastest way to see whether a ship will fly straight or tip on the way up.
The pad decides what can fly
None of this matters if the finished ship cannot leave the ground: the Launch Pad you are standing on caps how much a rocket may weigh and how tall it may stand, and a ship over either limit is refused when you try to fly. A higher-level pad raises both caps. See Buildings for what each level allows and The Space Center for upgrading one.