The map and maneuver nodes
The map is where you read your ship's whole future at a glance, and where you write a new one, one planned burn at a time.
Reading the map
Tap MAP in the flight screen. It reads FLIGHT while the map is open, so the same button always gets you back. Every world is drawn where it really is at this moment, on rings that trace its own path around whatever it orbits; pinch, scroll or drag to zoom and pan, and twist two fingers to turn the map any way round. While it is turned, a NORTH button shows where north is; tap it to put north back at the top. A twist let go close to north settles on north by itself. Zoomed all the way out, the whole solar system fits on one screen, worlds and moons alike, each carrying its own name.
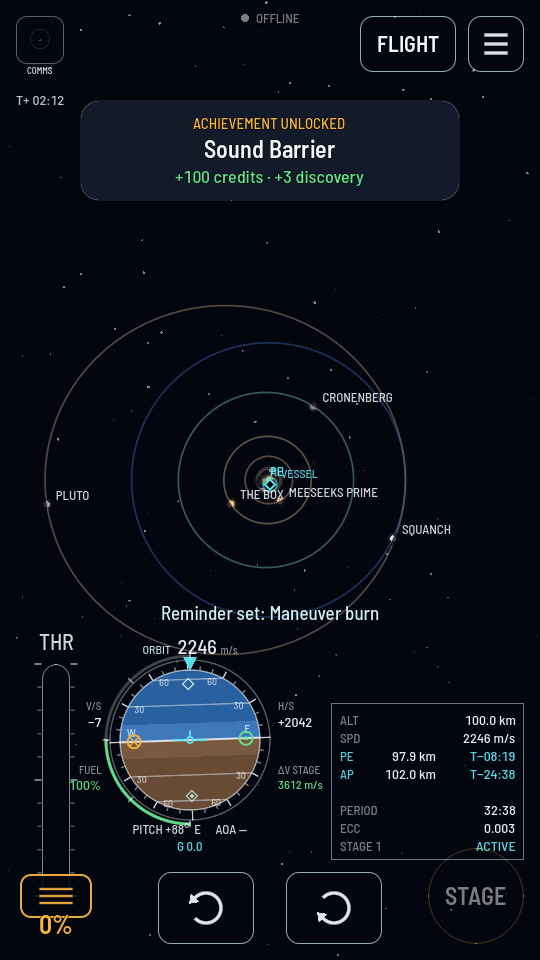
Tapping a ship, or holding your finger on a world, follows it: the camera keeps it centred every frame instead of letting it drift off as it moves. Panning away only unlocks the camera: the selection and its card stay put. Selecting the followed thing again the same way either locks the camera back onto it or lets it go, depending on whether it was already locked.
A world is held, not tapped, because on a phone a planet next to your ship can fill half the screen: a tap that just missed the ship would throw the camera across to the planet. Keep your finger still on the world and a white ring fills around it; the world is selected the moment the ring closes. A plain tap on a world selects nothing and shows HOLD TO SELECT and the world's name instead. Ships are still a tap, and a pinch never selects anything, whatever your fingers were resting on.
Ships whose dots lie on top of each other share one label that counts them and names them, for example 3 SHIPS (OLD FAITHFUL, RELAY 2, DEBRIS), cut short with +N when the list is long. Zoom in on the spot and the dots pull apart, each with its own name again.
When several ships sit so close together that one tap lands on all of them (a fleet parked on the same orbit, a station with a visitor, the stages of a launch that has just split), the map does not guess which one you meant. It fans them out in a ring around the spot instead: each ship gets its own round button with its name beside it, and the more ships there are, the wider the ring. Tap a button to follow that ship. When there are more ships than one ring can hold on your screen, the last button reads +N MORE and shows the next ringful each time you tap it. To close the ring without picking anything, tap anywhere off its buttons, pan or pinch.
Whichever world you last selected also becomes what the map holds still. Everything on this chart is really moving — Earth crosses its own diameter every couple of minutes — so a camera left sitting in empty space would watch the planet walk off the screen. Instead the view travels with the world you picked: pan off to one side, let the camera go, clear the selection entirely, and that world stays exactly where you put it while the rest of the system slides past. Select a different world and the view holds that one instead; zoom right out to the whole system and the star is what stays put.
Selecting a point and its info card
Tap your ship or any other vessel of yours, or hold your finger on a world, and its card opens in the top left corner, folded to a title and a subtitle; tap the card anywhere to open the rest — altitude, speed, apoapsis and periapsis, fuel, and more depending on what you picked — and tap it again to fold it. A vessel that is not the one you are flying gets the same card, whether it is a dropped stage still going around on its own or a ship you left here on an earlier flight.
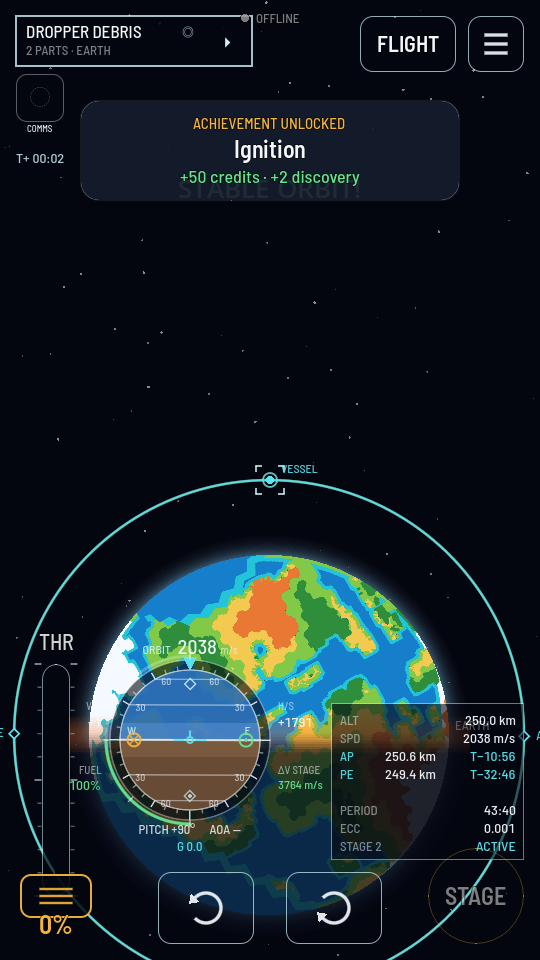
Underneath the card and the ORBIT panel beside it sits a row of square chips for whatever it can do: CONTROL hands you the controls of a dormant ship of yours in place of the one you are flying (or, for one of yours close enough to be beside you in the flight, such as the other half of a ship you split, switches to it on the spot), VIEW takes its place on debris nobody can fly and opens it on the flight screen just the same, with every control dead (on another player’s ship it only closes the camera in), RENAME renames it, and SHIPS chooses what else is drawn. Tap it and its five choices open in a ring around it, the one in force ringed; tap one to pick it, or tap anywhere else to leave things as they were. The chip then reads the choice: HIDDEN (nothing but the vessel you picked), NEARBY (only the ships around the world you picked, or the world the ship you picked is at: pick Earth and you see Earth's ships, pick the Moon and you see the Moon's), MINE (your own ships and your own debris, and nothing of another player's), SHIPS (every vessel somebody can fly — the default; other players' ships only once your Comm Station is at level 2, except the ship a player contract you hold sends you to, which is there at every level) and +DEBRIS (spent stages and empty capsules as well). Switch to a dropped stage covers taking control of one in full.
Where you will land
When your path comes down, the map works out where — with the air in it. The cyan curve runs as far as the top of the atmosphere and is marked ENTRY; from there an amber arc carries on through the air to a LAND marker on the surface. That is the spot the ship is actually heading for, drag and the planet’s own rotation already counted — the marker sits on the ground you will come down on, not on the point in space you will arrive at, which on a long fall are a good many kilometres apart because the world turns underneath you the whole way. The amber arc is drawn the same way, as your track over the turning ground, so it bends away from the plain cyan orbit and finishes exactly on the marker. Tap it like any other point for the touchdown speed, the countdown, the heaviest load the fall will put on the ship, and how far the world turns underneath you while you are falling — a figure the marker has already allowed for, shown so you can see that it has.
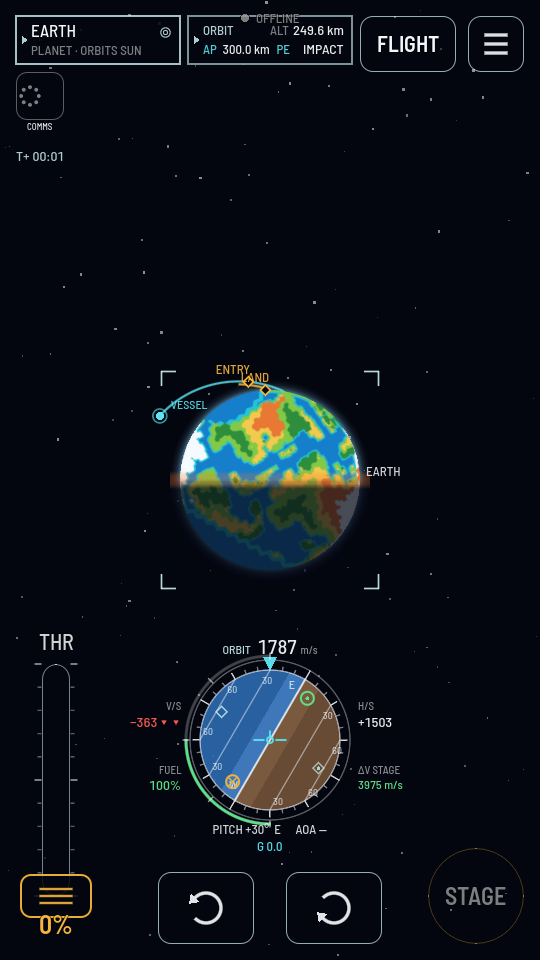
The forecast assumes you hold the ship as it is pointed now. Turn broadside and it bites more air and the marker walks back toward you; put the heat shield forward and it slides out again. That is what makes it worth watching rather than reading once — it is an instrument you steer with, so line the LAND marker up with wherever you meant to come down and trim until it sits there. Deploying a parachute is not in it, so a canopy will always set you down a little short of the mark.
That turn figure is often large — eighty kilometres under a long descent — and yet the marker usually ends up close to straight below you. That is not the forecast ignoring it. The air turns with the planet, and it carries your ship around with it, so you are already travelling east at very nearly the speed of the ground beneath you and the world does not slide out from under you as you fall. What the marker shows is the ground you will meet, turn and all.
On a world with no air — the Moon, and anywhere else airless — there is nothing to fly through, so the path simply meets the ground and the marker sits at the exact point it touches.
If there is no LAND marker, the game is not predicting a landing: you are in a stable orbit, or the path skims the air and climbs back out without coming down. It shows you a marker or it shows you nothing — it will never show you half a guess. A path that leaves the air and comes back draws its arc in two pieces, one for each time through the air, with the plain orbit between them.
The orbit panel
Beside the card — the two share the top of the screen, half each — the ORBIT panel states the figures for the ship you are flying — whatever the map happens to be holding still. It arrives folded, because the map is what you opened the screen for: its header alone gives you the three figures a glance is usually after — ALT, the altitude you are at, and under it AP and PE, the high and low points of the orbit you are on. A hyperbola reads ESCAPE for its apoapsis, and a path that comes down reads IMPACT for its periapsis.
Tap the panel anywhere and the rest unfolds under that header: altitude and inertial speed; then the next things coming, each with its height and a countdown — PE and AP, an atmosphere ENTRY, a sphere crossing; and the orbit’s period and eccentricity at the foot. Tap it again to fold it away, exactly the way the flight screen’s RESOURCES list folds. It stays as you left it.
Every countdown on the map is real time, because the world's clock is the wall clock. In the shared world a tapped point says so outright, with the time of day beside its countdown — T-7:24:00 · tomorrow 06:12 — so a sphere crossing seven hours out reads as the morning it is. In sandbox the countdown stands alone; its clock only moves while you play.
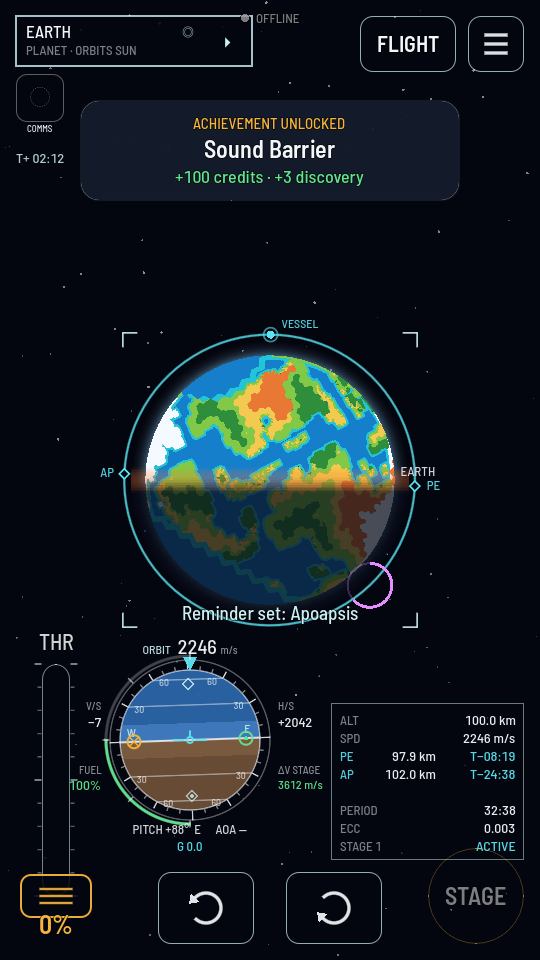
The navball keeps the bottom centre of the screen on the map just as it does in flight, so the ship’s attitude, its prograde mark and a node’s burn marker are all where your thumb already expects them.
Planning a burn: maneuver nodes
Hold your finger down on your own orbit line and a ring fills in around it; let go once it is full and a node appears where you were pressing, in the colour its planned path will take. You can slide it along the line before releasing, or drag it afterward to place it more roughly before dialling it in.
Selecting a node opens a panel with two directions to push in: PROGRADE, along your current direction of travel, and RADIAL, straight out from or in toward the world. Each has its own + and − buttons, and a STEP chip set to 1, 10 or 100 decides how big every tap is. A TIME row with its own ◀ / ▶ nudges exactly when the burn happens. As you dial it in, the game draws the whole path that burn would leave you on: a new curve with its own apoapsis and periapsis, and, if it carries you far enough, a marker for whatever world it meets next.
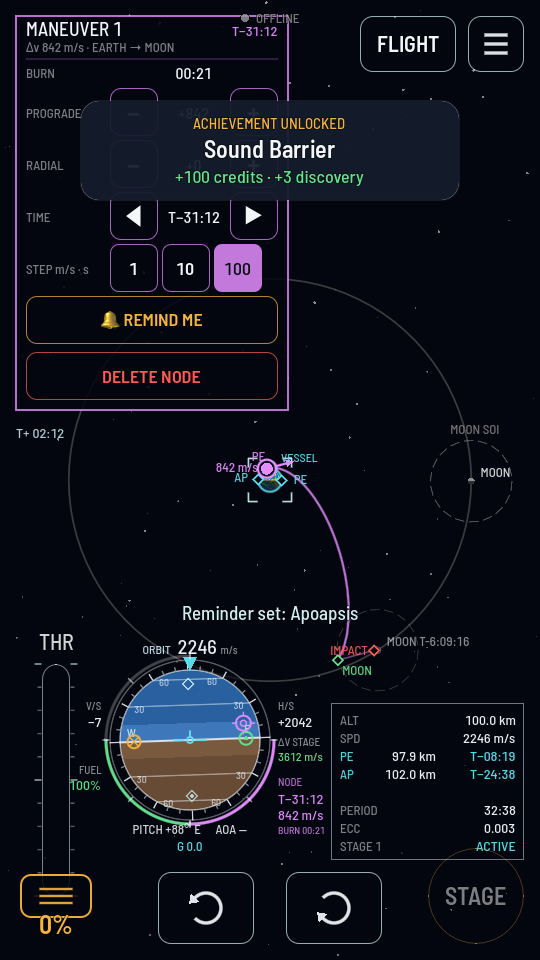
The panel's own BURN row says how long your current stage needs to hold the throttle open to deliver that much Δv. That is the figure you need before you decide whether this ship can make the trip at all.
Flying it
Once a node exists, the round instrument at the bottom of the screen carries a marker of its own to steer onto, with a countdown beside it. Execute a maneuver node covers pointing the ship, timing the light-up and knowing when to stop. A node whose moment has already passed does not vanish: it waits, reading that the burn is owed now, until you fly it or delete it.
When a node's plan crosses into another world's pull, its panel carries an ARRIVES line under the burn time: how long until that crossing, in days and hours, and in the shared world the date and time it lands on. That is the price of the transfer in your own evenings, said before the burn is made — a Moon crossing is an evening away, a Mars one is seventy-six days. Fly the node and, if the crossing is hours out, a toast offers a reminder for it on the spot; tapping it opens the lead picker over the map.
Nor does a plan vanish when you stop playing. Nodes are part of the ship, kept with it the way its fuel and its attitude are: park a ship in orbit with a capture burn planned days out, close the game, and the node is on its forecast when you fly it again — from the same phone or from another device signed in to the same world. Plan the whole transfer the evening you launch, then set a reminder and go to bed.
FLY IT FOR ME
A burn days out need not wait for you. In the shared world a node's panel carries FLY IT FOR ME above REMIND ME: tap it, say yes on the sheet that follows, and the world flies that burn itself at its time, exactly as you planned it, while you are away from the ship. It costs a few gems, paid when you mark it; take the mark off, or let the world find a burn the ship cannot make, and the gems come back. The one rule: the world never flies a ship you are flying, so leave it (back to the hangar, or into another ship) before its time. Let the world fly a burn has the steps.
REMIND ME
The map is the one place that knows exactly when an apoapsis, a sphere crossing or a burn happens, so it is where you ask to be told about one ahead of time: tap REMIND ME under a selected point's card, or the same button inside a node's panel for the burn itself. Set a reminder covers the choices that follow.
TARGET
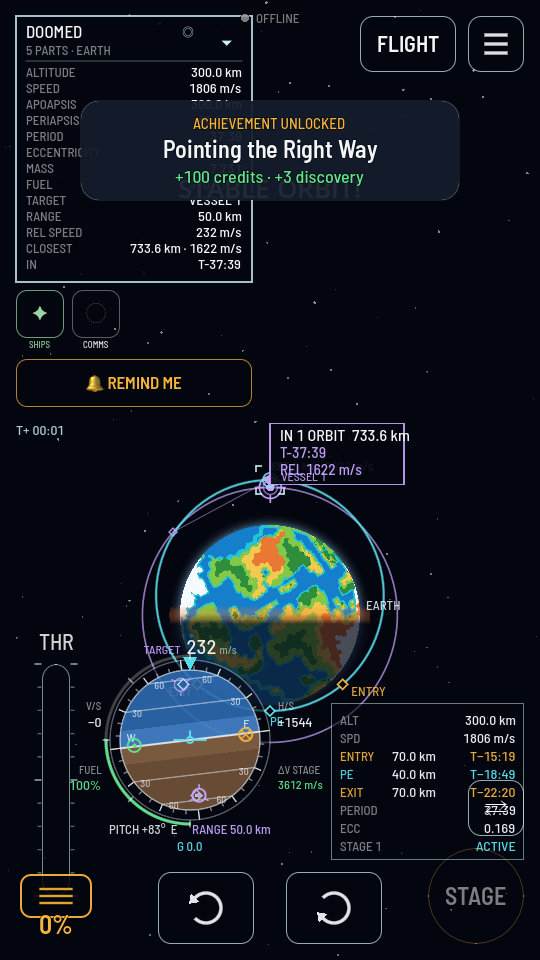
Following a dormant ship of yours and tapping TARGET under its card marks it as the thing you are steering toward. Your ship's forecast grows a marker at the closest point it comes to it, and the navball gains a TARGET speed mode showing the range and the closing speed once you are near: the numbers a rendezvous is actually flown on.