Flying
The flight screen shows you the ship, the sky or ground around it, and the handful of controls that fly it. Every number on it tells you how hard the engine is pushing, which way the nose points, or how much of something is left.
Nothing on the screen flies the ship for you. The throttle, the stage button and the turn controls are the whole of what you touch; the altimeter, the navball and the resource list only tell you what the ship is doing, so you can decide what to touch next.
The throttle and the stage button
The THR slider sits at the lower left. It behaves like a real lever rather than a switch: a drag follows how far your finger has travelled since you touched it, not where you first touched it, so a stray tap never slams it open. Slide your finger sideways off the column and the slider drops into a finer gain, marked FINE beside the thumb, for a trim smaller than a straight drag can land on. Three settings snap under your finger as you pass them: 0%, 50% and 100%.
The handle is also the throttle’s lock, like the gate on an aircraft’s throttle: a dark bar with an amber rim, and in it a yellow grip resting at the right end. Slide the grip to the left and the throttle is held where it stands: it clicks into place, the rim dims, a padlock shows in the space the grip left, and no touch moves it, so a thumb that lands on it on the way to the map cannot light the engines while you coast. Slide the grip back to the right to free it. Either lock stays until you take it off, from one ship and one flight to the next, and after the game is closed. Only a sideways slide past the middle changes it; a tap or a nudge does not, and dragging the handle up or down still moves the throttle. See Lock the throttle.
The STAGE button, lower right, fires whatever the active stage holds and arms the next one. A ring pulses outward from it on every press, so a tap on a crowded screen always reads. What goes into a stage, and in what order, is Staging.
STAGE has a lock of its own, pulled out of the button: press it, hold, and pull up. The ring stretches after your finger like a bubble, and once you have pulled about twice its height it pops and a padlock shows over the word. A locked STAGE ignores taps, so a thumb that lands on it on a long coast cannot drop the parachute or the lander's engine early. The same pull frees it. A tap, or a press let go where it was, still stages as it always has; only a hold followed by a pull works the lock, and a pull let go before the pop springs back and stages nothing. With Auto-lock staging on (Settings → Flying, or the flight's SETTINGS sheet), the button locks itself after every stage you fire. See Lock the stage button.
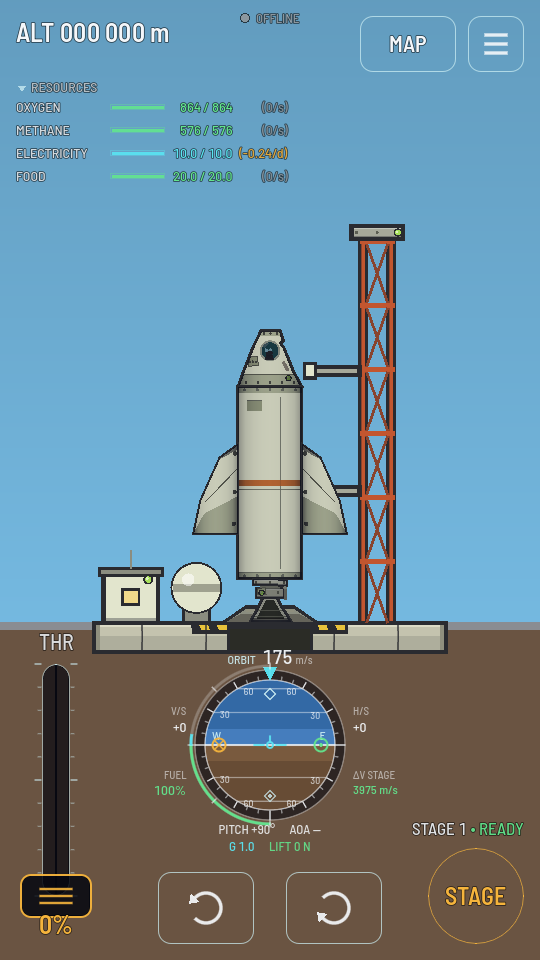
The altimeter and the navball
Altitude sits at the top left, counting up in meters and regrouping into kilometers as the ship climbs so the line never widens. ALT is the height of the ship's lowest point above sea level; tap the reading and it becomes AGL, the height above the ground or water right under the ship, which is the one to land by on a hill or a plateau. Tap again for sea level. The choice sticks for your next flights. Once you are off the pad, a second line under it adds APO and PER, the highest and lowest points the ship's path reaches; on a flight that is coming back down, PER reads a negative height, because that point is under the ground.
The navball, centre screen, is the attitude instrument: a ball with sky on top and ground below, the nose fixed at the top of the screen, so pitching the ship turns the ball under it rather than the ship on the ball. The nose it shows is the one on the pod you are flying from: release a satellite that rode up mounted sideways on its carrier, take control of it, and the ball swings round to that satellite’s own nose instead of keeping the carrier’s. A green mark shows the direction you are already moving and an amber one the opposite; tap the ball to cycle its speed reading between ORBIT (against the planet's centre), SURFACE (against the ground under you) and, once the map has a target ship, TARGET (against that ship). Around the ball: a fuel gauge on the lower left quarter (the current stage’s propellant, never the whole ship’s), a maneuver node's remaining burn on the lower right once one is planned, and a load-factor arc on the upper left. Two lines below the ball give your pitch and facing, then your angle of attack, your G load and, while there is air to push against, the lift the ship is making.
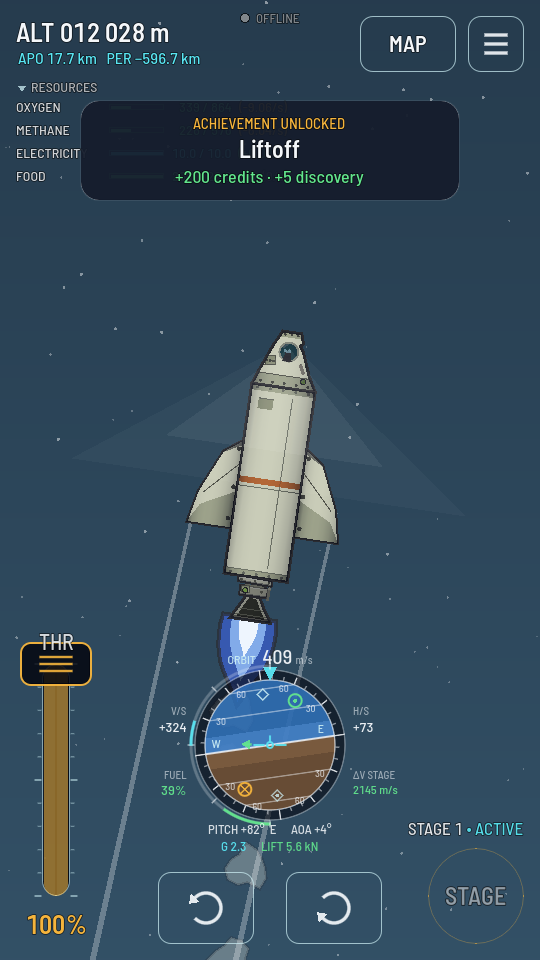
Resources and G
The RESOURCES panel, upper left, lists one line per resource the current stage can draw: how much is left over how much the ship holds, and in parentheses how fast that is changing. It starts folded to a single row of coloured dots — one per resource, filled to how much is left — so the view is yours until you ask for the figures. Tap the row to open the list; while it is open a tap anywhere on it folds it back to the dots, so putting the view back never means hunting for one thin line.
Your G load is the number beside the navball's load arc. It reads white in ordinary flight, turns amber as it climbs and red with a warning mark as it nears what a ship's parts start to break under. Sustained load is what breaks a part, not one jolt of it, which is why a hard corrective burn costs you more the longer you hold it.
Steering the ship
Two curved-arrow buttons at the bottom turn the ship left and right. What answers them depends on what the ship is carrying: fins bite while there is air to push against, a reaction wheel spins the hull on nothing at all, an engine's gimbal swings its whole bell, and an RCS thruster fires from wherever it is bolted, propellant allowing. The ship uses whichever of these it has, in whatever mix keeps the turn balanced.
Every pod and the Sat Controller has small reaction wheels of its own, enough to point a capsule and not much more. A long, heavy ship turns on them like a barge. The in-line reaction wheels, the RW-100 and the wide RW-500, are what fix that: a drum in the stack with many times a pod's grip, spending no propellant at all. They pay in charge instead, a lot of it while they turn and nothing while they rest, so a ship that leans on them carries batteries and the panels to refill them (Electricity). They are not pods: they turn the ship only when the pod or controller flying it asks them to.
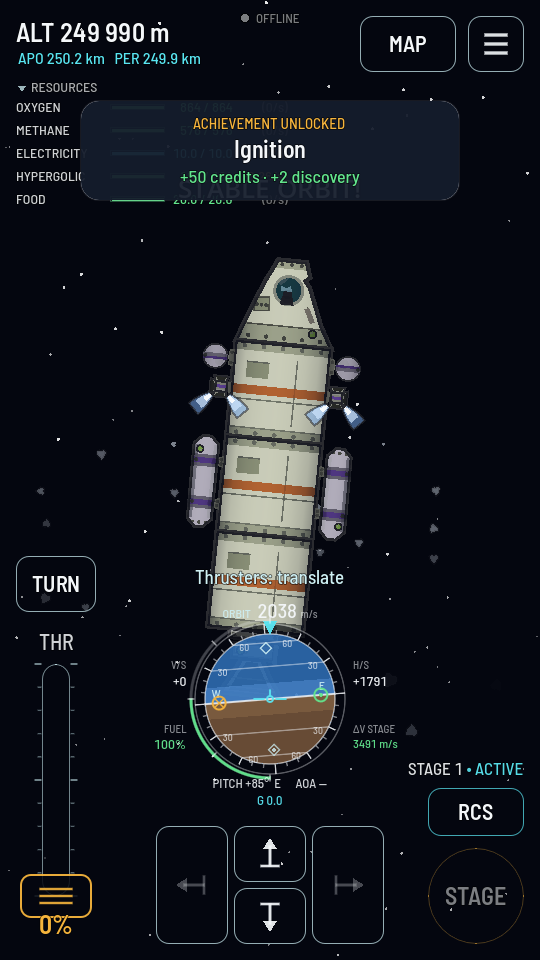
A ship carrying an RCS block gets a mode switch above the throttle, and it has three positions. Tapping it walks through them and it always reads the one you are in:
- TURN — the two curved-arrow buttons, as above.
- MOVE — four buttons in their place that slide the ship forward, back, left and right along its own axes instead of turning it.
- DOCK — both at once, in one band across the bottom of the screen: a turn key in each corner with the four sliding keys between them. See Docking mode.
Above the stage button sits the master switch, labelled RCS: cyan while every thruster is armed. Thrown off, it puts every thruster nozzle cold, whatever fires it, and drops the mode switch and its pad from the screen, leaving the ship to steer on whatever else it has.
Thrusters heat up as they fire. They are for turning, docking and small corrections, not for flying on. A block firing flat out overheats after 5 s. When it overheats it stops firing until it has cooled all the way down, which takes 10 s from full. It cools all the time, so every second of firing flat out takes two seconds of rest to shed, and a block firing at a third of full or less never gains heat at all. While a block is warm, a thin bar along the foot of the mode switch shows how hot the hottest one is. The bar is amber as it fills and red while an overheated block cools. Overheating harms nothing: the block simply sits out until it is cold, and the sliding keys go grey meanwhile. Short presses with pauses between them never get there.
Docking mode
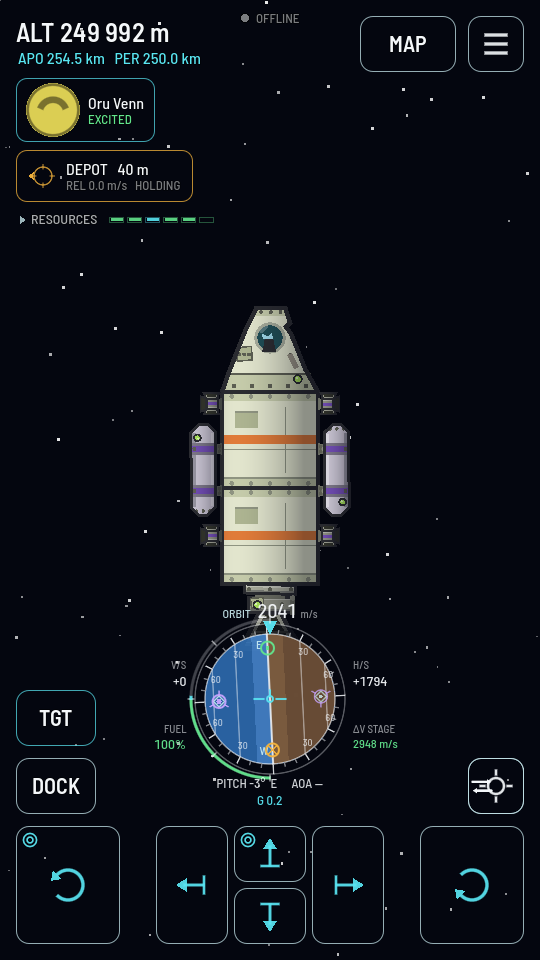
The last few metres of a berth need turning and sliding in the same breath, and swapping the pad back and forth to get them is how a ship drifts past its port. DOCK puts all six keys on screen together, in one band along the bottom: a turn key under each thumb, in the corners, and the four sliding keys as a cross between them.
It is flown on thrusters and nothing else, so three controls leave the screen while you are in it: the throttle (it closes itself to 0 % on the way in — a main engine has no business in a berth), the stage button, and the RCS master switch, which stays on because the pad is the only thing flying the ship. They are not greyed, they are gone, and the turn keys take the two corners they free — on a phone a dead control costs a live one its size. All three come back the moment you leave the mode, the throttle at whatever you set it to next.
A second button, TGT, appears above the mode switch once you have a ship targeted — with nothing to aim at there is nothing for it to do, so it is not drawn. It is a toggle, and it changes what the six keys mean:
- Off — every key is the ship's own: forward is out of the nose, the side keys are its flanks, and the turn keys turn left and right.
- On — every key is read against your target instead. Forward moves the ship toward the target, whichever way the nose happens to be pointing: if the target is off to one side, forward slides you sideways at it. Back moves away, the side keys track across it, and the left turn key swings the nose onto the target while the right one swings it off. The arrows turn cyan and the two keys that mean “toward the target” wear a small target ring, so a glance says which frame you are in.
The view turns with the ship while it is on. The camera is held to your hull: your ship stands still on screen with its nose pointing up, and the world — the planet below, the stars, the ship you are berthing with — turns around it as you steer. So a key pushes the same way in your eye every time: forward is up the screen, the side keys are left and right, and the arrow on the target chip still points where the target really is. Turn the toggle off and the view goes back to holding the local vertical up, the way it does for the rest of a flight.
A target is set from the map (Rendezvous and docking). Drop it and the button goes away again, with the keys back on the ship's own axes and the view back on the local vertical; set one again and it comes back the way you left it.
Moving the camera
The view keeps your local vertical up the screen — straight up away from the world you are at — so the horizon stays level however far around the planet you fly. (The one exception is docking mode with TGT on, where it is held to your ship instead.) The view starts centred on your whole ship: at rocket scale, or zoomed out just far enough to show all of a ship too tall for that. Drag anywhere on the sky with one finger to slide it, and pinch to zoom — out far enough to watch the whole ascent against the ground, or in close enough to find a small part on a tall stack. The zoom happens around your fingers, so whatever you pinched on stays where it was.
A crosshair button appears in the right-hand column, above the stage button, as soon as the view is no longer where it started — dragged off the ship, zoomed away from where it started, or both. Tapping it (or pressing C on a keyboard) undoes both at once: the ship comes back to the centre of the screen, framed whole as it is now (so after dropping a stage it can come back closer than the flight opened), and the button takes itself away.
Tapping a part
Tap any part on the ship and its sheet opens over the HUD: what it is holding, what it can do right now, worded for its state, and any of its properties you are allowed to change in the air. The load lines are that part's own — the level, the units and the flow per second for each resource it stores, counting while you watch — which is how you find the empty tank of a pair that the RESOURCES panel adds together. Tap a part in flight covers how to use it.
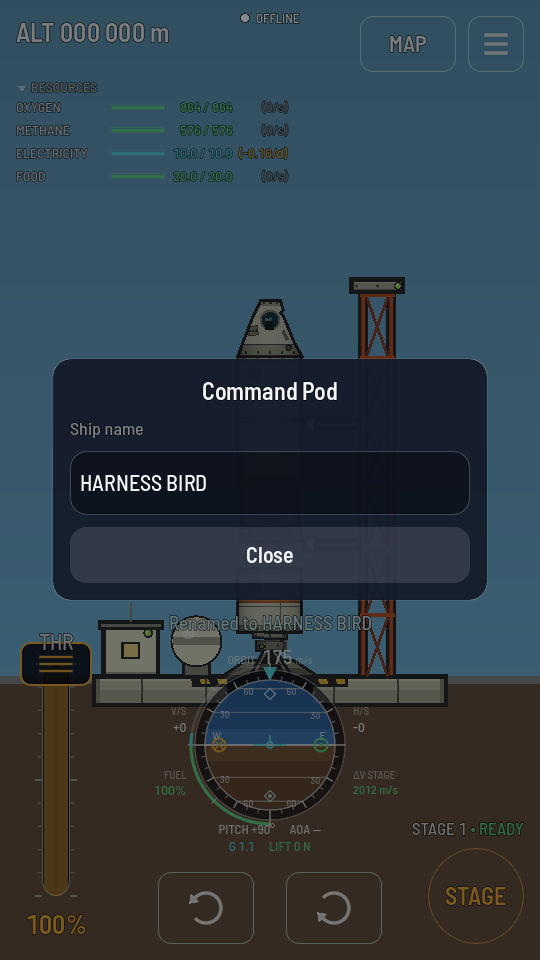
The flight menu
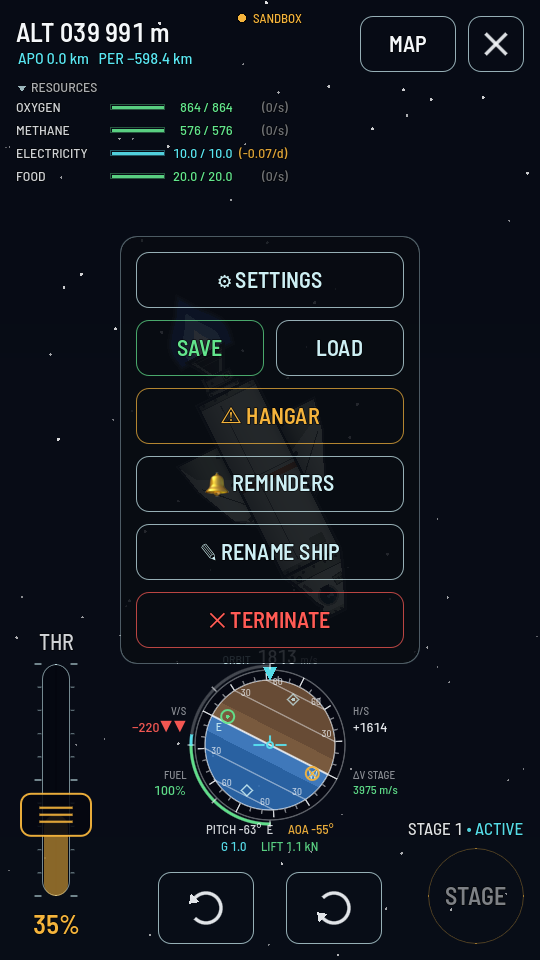
The button at the top right opens a menu sheet: SETTINGS for the display sliders (scale, HUD opacity, font size); SAVE and LOAD, sandbox only, since the shared world cannot be rewound; the exit chip, reading EDITOR before you launch, HANGAR once you have, or an amber HANGAR under a warning triangle that asks twice if the ship is still in the air or under thrust, since leaving it there loses it; REMINDERS for the list a map marker adds to; RENAME SHIP; CONTRACTS, read-only and only while one is under way; RECOVER, only while the ship stands still on the ground, which brings it home and refunds every part still aboard; and TERMINATE, which destroys the ship on the spot and also asks twice (the flight ends with it, unless another ship you can fly is still in the flight: control passes to that one) — the sheet and the menu clear away first, and the vessel blows up a moment later, so you watch the blast instead of reading it through a panel. Blowing the ship up is an order given to it like any other, so TERMINATE is greyed, with the reason written under it, whenever the ship cannot hear one: nothing aboard to command it, no radio link to a machine, or nobody alive and awake at the controls. Wait for the link, or for your pilot to come round, and it lights again. Opening the menu does not pause anything: the world keeps one clock, and the flight runs on behind the sheet.
MAP, beside the menu button, swaps the screen for the system map without ending the flight; The map and maneuver nodes covers what is on it.