Helium-3 and antimatter
Helium-3 is mined on the Moon, a few kilograms a day, by a rig standing on a deposit you have found. Lifted to orbit, a converter turns it into micrograms of antimatter, and a container holds that for as long as it has power. Every microgram of antimatter in the game is made this way, the first warp's fuel included. Every step of the chain has one place it works, and this page says why.
The chain, end to end
Five things happen in order, and each needs the one before it.
| Step | Part | Where it works | What it needs |
|---|---|---|---|
| Find a deposit | A lander, or a GI-1 Ground Imager | The Moon | Its Prospect contract and a landing, or a camera in the Moon's imaging band |
| Mine | MR-4 or MR-8 Mining Rig | Landed on a deposit you have found | 0.24 or 0.48 u/s of power, and a helium-3 tank with room |
| Carry | H3-4 or H3-8 Helium-3 Tank | Anywhere | A ship that can lift off the Moon |
| Convert | AC-4 or AC-8 Antimatter Converter | In space: above the air, off the ground | 0.48 or 1.2 u/s of power, helium-3, and a container with room |
| Hold | AM-4 or AM-8 Antimatter Container | In space, and nowhere else | Power that never runs short, more of it the stronger the gravity |
The mine has to be on the ground because that is where the helium-3 is. The factory has to be in space because that is the only place its product can be kept. So the chain is always two ships at least: an outpost that stays on the Moon, and something in orbit that the helium-3 is brought up to.
The chain is sold in three steps up the tech tree, and the mine always comes before the drive that burns what it makes. Tier 3 sells the small mine, 4 m across: Helium-3 Prospecting for the MR-4 rig and the H3-4 tank, Antimatter Containment for the AM-4 trap, and Antimatter Synthesis for the AC-4 converter. Tier 4 is the probe's warp: Antimatter Power for the AR-4 reactor, Heat Rejection for the water radiator and Warp Theory for the Warp Coil — and Antimatter Power cannot be bought until Antimatter Synthesis is yours, so no drive is on sale before you can make its fuel. Tier 5 is the wide mine, 8 m across: Helium-3 Mining for the MR-8 and the H3-8, Antimatter Conversion for the AC-8 and the big AM-8 trap, then Crewed Reactors, High-Temperature Radiators, Warp Rings and Warp Lattices. The Tech tree reference has their prices.
Deposits and grade
A deposit is a point of interest with helium-3 in its ground. The Moon has four, all on its dark plains. You find one the way you find any point: land inside the field, with or without its survey contract, which for a deposit is titled Prospect: and marks where it is; or photograph it from orbit with a Ground Imager. Finding it pays its reward once, like any point.
What makes a deposit different is what happens afterwards. It stays on your map for good, drawn in helium-3's mint colour instead of a found point's green, with its name and its grade beside it: Serenity Field · Helium-3 ×1. The grade multiplies what a rig makes there. An MR-4 makes 3 kg a day at grade ×1, so the same rig on Twin Craters Field, grade ×1.5, makes 4.5 kg a day. An MR-8 makes 8 kg a day at grade ×1.
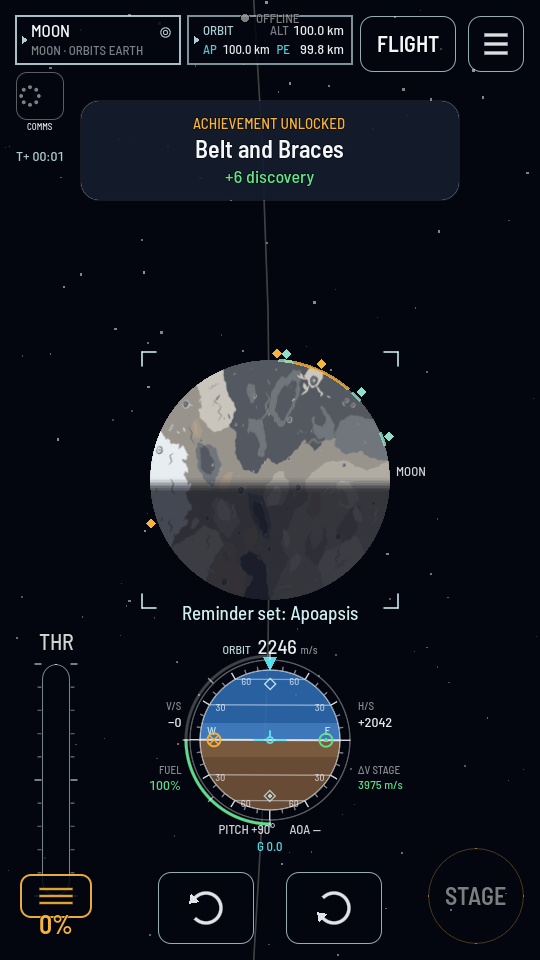
The richer the field, the harder it is to work. Serenity Field is flat ground on the near side. Twin Craters Field lies between two crater rims. Basin Floor Field is out toward the edge of the near side, where a radio link straight home starts to fail. The richest field of all is hidden, somewhere on the far side, where no radio reaches without a relay of your own. The list of points of interest has where each one is.
A deposit is the whole circle, not its centre. Anywhere a ship stands inside the radius, the rig works at the field's grade. Where two fields overlap, the rig works the richer one. Near the ground the field is marked like any point of interest, with a mast at its centre and a post at each edge.
Mining
A rig has one switch. Switched on, standing still on a found deposit, with power, it makes helium-3 and puts it in whatever helium-3 tank aboard has room. The MR-4 Mining Rig draws 0.24 u/s only while it works, which is one SP-6 Twin Array in full sun; the MR-8 draws 0.48 u/s, two arrays, and makes more than two and a half times as much.
It stops by itself in three cases, and its sheet names each one. With no room left it reads Nowhere to put it: every store is full and draws nothing, so an outpost limits itself at the tankage you flew to it. With no power it reads No power and waits. With only part of the power it asks for, it works that much slower: the sheet's percentage is the share of full work it is managing.
Night is the case to plan for. The Moon's day is 38.6 hours long and half of it is dark. A B-400 Battery Bank runs an MR-4 for under half an hour, and a B-1600 runs an MR-8 for under an hour, so an outpost on panels mines through the day and sits out the night. Nothing is lost by that but time. A running rig does drink the batteries flat at dusk before it stops, so anything else aboard that needs charge has none until sunrise.
Mine helium-3 has the steps.
Carrying it
Helium-3 boils a few degrees above absolute zero, so a helium-3 tank is mostly insulation: the H3-4 Helium-3 Tank keeps 15 kg and the H3-8 60 kg at their base lengths, where a fuel tank the same size would hold tonnes. Both stretch, and both launch empty, like every store of helium-3.
Helium-3 runs along every joint on a ship, the way electricity does. The rig fills any tank aboard wherever it sits, through pods, beams and docking ports. But it fills only the ship it is part of, and two ships standing on the ground cannot dock. So the tank that is going to leave is built into the same ship as the rig, above a Docking Port or a Separator, and lifts off when it is full. In orbit a tanker docks like any ship, and then its load can be pumped across by hand with Transfer resources.
A Cargo Bay can be given to helium-3 as well, as room that launches empty. It packs it poorly: 1.2 kg in a whole Cargo Bay, 9.8 kg in a Cargo Bay L.
Converting
A converter has the same one switch. It works only in space: launched, above any air, off the ground. Both sizes turn helium-3 into antimatter at 437 g to the microgram; they differ in how fast.
| Converter | A day's work | Power | Fills its trap |
|---|---|---|---|
| AC-4 | 7.0 kg in, 16 μg out | 0.48 u/s | An AM-4 in 3.1 days, from 22 kg |
| AC-8 | 21 kg in, 48 μg out | 1.2 u/s | An AM-8 in 3.5 days, from 74 kg |
A full H3-4 at its base length lasts an AC-4 about two days and makes 34 μg; a full H3-8 lasts an AC-8 nearly three and makes 137 μg. So a converter is quick, and the rig on the Moon is what sets the pace of the whole chain.
The AC-4's 0.48 u/s is two SP-6 Twin Arrays in full sun, the AC-8's 1.2 u/s five. A converter pays for a step in order: power first, then helium-3 by the share of power that arrived, then antimatter by both. So a brown-out slows it and wastes no helium-3. It stops when every container aboard is full, and when the helium-3 runs out its sheet reads Nothing to convert.
Make antimatter has the steps.
Holding it
An antimatter container is a magnetic trap. There are two: the AM-4, which holds 50 μg on the 4 m stack, and the AM-8, which holds 170 μg on the 8 m one. Both launch empty: a container is filled by a converter in space and in no other way. Both follow three rules. The figures below are the AM-8's; the AM-4's are on its reference entry.
It holds only in space. Landed, or anywhere inside an atmosphere, a loaded container starts a 60 second fuse. The screen says CONTAINMENT FAILING and counts it down every ten seconds. Get back above the air and off the ground in time and the fuse is forgotten. Otherwise the container opens, and what follows is the largest blast in the game: the load added to the case, about 20,000 kN reaching 99 m when full — four times the biggest fuel tank and twice its reach, drawn white and violet instead of orange. It takes the whole ship and anything parked near it. The same thing happens if a loaded container is destroyed any other way: a crash, a collision, an FTS charge. The safe way down is the sheet's Vent antimatter, which empties every container aboard and harms nothing.
It must never run short of power while loaded. A container that gets less power than its upkeep leaks, by the share that was missing, up to 0.02 μg a second with no power at all — and it lights the same 60 second fuse, because a trap the ship cannot pay for is a trap letting go. Get the power whole again inside the minute and the fuse is forgotten; let it run out and the container opens. A full container left dark long enough would have leaked empty in 2.4 hours, but the fuse reaches it first. An empty one is switched off and draws nothing.
Its upkeep depends on where it is. That is the gravity gauge.
The gravity gauge
Every container carries a gravity gauge: four lamps on its casing, and a line on its sheet such as Gravity gauge 3.9: upkeep ×4.9, 0.24 u/s. The gauge reads how strong gravity is where the ship is, counting the pull of the world you are orbiting and of everything that world orbits in turn. A ship round the Moon is pulled by the Moon, by Earth and by the Sun, and the gauge adds all three.
The reading goes up by one each time that pull gets ten times stronger. It reads 0 where the pull is a millimetre per second squared or less, and 4.0 on Earth's launch pad. Upkeep is the container's base draw multiplied by one plus the reading: 0.05 u/s for an AM-8, 0.026 u/s for an AM-4.
| Where the container is | Gauge | Upkeep | AM-8 draw |
|---|---|---|---|
| Low Earth orbit, 100 km up | 3.9 | ×4.9 | 0.24 u/s |
| Low Moon orbit | 3.0 | ×4.0 | 0.20 u/s |
| 2,400 km over Earth | 2.6 | ×3.6 | 0.18 u/s |
| The edge of the Moon's sphere of influence | 1.6 | ×2.6 | 0.13 u/s |
| The edge of Earth's sphere of influence | 0.8 | ×1.8 | 0.09 u/s |
| The outer system, past five times Earth's distance from the Sun | 0 | ×1 | 0.05 u/s |
The gauge does not jump when a ship crosses from one world's sphere of influence into another's, because it always adds the same pulls. It also has nothing to do with what the crew feels: a ship in orbit is in free fall wherever it is.
So low orbit is the worst place to keep antimatter twice over. The upkeep is highest there, one whole SP-6 Twin Array for a single AM-8 over Earth and half of one for an AM-4. And a low orbit spends the largest share of every lap in the world's shadow, where the panels make nothing and the battery has to carry the trap alone. A high orbit is cheaper to hold and is sunlit nearly all the way round. Keep antimatter safe turns this into a parking place.
It all runs while you are away
The world's clock does not stop when you close the game, and neither does the chain. A rig left running on a deposit keeps mining, by day, until its tanks are full. A converter left running in orbit keeps converting. A container keeps drawing its upkeep, and leaks if its power fails while nobody is watching. Come back in a week and the tanks hold what a week made.
A landed ship you are flying behaves the same way as one you have left: its panels charge, its crew eats and its rig mines while you watch. Only a ship standing on the launch pad before its launch spends nothing.
An outpost with nobody aboard is worked by radio, like any uncrewed ship. With no link you cannot tap Start or Stop, but the rig goes on doing whatever it was last told. See Communications.
What it pays, and what it is for
Neither helium-3 nor antimatter can be bought or sold, and recovering a full tank or trap on Earth refunds the part and nothing for what is in it. What pays along the way is finding the deposits, their Prospect contracts, and the achievements for each step of the chain.
What the antimatter is for is the other half of the chain. An AR-8 Antimatter Reactor burns it at 1 μg every twelve hours and makes power where no sunlight reaches; the probe's AR-4 burns one every thirty-two. A warp drive spends it by the microgram to close a bubble and carry the ship forward along its own orbit. Both need radiators to throw their heat away, and the AR-8 needs a nuclear scientist aboard. A full AM-8 is eighty-five days of AR-8, or about 136 days of the smallest bubble with its AR-4 counted; a full AM-4 is forty days of that bubble.
A trap launches empty. There is no antimatter for sale: a container's price is the trap and nothing else, and the only way to fill it is a converter in space. So every warp in the game is paid for in days of a mine, never in credits, and the mine comes first on the tech tree for exactly that reason.
The first warp's fuel
The first warp ship most programmes fly is a radio probe to Mars: a Sat Controller, an AR-4 Antimatter Reactor, a water radiator, a Warp Coil, a dish, solar arrays, and two AM-4 traps. The Mars leg is about 76 days of coasting, and skipping it costs the drive and its reactor about 94 μg between them — more than one AM-4 holds, which is why the probe carries two. See What a jump costs.
Those micrograms come from the small mine. An MR-4 on the Moon's richest field, grade ×2.5, makes 7.5 kg of helium-3 a day; an AC-4 in orbit turns it into 16 μg a day. Run one after the other, that is about 11.5 days of running for the Mars leg: five and a half days of mining, six of converting. On Serenity Field, grade ×1, the mining alone is about two weeks. Two rigs, or two whole mines, make it faster, and a rig on panels sits out the lunar nights, which makes it slower. Warp a ship walks the route from the first rig to the first bubble.
Two sizes of mine
Every part of the chain comes in two widths. The small mine — MR-4, H3-4, AC-4 and AM-4 — is 4 m across and fits the stack a tier 3 ship already flies: the rig is 900 kg and the converter 1.4 t. It is sized for a probe's warp. The wide mine — MR-8, H3-8, AC-8 and AM-8 — is 8 m across and fits the wide stack alone: this is heavy industry, a tier 5 ship, with a rig of 3.2 t and a converter of 5.2 t. It is what fills the crewed drives, whose jumps run to hundreds of micrograms. An Adapter joins a wide part to a narrow stack where you need one.
In sandbox
Nothing is found in sandbox, so there every deposit is drawn on the map and can be worked from the start. Nothing mined there leaves sandbox.