Landing on the Moon
Take a three-stage rocket off Earth's pad, throw it across to the Moon, stop it in orbit there and set it down on its legs. At the end of it you hold One Small Step.
What you need first
This guide assumes you have flown Reaching orbit and Coming home from orbit, so you can put a ship in a stable orbit and bring one down through the air without losing it.
The rocket below needs seven tech nodes, a Research Centre at its third level and a Launch Pad at its third. Buy them in this order and nothing is ever locked when you reach for it.
| Buy | Price | Needs first |
|---|---|---|
| Staging | 18 discovery | Rocketry |
| Instruments | 15 discovery | Rocketry |
| Launch Pad level 2 | 4,000 credits | Staging |
| Research Centre level 2 | 200 discovery + 2,500 credits | — |
| Barometry | 32 discovery | Instruments |
| Payload Bay | 48 discovery | Barometry |
| Vacuum Engines | 55 discovery | Staging |
| Landing Gear | 50 discovery | Staging |
| Launch Pad level 3 | 15,000 credits | Payload Bay |
| Research Centre level 3 | 450 discovery + 6,000 credits | — |
| Heavy Engines | 75 discovery | Vacuum Engines |
That is 943 discovery and 27,500 credits spent before the rocket exists. The rocket itself costs 3,460 credits every time its first stage lights.
You also need an astronaut seated in the pod, as every flight does. See Seat crew on a pod.
What the trip costs in Δv
How much you can change your ship's speed over the whole flight is its Δv, and the hangar prints it stage by stage. These are the figures counted from Earth's pad:
| As far as | Δv from the pad |
|---|---|
| A stable orbit of Earth | 3,104 m/s |
| Orbit of the Moon | 4,272 m/s |
| Standing on the Moon | 4,863 m/s |
| Standing on the Moon, then home to Earth | 5,766 m/s |
The rocket below carries 8,540 m/s, so a round trip has plenty in hand. That margin is the point: a lunar landing flown badly costs far more than one flown well, and you will fly this one badly.
Build the three-stage rocket
Clear the canvas and stack it from the top down.
- The lander, on top. A Parachute at the very top, a Command Pod under it, a Fuel Tank with its Length slider at 192, and a Vacuum Engine at its base. Put three LT-1 Landing Struts around the tank's flank, as low as they will sit. They are what the lander is meant to come down on: a strut survives a touchdown at 30 m/s, and the Vacuum Engine's bell gives out at 12 m/s.
- A Separator, then the second stage: a Fuel Tank at 256 with an Engine under it.
- Another Separator, then the first stage: two Fuel Tanks at 256 stacked one on the other, a Heavy Engine at the bottom, and a Fin on each flank. Select one fin and tap Symmetry for its twin.
The hangar's top strip should read 46.6 t and 3,460 cr.
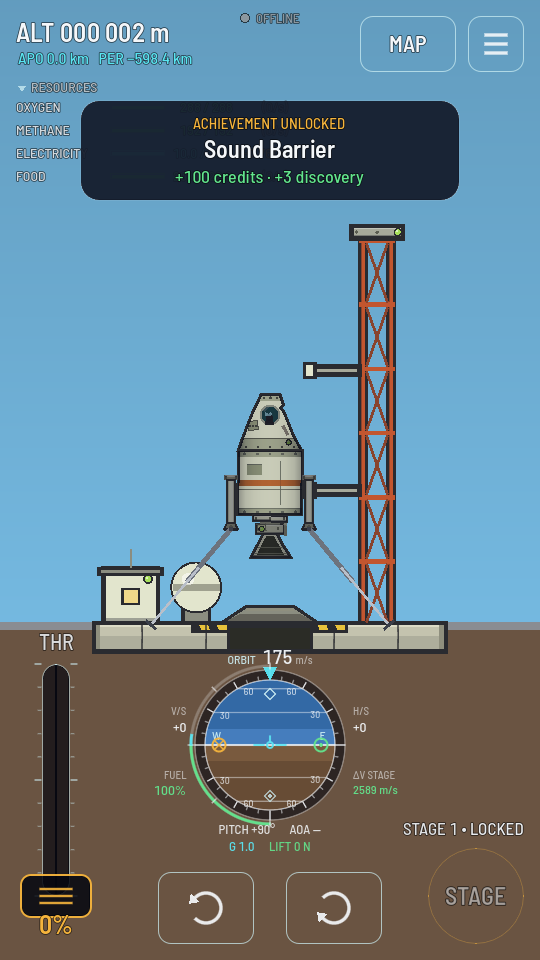
Set up the staging
Open Stages and build three.
- Stage 1: the Heavy Engine.
- Stage 2: the lower Separator and the second stage's Engine together, so the spent first stage drops as the next one lights.
- Stage 3: the upper Separator and the Vacuum Engine together, the same way.
Leave the Parachute out of the list. You will tap it by hand at Earth, hours from now, and a chute in a stage would open on the Moon where there is no air to fill it.
Get to orbit
- Launch and fly the gravity turn. Tap Fly, then STAGE, and ease the rocket over in short pulls once it is moving, exactly as in Reaching orbit. Stage when the readout beside STAGE says the burning stage is empty.
- Circularise around Earth. Coast to apoapsis, point at the green ⊙ prograde mark with the navball reading ORBIT, and burn until the periapsis clears 70 km too. Stop there. You want the third stage nearly full.
Plan the transfer
- Open the map and plant a node on your orbit. Tap MAP, then hold your finger on the orbit line until the ring closes. See Plan a maneuver node for the panel's controls.
- Add prograde until the planned path reaches the Moon's orbit. Tap + beside PROGRADE with the STEP chip on 100, then on 10 to finish. The violet planned line stretches out until its far end is level with the ring the Moon travels on.
- Slide the node around the orbit until the Moon is there to meet it. Use the TIME row's ◀ and ▶, or drag the node itself along the line. When the timing is right the planned path picks up a marker at the Moon and the panel's second line reads EARTH › MOON. That line is how you know you have an encounter and not just a long ellipse.
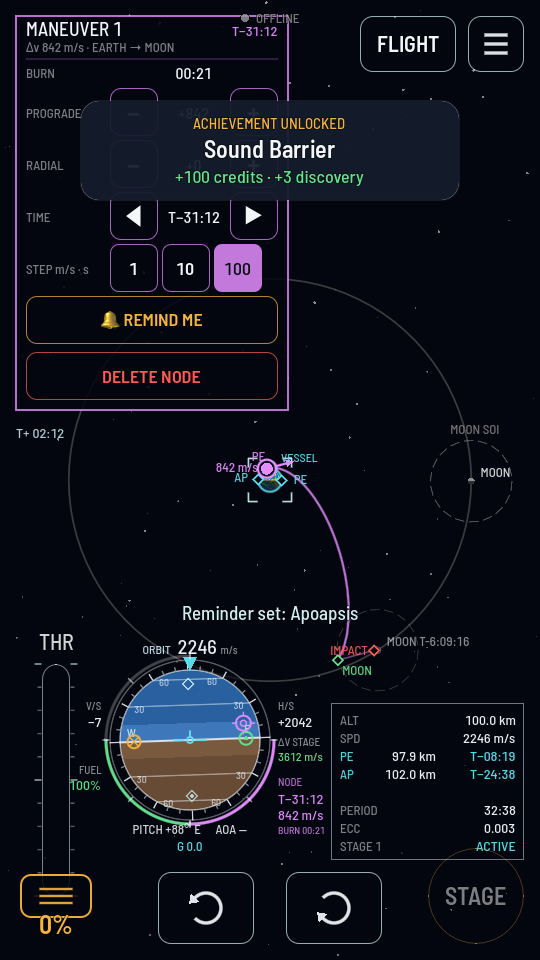
EARTH › MOON under the panel's title, and a marker on the Moon at the far end of the violet line. This burn is 842 m/s. - Tap REMIND ME. The burn is a long way ahead and the world's clock runs whether the game is open or not.
Burn it and coast
- Fly the node. Point at the node marker on the navball and light the engine about half the BURN time before the mark, holding the throttle until the marker and its Δv are gone. Execute a maneuver node has the detail.
- Coast, and watch the countdown to the Moon. Your path is now a long ellipse with the Moon's dashed sphere waiting at the far end. The map labels the crossing with a countdown. This takes hours; set another reminder and put the phone down.
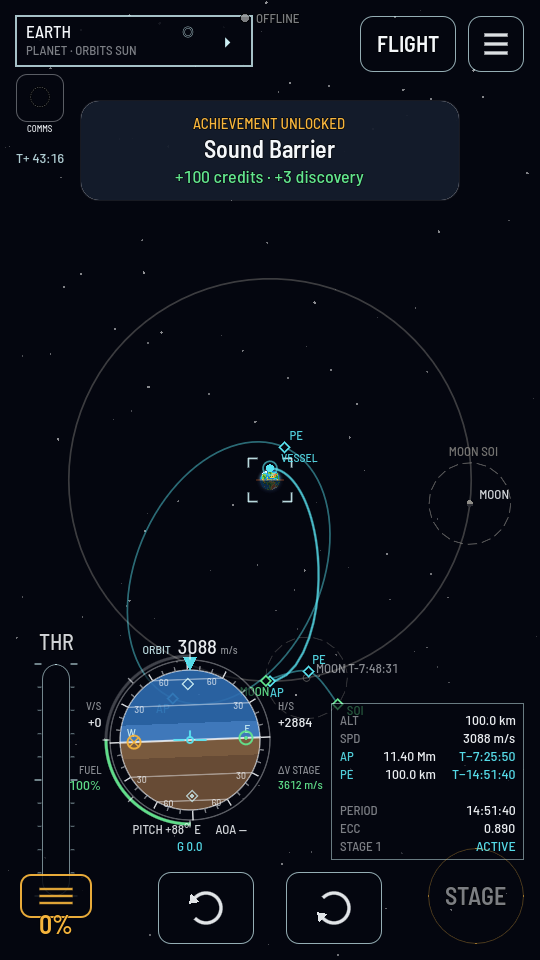
Coasting out. AP is 11.40 Mm and ECC 0.890: a long thin ellipse aimed at the dashed ring around the Moon. - Cross into the Moon's sphere. Nothing happens to the ship. The map simply redraws your path around the Moon instead of around Earth, and you earn Lunar Visitor. Everything from here is judged against the Moon.
Stop at the Moon
- Read the new periapsis. Now that the Moon holds you, the map's PE is your closest approach to it. If it reads IMPACT you are on course to hit the ground; that is fine for now and you are going to burn before then anyway.
- Burn retrograde at the closest approach. Set the navball to ORBIT, point at the amber ⊗ retrograde mark and hold the throttle. The far end of your path drops as you burn. Stop once both ends of the orbit are clear of the ground and the map draws a closed loop around the Moon rather than a curve that leaves again.
- Tidy it into a circle if you can spare the fuel. Burning retrograde at your high point brings the low point up. A near-circular orbit earns Lunar Orbit and makes the descent easier to judge.
Go down on the legs
An airless landing is one long retrograde burn. You are travelling sideways at a few hundred metres a second and the only thing that will take that away is the engine.
- Lower one side of the orbit to skim the ground. Burn retrograde until the map's PE sits a few kilometres over the surface on the side you want to land on.
- Kill the sideways speed as you fall. Coast down to that low point, then hold retrograde and burn. The navball's H/S reading is what you are trying to bring to zero. Keep an eye on V/S at the same time: it is your rate of fall, and it is the number that breaks the ship.
- Land on the flat. The Moon's ground has craters, valleys and mountain ranges, and their floors are the flat parts. Aim for one, not for a slope.
- Touch down under 30 m/s. That is what the LT-1 struts take. Ease the throttle so V/S is small in the last stretch, and let the legs meet the ground before the engine bell does. The banner reads LANDED and you have One Small Step.
What you earned
| Achievement | Reward |
|---|---|
| Lunar Visitor | 1,500 credits + 40 discovery |
| Lunar Orbit | 3,000 credits + 60 discovery |
| One Small Step | 5,000 credits + 100 discovery |
| Crater Floor | 2,000 credits + 40 discovery |
Crater Floor pays only if you set down inside one of the Moon's craters. It is the cheapest extra on the trip, so pick a crater floor to aim at before you start the descent.
Bringing it home
The third stage still has fuel in it. Lift off, climb back into a low orbit of the Moon, then burn prograde until the map shows your path leaving the Moon's sphere and falling back toward Earth. Plan a node there that drops your Earth periapsis into the atmosphere. From there it is Coming home from orbit again: hold the pod into the airflow through the heat, open the Parachute once you are low and slow, and tap RECOVER when the ship stands still.
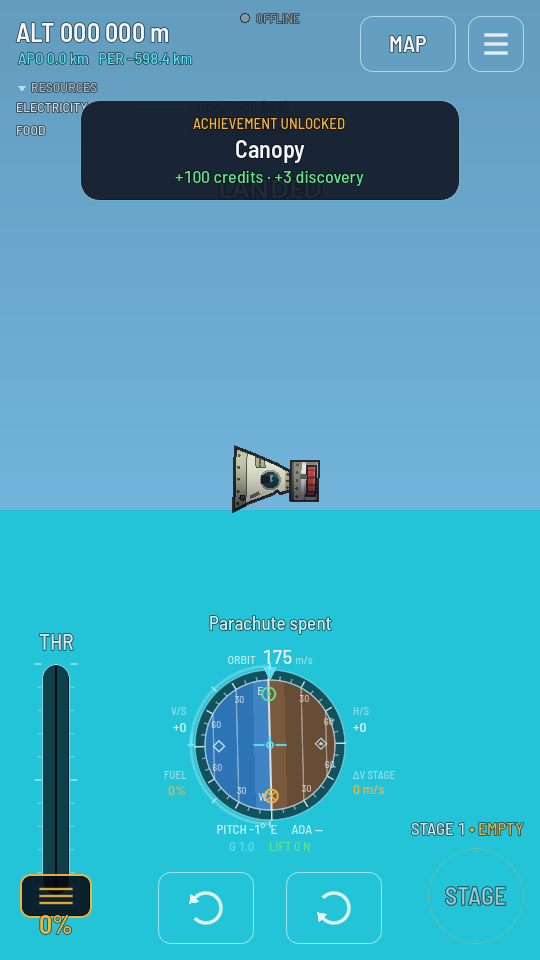
If you would rather not risk the trip back, leave the ship where it stands. The landing is what counts, and the Moon is a perfectly good place to abandon a rocket.
What went wrong?
The Launch Pad refuses the ship. Check the height. This stack is at the pad's exact limit, so an aerocone, a second chute or a taller tank puts it over.
The planned path never picks up a Moon marker. Either it is too short, so add more prograde until its far end reaches the Moon's ring, or the timing is wrong, so slide the node around the orbit with the TIME row until the panel reads EARTH › MOON.
The ship flew past the Moon and came back out. There was no capture burn, or it was too small. You have to burn retrograde while you are inside the Moon's sphere; nothing there slows you on its own.
The lander broke on touchdown. It arrived faster than the struts take. Burn later and harder into the last part of the descent so the fall rate is small at the ground.
It landed and then fell over. The ground under it was sloped. Craters and the Moon's flat plains are what to aim for; the flanks of a range are what to avoid.
Everything worked and nothing was earned. The flight was in sandbox. Sandbox never touches your account: no credits, no discovery, and its achievements are sandbox's own. Switch back to the shared world and fly it again.
Next
You now hold One Small Step. The next rung is Mars, and like every flight it starts from Earth's pad. See what each destination costs to reach.