Recruiting the Meek
Go from the one astronaut the game hands you to a crew of your own: read the board, hire a second pilot, put them in a ship, fly it, and bring them home better than they left.
What you need to start
- You have flown once, so you know the hangar and the flight screen. Your first flight is that flight.
- You are in the shared world, not sandbox. Sandbox has a crew of its own, signed on for free, and nothing you do with it reaches your account (see The Meek in sandbox).
- Around 900 credits spare. That is what a raw astronaut asks for, and it is the cheapest hire in the game.
At the end you will have a second astronaut on the roster, a flight of their own behind them, and their card's counters moved.
Meet the one you already have
- Open the Space Center. Tap the Space Center button (the dome on the bottom bar) in the hangar. The strip of buildings runs along the middle of the screen; drag it sideways, or tap ALL in the top right, until you find the Astronaut Center.
- Tap the Astronaut Center. Its sheet opens under the strip: its level, MEEK AT ONCE and RECRUITS UP TO, and what the next level would change.
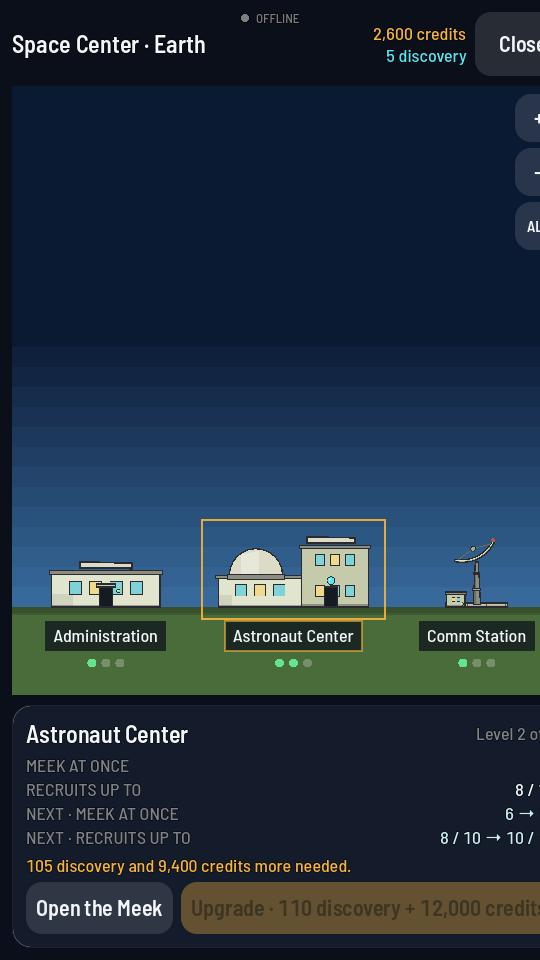
The Astronaut Center's sheet. The two buttons along the bottom are the crew list and the upgrade. - Tap Open the Meek. The sheet titled The Meek opens on the Roster tab, with one card on it: the astronaut you were given. The line above the tabs reads ROSTER 1 / 3 and names your Astronaut Center's level.
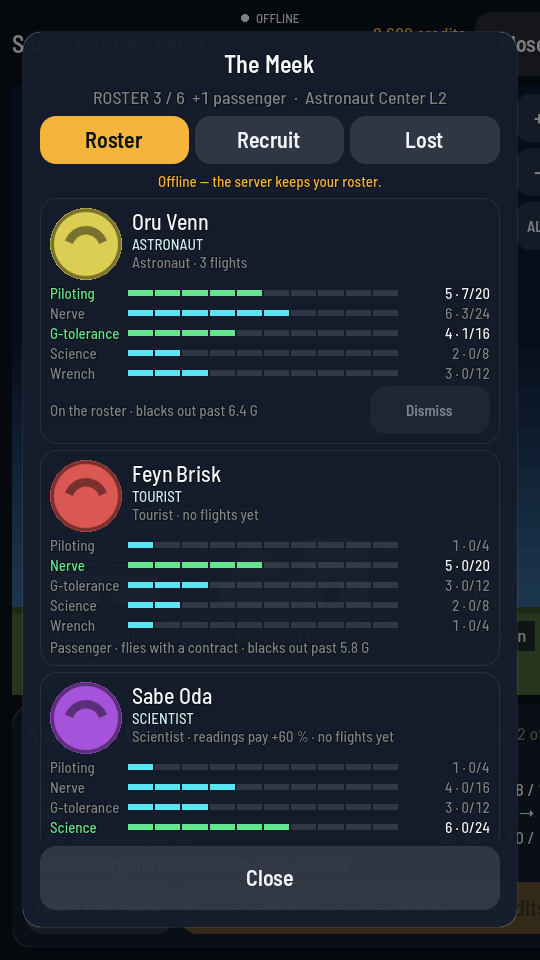
A fuller roster than yours will be. Read the green bars first: they are the stats that trade lives on. - Read the card. Five bars, one per stat, with the value and a small counter beside each: 5 · 7/20 means the stat is at 5 and has 7 of the 20 points it needs to reach 6. The foot line says the load they stay awake through, and how many hours they have spent aloft.
Hire a second
- Tap Recruit. The board opens: up to seven candidates, each a card like the roster's with a price on its foot line and a Hire button beside it. The note above the first card says which trades the board is drawing right now, and which trade the next Astronaut Center level would bring.
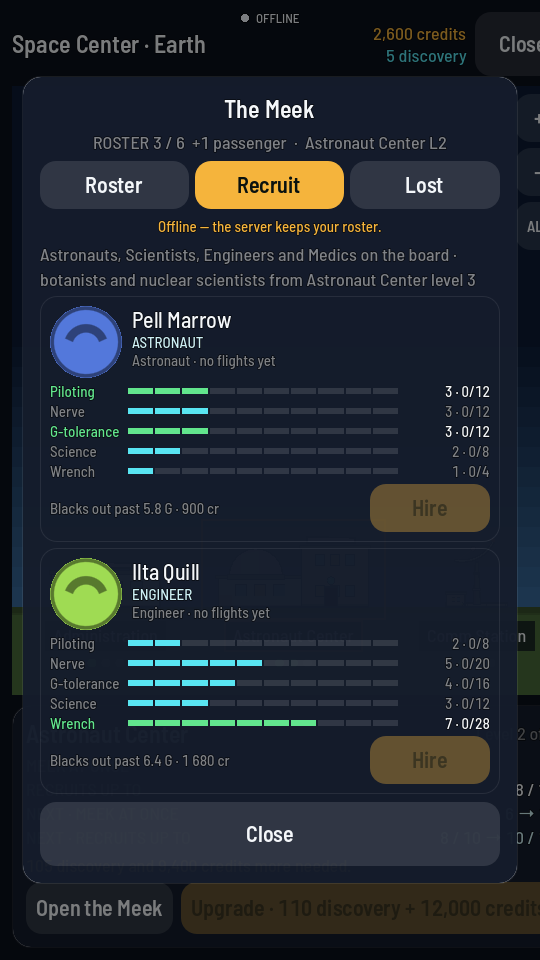
The board. The price on each foot line is what that candidate signs for, once. - Read the rate. If you have lost anyone, an amber line above the cards reads "Hiring at +5 %" or more: every Meek lost puts 5 % on every price, and every crewed flight you recover takes 0.5 % off again. A clean record earns the opposite, up to 20 % off. There is nothing to tap; the prices on the cards already include it.
- Pick an astronaut, not a bargain. Only astronauts fly a ship, so your second hire should be one. Between two astronauts, high G-tolerance is worth more than high piloting on your early flights: it is what keeps them conscious through an ascent. A candidate with a lot of nerve signs for less than a timid one of the same skill.
- Tap Hire. The button reads "Signing…" for a moment, then the card leaves the board and the line under the tabs says they signed on. Your credits drop by the price, once, and never again.
- Tap Roster. Both of them are there now, and the count above the tabs has moved to 2 / 3. Tap Close, then close the Space Center.
Fly your new hire
- Take the starter rocket as it is. Its Command Pod has one seat, and one seat is all you need to fly your new astronaut. Your first one stays on the ground this time.
- Tap the pod to select it, then tap it again. Its properties sheet opens at the bottom of the screen with a Crew row: one wide button per seat, reading Seat 1 · — empty seat — until somebody is in it.
- Tap the seat button until your new hire's name is on it. Each tap moves to the next Meek who is free to fly, then back to the empty seat. The warning line under the ship's mass goes away as soon as an astronaut is in there. The whole of this step is Seat crew on a pod.
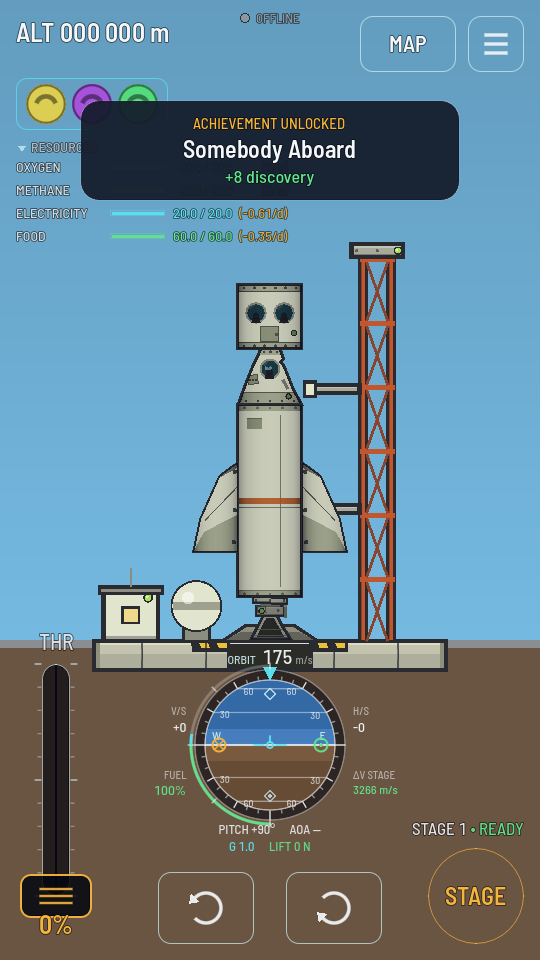
- Tap Fly, then STAGE. The crew chip appears at the top left, under the altitude: their face, their name, and a line saying their trade, the G they black out past, and the days of food aboard.
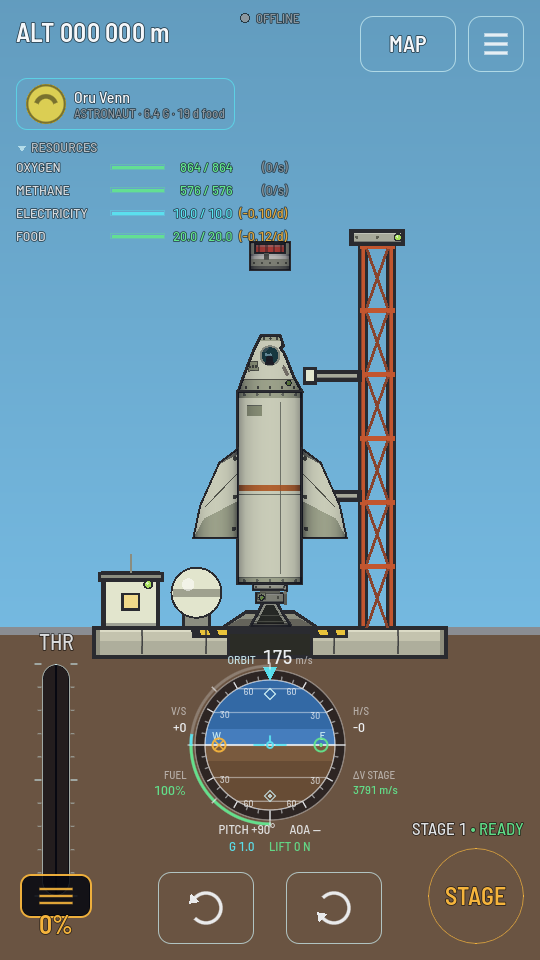
One aboard. The chip is a face, a name and one line. - Watch that second line while you climb. Ease the throttle back if it turns amber and reads PANICKING: that is your pilot within two G of passing out, and the sky is already darkening at the edges. Read the crew chip lists every state it shows.
- Bring the ship down and recover it. Open the parachute, land, then the three-bar button and RECOVER. This is the step that matters: recovering the ship is what brings the Meek home, and coming home is the only thing that grows them.
See what the flight did to them
Open the Astronaut Center again and look at your new hire's card. The counters beside the bars have moved: nerve for everyone who was aboard, more for whatever was a first for that Meek; piloting for whoever held the controls; G-tolerance if the flight pressed near their limit, or for the hours they were aboard. When a counter fills, the stat steps up a point and the counter starts again against a higher target. Ten is as far as any stat goes, and nothing ever falls back.
The foot line changes too: it now says how many hours they have flown, and their blackout figure will have moved if their G-tolerance did.
What to do next
The Astronaut Center holds three Meek at its first level. Extending it to level 2 raises that to six and puts Scientists, Engineers and Medics on the board; level 3 raises it to ten and adds Botanists and Nuclear Scientists. A scientist is the one to hire next if you are taking science readings, because every reading pays more while they are aboard; an engineer earns their seat on a flight that has to come down twice, since they are the only Meek who can repack a spent parachute; and a botanist is what a station with a greenhouse needs, because nothing grows in one unless a botanist is aboard the ship, wherever they sit. The prices are in the Astronaut Center's levels, and Upgrade a building is how you buy one.
If the roster fills up before you want it to, Dismiss a Meek frees a place. You get nothing back for it, so let go of the one you will fly least.